How to fix missing desktop icons in Windows 10 and 11
Are desktop icons missing or disappeared in Windows 10 or 11? Here are several solutions you can try to fix the problem.
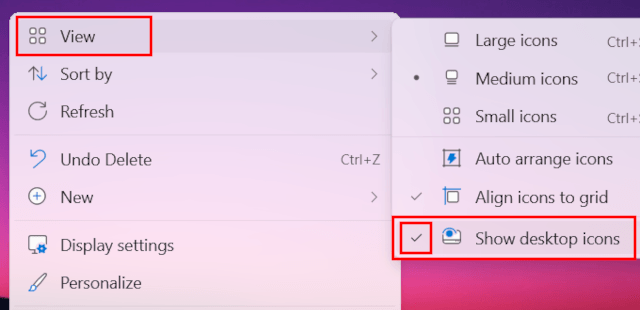
Solution 1: Check if the desktop icons aren't disabled
- Right-click on the desktop.
- Go to View.
-
Make sure there's a checkmark next to Show desktop icons.
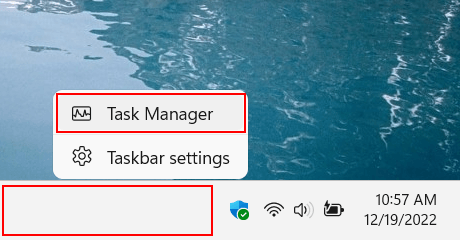
Solution 2: Restart the Windows Explorer process
- Right-click on the Windows taskbar.
-
Click on Task Manager.
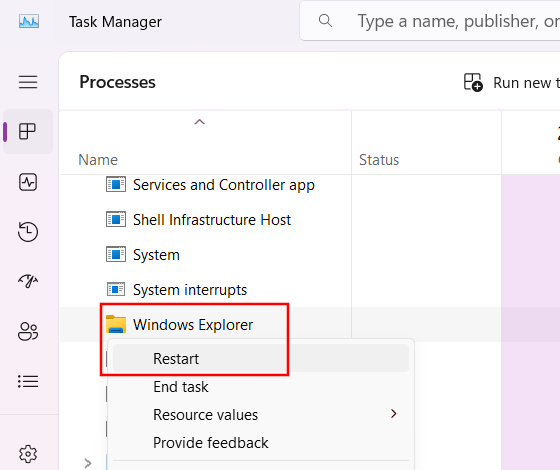
- In the Processes tab, you right-click on Windows Explorer.
-
Click on Restart.
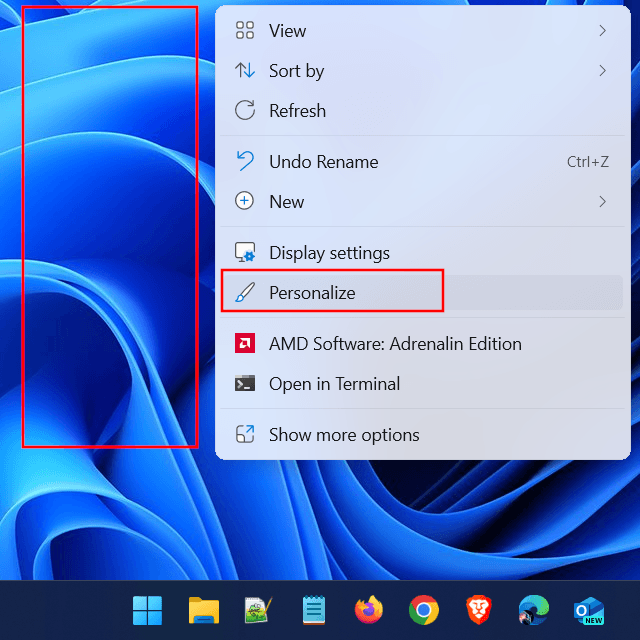
Solution 3: Recycle Bin, Computer, Control Panel, or Network icons
If the Recycle Bin, Computer, Control Panel, or Network icons are missing, follow the steps below.
- Right-click on the desktop.
-
Click on Personalize.
-
Click on Themes.

-
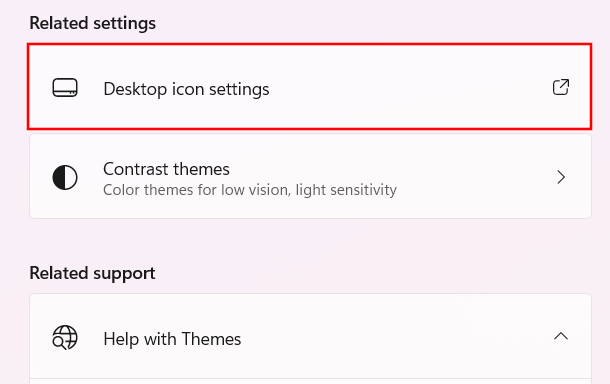
Click on Desktop icon settings under Related Settings.
-
In the next window, you check the checkbox next to the item you want to show on the desktop.
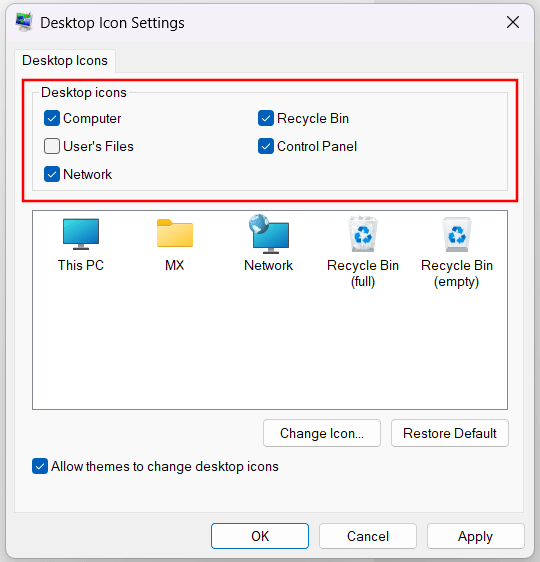
- Click on Apply at the bottom of the window.
- Click on OK.
Solution 4: Clear icon cache
-
Open File Explorer.

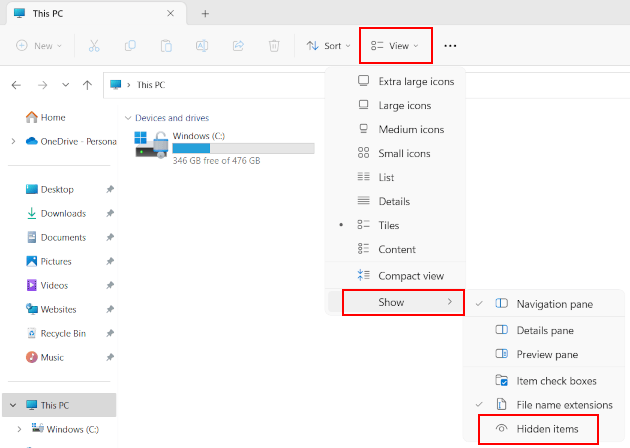
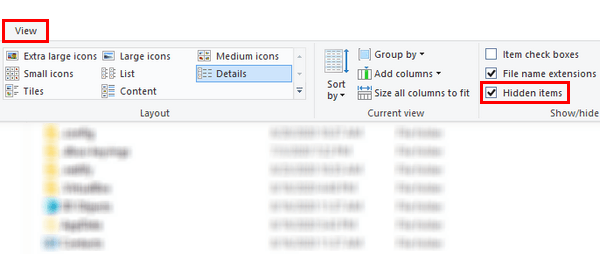
- Click on View located in the top toolbar.
-
On Windows 10, you check the checkbox next to Hidden items. On Windows 11, you go to Show and then click on Hidden items to check this option.
-
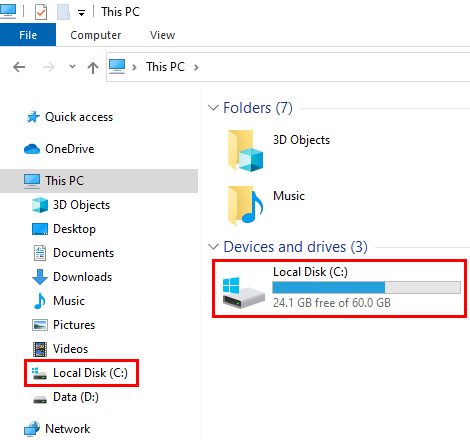
Open the (C:) drive.
-
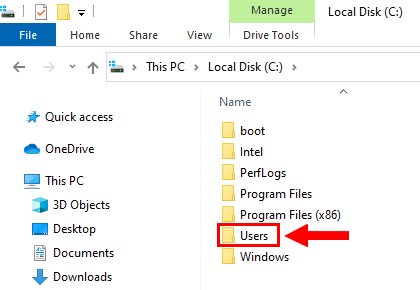
Open the Users folder.
-
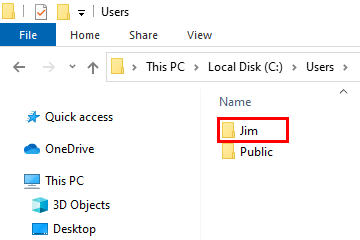
Open the folder with your user account name.
- Open the AppData folder.
- Open the Local folder.
-
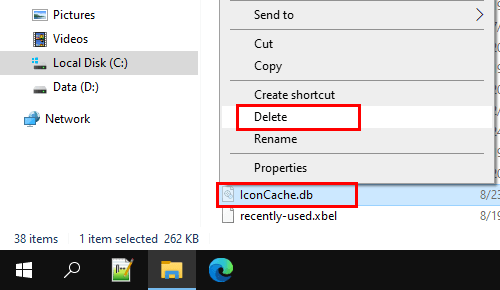
Delete the IconCache.db file.
- Restart your PC.
Solution 5: System File Checker Tool
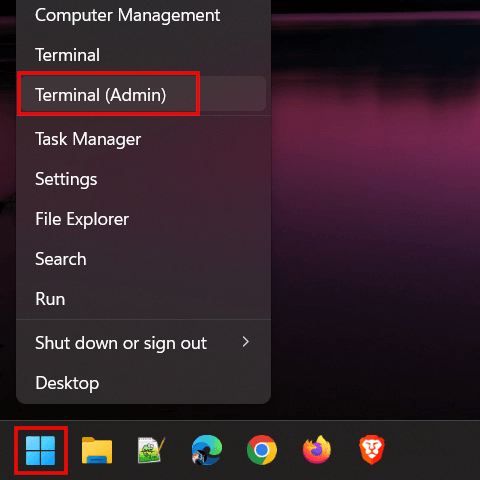
- Right-click on the Windows start menu button.
-
Click on Command Prompt (Admin) or Terminal (Admin).
- When the User Account Control (UAC) window appears, you click Yes. Depending on your settings, you might need to enter your administrator password first and then click Yes.
-
In the Command Prompt or Terminal window, you type
sfc /scannow.
- Press the Enter key on your keyboard.
- The System File Checker tool will scan all protected system files, and replace corrupted files with a cached copy. This process may take a while. Wait for the process to finish.
- When the System File Checker is finished, you close the Command Prompt or Terminal window.
- Restart your PC.
Note: If the System File Checker tool is unable to fix corrupt files, go to the following page: How to fix 'SFC unable to fix corrupt files' in Windows 10 and 11.
Solution 6: DISM
- Right-click the Windows start menu button.
-
Click Command Prompt (Admin) or Terminal (Admin).
- When the User Account Control (UAC) window appears, you click Yes. Depending on your settings, you might need to enter your administrator password first and then click Yes.
-
In the Command Prompt or Terminal window, you type the following command.
DISM /Online /Cleanup-Image /CheckHealth - Press the Enter key on your keyboard.
- Wait for the command to finish.
-
Type the following command.
DISM /Online /Cleanup-Image /ScanHealth - Press the Enter key on your keyboard.
- Wait for the command to finish.
-
Type the following command.
DISM /Online /Cleanup-Image /RestoreHealth - Press the Enter key on your keyboard.
- After the DISM scan is complete, restart your PC.
Related:
Windows 10 or 11 taskbar icons missing? Try these solutions!
How to create a desktop shortcut to open multiple web pages
How to create a website shortcut on the desktop of your PC
How to show or hide the Recycle Bin on Windows 11
References:
https://www.howtogeek.com/272/restore-missing-desktop-icons-in-windows-10/
https://www.howtogeek.com/805889/how-to-restore-missing-desktop-icons-on-windows-11/
https://www.makeuseof.com/ways-to-fix-desktop-icon-disappearing-windows/