How to hide the Recycle Bin from the desktop in Windows 10 and 11
This step-by-step tutorial will show you how to hide the Recycle Bin icon from your desktop in Windows 10 and 11.
Remove the Recycle Bin icon from the desktop in Windows 10
First, you'll need to pin the Recycle Bin to File Explorer. This way, you'll still be able to access the Recycle Bin easily and quickly via File Explorer.
-
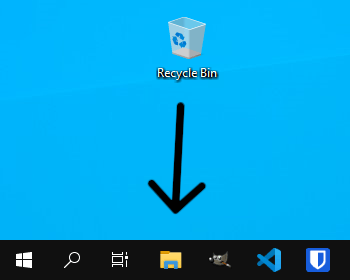
Pin the Recycle Bin to File Explorer by dragging the Recycle Bin icon to the File Explorer icon.
-
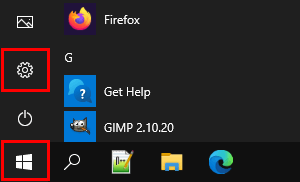
Click on the Windows start menu button.

-
Click on Settings.
-
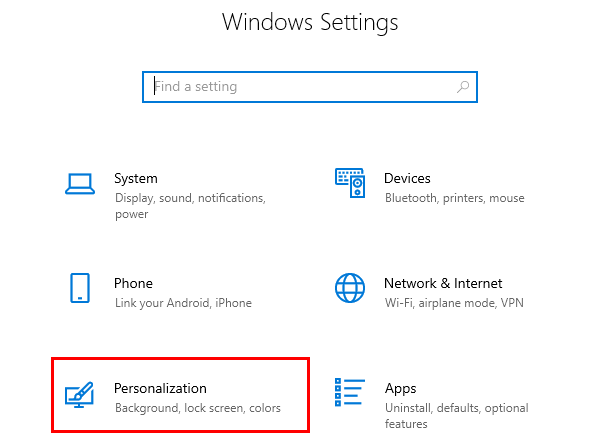
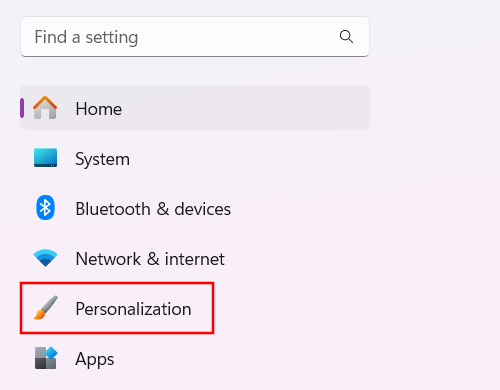
Click on Personalization.
-
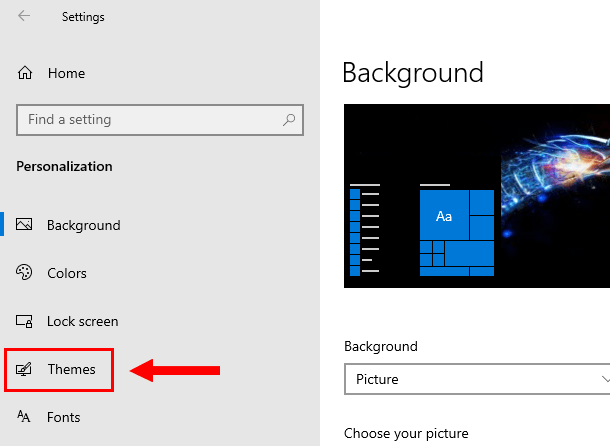
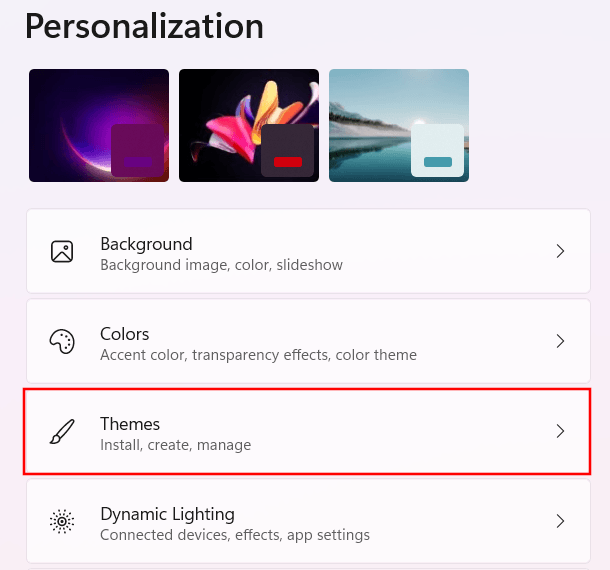
Click on Themes in the left menu.
-
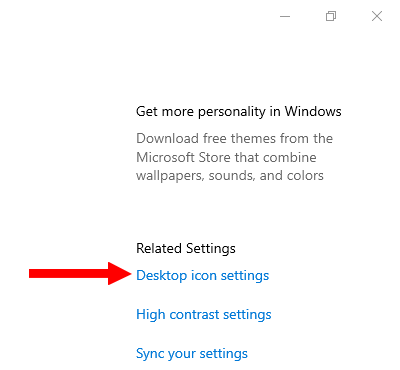
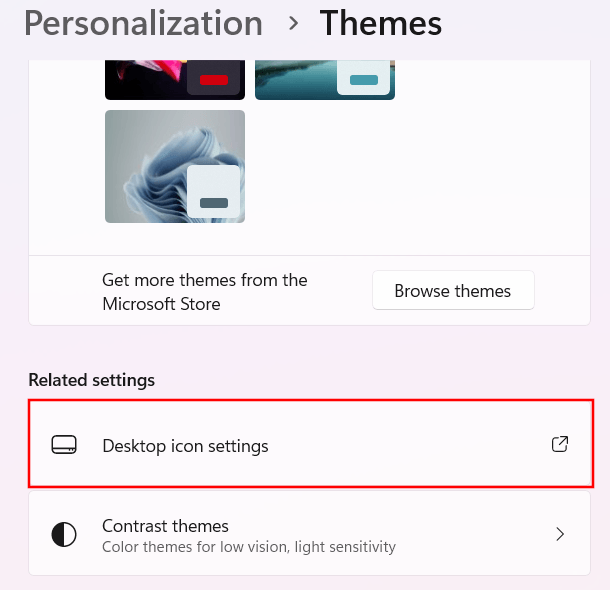
Click on Desktop icon settings located under 'Related Settings' on the right side.
-
In the next window, you uncheck the checkbox next to Recycle Bin.
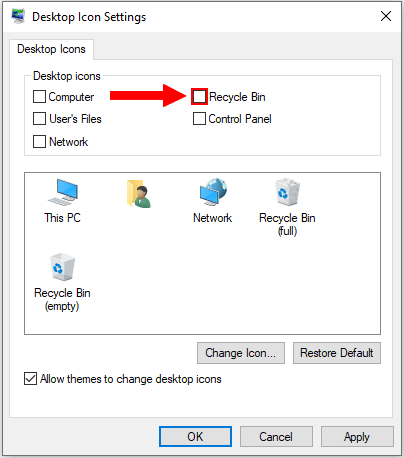
- Click on Apply at the bottom of the 'Desktop Icon Settings' window.
- Click on OK.
- Close settings.
The 'Recycle Bin' icon is now hidden from the desktop.
To unhide and show the Recycle Bin icon, follow the same steps but then check the checkbox next to Recycle Bin.
Alternatively, you can hide all desktop icons by right-clicking on the desktop, going to View, and then clicking on Show desktop icons.
Remove the Recycle Bin icon from the desktop in Windows 11
First, you'll need to pin the Recycle Bin to 'Quick access' or start menu. This way, you'll still be able to access the Recycle Bin easily and quickly via File Explorer or the Windows start menu.
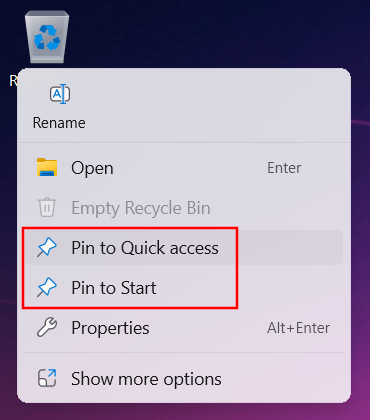
- Pin the Recycle Bin to 'Quick access' or the Windows start menu by right-clicking the 'Recycle Bin' icon on your desktop.
-
Click on Quick access or Start.
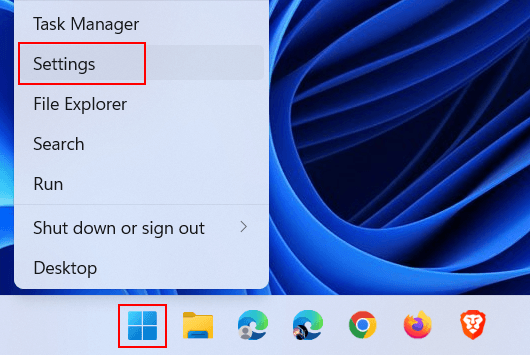
- Right-click on the Windows start menu button.
-
Click on Settings.
-
Click on Personalization located in the left menu.
-
Click on Themes.
-
Click on Desktop icon settings.
-
In the next window, you uncheck the checkbox next to Recycle Bin.

-
Click on Apply at the bottom of the 'Desktop Icon Settings' window.

- Click on OK.
- Close settings.
The 'Recycle Bin' icon is now hidden from the desktop.
To unhide and show the Recycle Bin icon, follow the same steps but then check the checkbox next to Recycle Bin.
Alternatively, you can hide all desktop icons by right-clicking on the desktop, going to View, and then clicking on Show desktop icons.
Related:
Recycle bin desktop icon missing? Here's how to restore it!
How to hide the language bar in Windows 11 (step by step)
How to fix missing desktop icons in Windows 10 and 11
How to create a desktop shortcut to open multiple web pages
How to create a website shortcut on the desktop of your PC
References:
https://www.lifewire.com/remove-recycle-bin-from-windows-desktop-5649317
https://www.howtogeek.com/215/hide-delete-or-destroy-the-recycle-bin-icon-in-windows-vista/
https://mspoweruser.com/windows-11-desktop-hide-recycle-bin/