How to enable DNS over HTTPS in Windows 11
This step-by-step tutorial will show you how to enable DNS over HTTPS in Windows 11. DNS over HTTPS improves privacy and security by encrypting your DNS requests.
DNS over HTTPS is an internet security protocol that improves privacy and security by encrypting your DNS requests. The benefits of this internet security protocol are that encrypting DNS requests helps hide your online activities and ensures that attackers cannot forge or alter DNS traffic.
Choose a free DNS service supported by Windows 11
The Windows 11 DNS over HTTPS feature only works with a few DNS services.
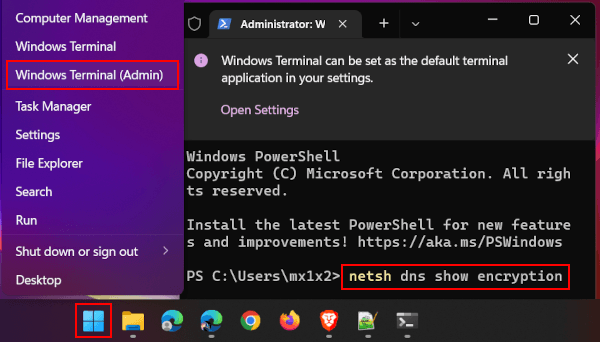
You can see the list by running the netsh dns show encryption command in a Windows Terminal window (right-click on the start menu button > Windows Terminal).
The DNS services supported by Windows 11 are Google DNS, Cloudflare DNS, and Quad9 DNS.
Here's the list of supported IPv4 DNS service addresses:
- Google DNS primary: 8.8.8.8
- Google DNS secondary: 8.8.4.4
- Cloudflare DNS primary: 1.1.1.1
- Cloudflare DNS secondary: 1.0.0.1
- Quad9 DNS primary: 9.9.9.9
- Quad9 DNS secondary: 149.112.112.112
Here's the list of supported IPv6 DNS service addresses:
- Google DNS primary: 2001:4860:4860::8888
- Google DNS secondary: 2001:4860:4860::8844
- Cloudflare DNS primary: 2606:4700:4700::1111
- Cloudflare DNS secondary: 2606:4700:4700::1001
- Quad9 DNS primary: 2620:fe::fe
- Quad9 DNS secondary: 2620:fe::9
You need two pairs of these DNS servers to enable DNS over HTTPS in Windows 11, a primary DNS and a secondary DNS for IPv4 and IPv6.
Enable DNS over HTTPS in Windows 11
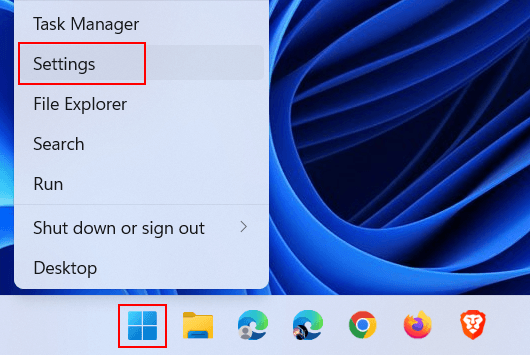
- Right-click on the Windows start menu button.
-
Click on Settings.
-
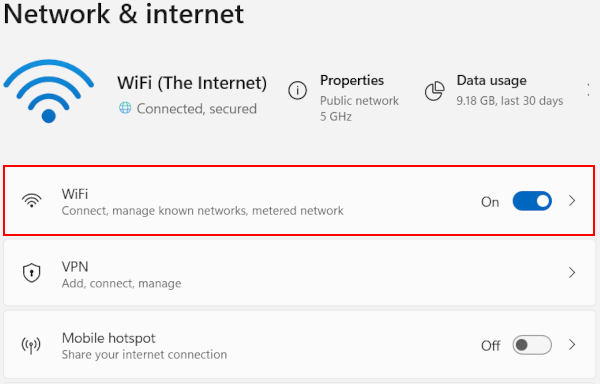
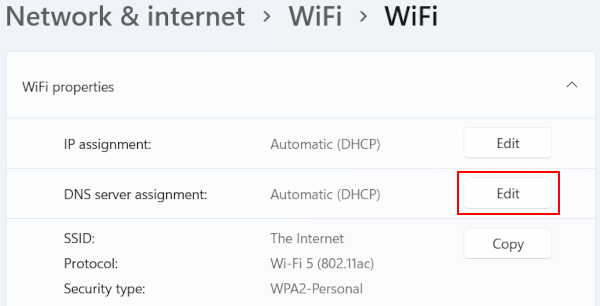
Click on Network & Internet in the left menu.

-
Click on Wi-Fi or Ethernet (Internet (LAN) cable). This depends on how your PC is connected to the internet.
-
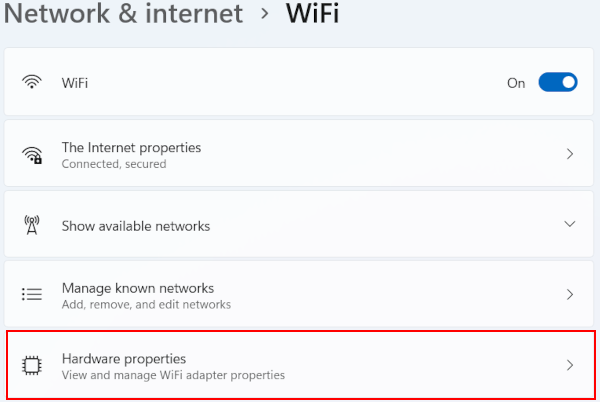
Click on Hardware properties.
-
Click on Edit next to DNS server assignment.
-
Select Manual.
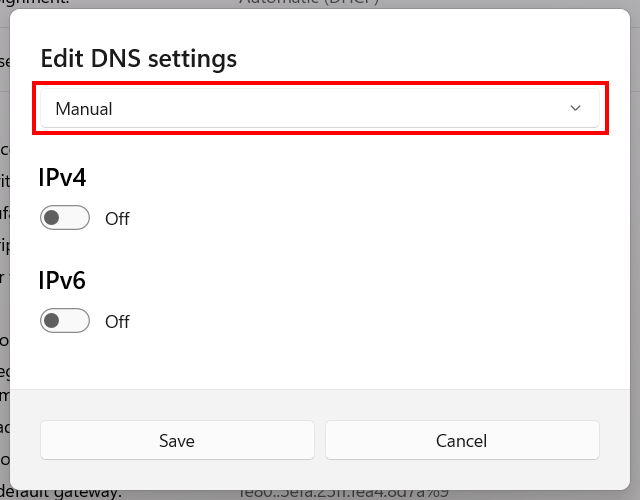
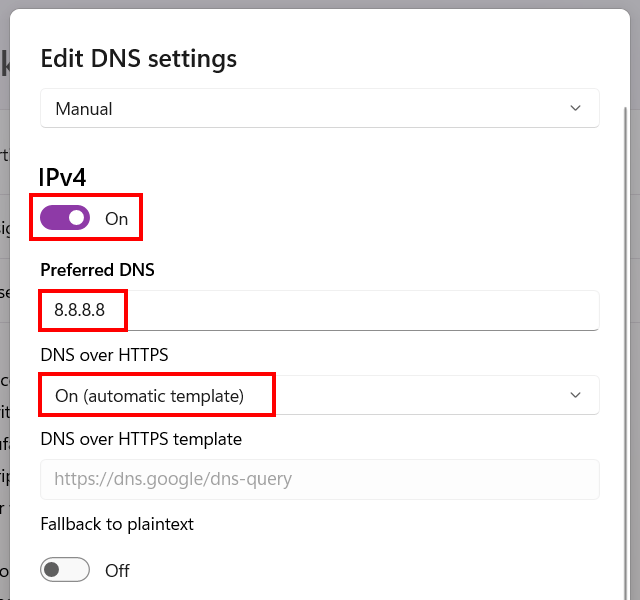
- Click on the Ipv4 toggle button to turn it on.
- Enter a primary DNS server address in the Preferred DNS field (e.g., 8.8.8.8 or 1.1.1.1).
-
Select On (automatic template) at DNS over HTTPS.
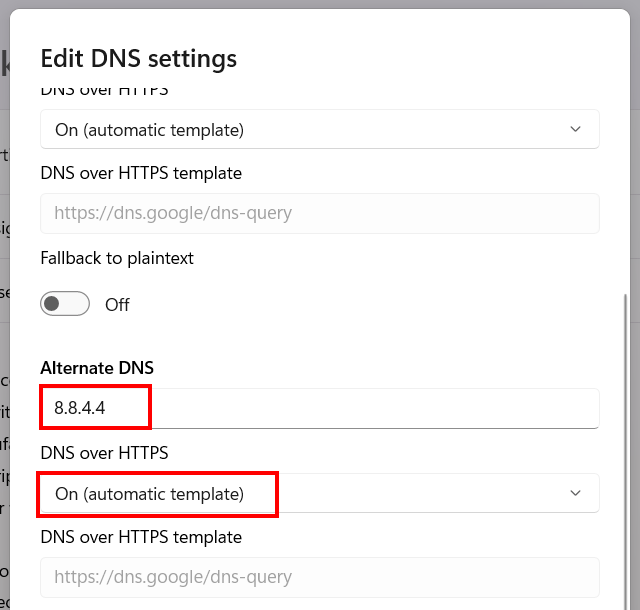
- Enter a secondary DNS server address in the Alternative DNS field (e.g., 8.8.4.4 or 1.0.0.1).
-
Select On (automatic template) at DNS over HTTPS.
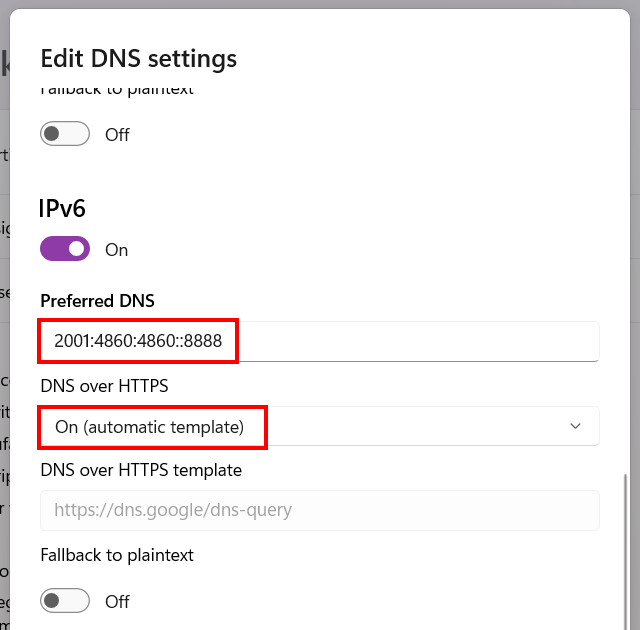
- Click on the Ipv6 toggle button to turn it on.
- Enter a primary DNS server address in the Preferred DNS field (e.g., 2001:4860:4860::8888 or 2606:4700:4700::1111).
-
Select On (automatic template) at DNS over HTTPS.
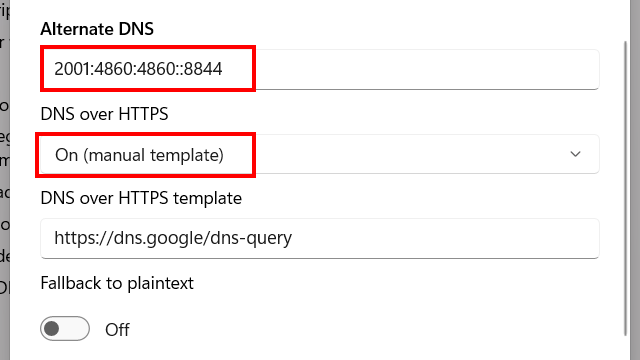
- Enter a secondary DNS server address in the Alternative DNS field (e.g., 2001:4860:4860::8844 or 2606:4700:4700::1001).
-
Select On (automatic template) at DNS over HTTPS.
-
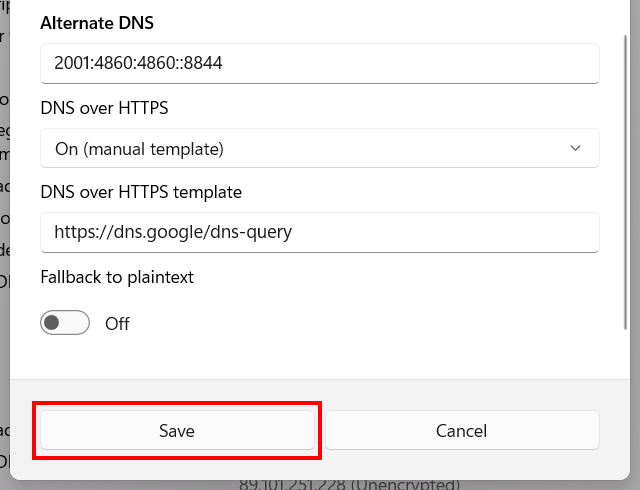
Click on Save.
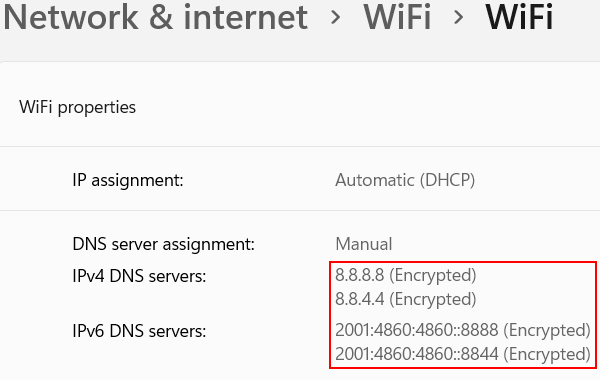
DNS over HTTPS is now enabled in Windows 11. Your DNS requests will be private and secure.
Related:
How to use Private DNS on an Android phone or tablet
How to set up DNS on any Android phone or tablet
How to unblock blocked websites (4 safe and free methods)
References:
https://developers.cloudflare.com/1.1.1.1/encryption/dns-over-https/
https://www.howtogeek.com/765940/how-to-enable-dns-over-https-on-windows-11/