What to do when Windows 10 or 11 is not saving screenshots in Pictures folder
This step-by-step tutorial will show you what to do when Windows 10 or 11 isn't saving captured screenshots in the Pictures folder.
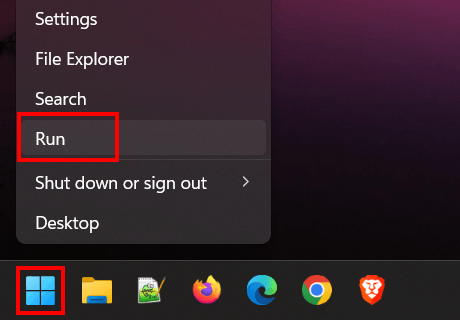
- Right-click on the Windows start menu button.
-
Click on Run.
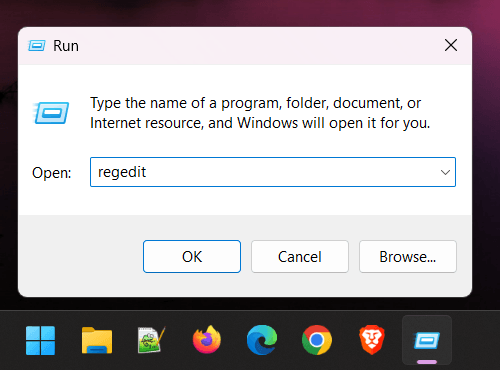
- In the 'Run' command window, you type regedit.
-
Click on OK or press the Enter on your keyboard.
- If the 'User Account Control' window appears, you click Yes. Depending on your settings, you may need to enter your administrator password first and then click Yes.
-
In the 'Registry Editor' window, you go to the following location:
HKEY_CURRENT_USER\Software\Microsoft\Windows\CurrentVersion\Explorer\User Shell Folders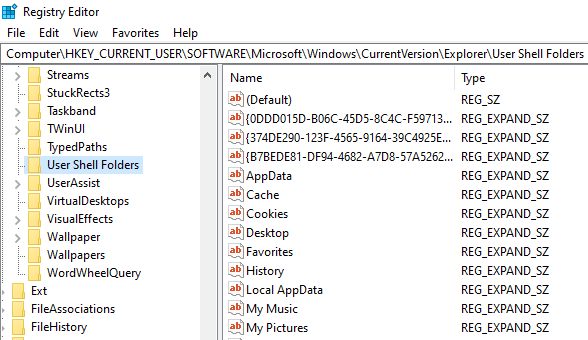
-
In the right section, you double-click on {B7BEDE81-DF94-4682-A7D8-57A52620B86F}.
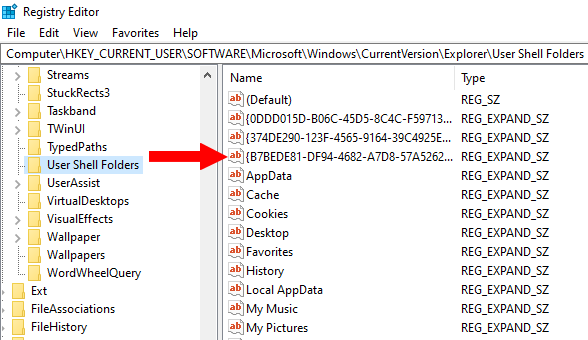
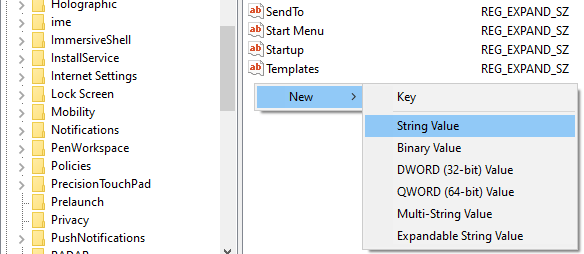
Note: If it's not there, you will have to create it. To do so, right-click in the right section > New > String Value > name it {B7BEDE81-DF94-4682-A7D8-57A52620B86F}.
-
Make sure its value data is %USERPROFILE%\Pictures\Screenshots.
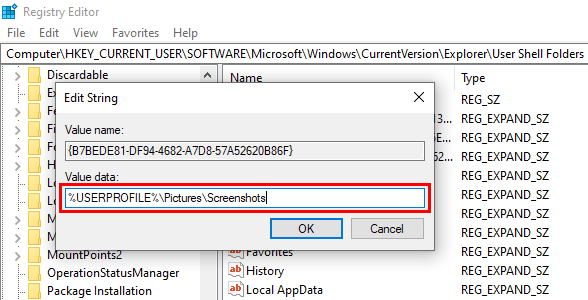
- Click on OK.
- Close the Registry Editor.
- Restart your computer.
Windows 10 or 11 will save your captured screenshots in the Pictures folder again.
Related:
How to locate the screenshots folder in Windows 10 and 11
How to change where screenshots are saved in Windows 10 & 11