How to locate the Screenshots folder in Windows 11 (and fix it)
Can't find the screenshots folder in Windows 11, or noticed that your system has stopped saving your captures entirely? Let me show you how to locate it instantly and how to fix it if it has gone missing.
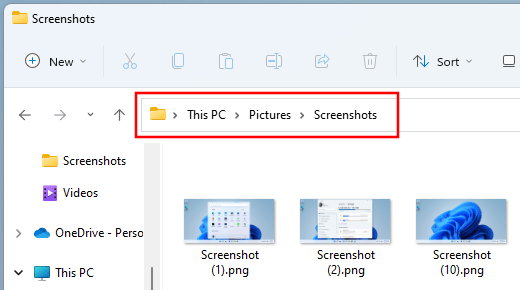
By default, Windows 11 saves screenshots in a dedicated Screenshots folder located inside your primary Pictures directory. Windows is designed to create this folder automatically the very first time you trigger a screen capture shortcut. However, user profile changes or system updates can sometimes disrupt this path.
Locate the screenshots folder in Windows 11
The fastest way to jump directly to your active screenshot folder—bypassing manually clicking through folders—is to use a direct shell shortcut command inside File Explorer:
- Open File Explorer.
-
Type shell:screenshots directly into the top address bar of File Explorer.
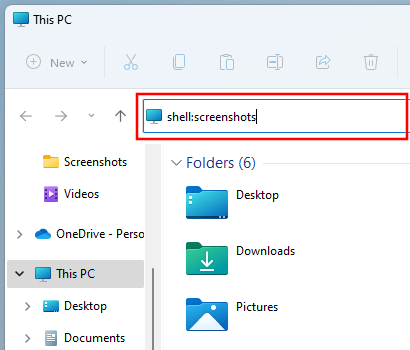
- Press the Enter key on your keyboard.
File Explorer will instantly open your designated folder. You can view its absolute file system path by clicking on an empty space inside the File Explorer address bar.
What to do when Windows 11 is not saving screenshots
If running the step above changes nothing, or if Windows 11 completely fails to save your captured screenshots to your Pictures folder altogether, a corrupted path entry in the Windows Registry is typically to blame. You can manually restore the default behavior by following these steps:
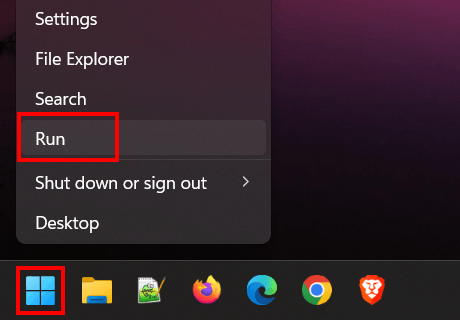
- Right-click on the Windows Start menu button and select Run.
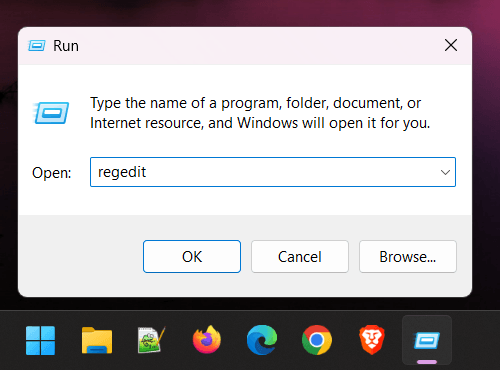
- In the Run command box, type regedit and click OK (or press Enter).
- If a User Account Control prompt appears, click Yes to grant administrative permission.
- Inside the Registry Editor sidebar, navigate down to the following folder path location:
HKEY_CURRENT_USER\Software\Microsoft\Windows\CurrentVersion\Explorer\User Shell Folders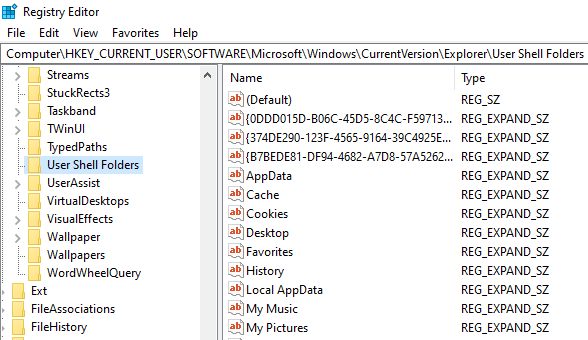
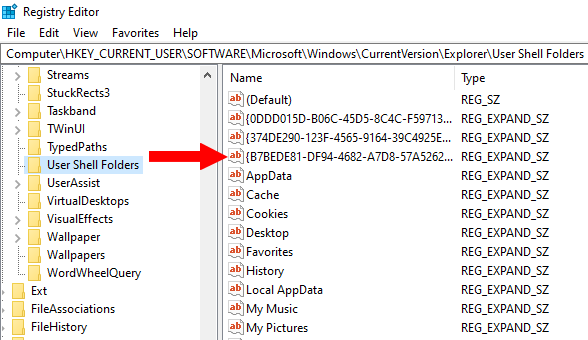
- Look at the list in the right-hand panel and double-click the string value explicitly named {B7BEDE81-DF94-4682-A7D8-57A52620B86F}.
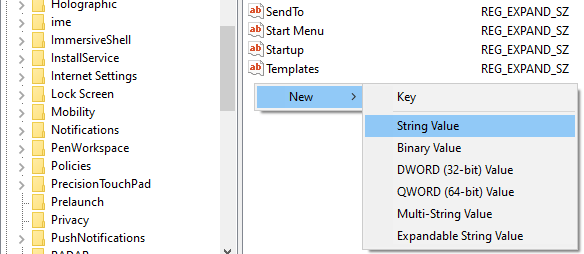
Note: If that exact string sequence is missing entirely, right-click on empty space in the right panel, choose New > String Value, and name it {B7BEDE81-DF94-4682-A7D8-57A52620B86F} exactly.
- In the Edit String window that opens, verify or alter the Value data text block to match this path exactly:
%USERPROFILE%\Pictures\Screenshots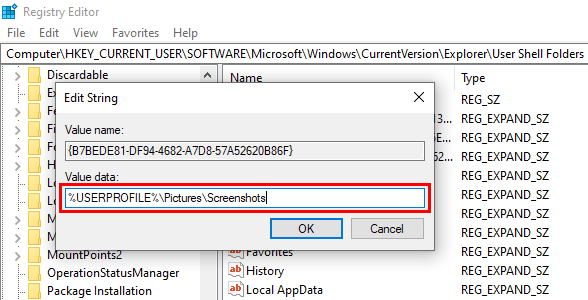
- Click OK to confirm your changes.
- Close out of the Registry Editor window and restart your computer.
Once your computer reboots, test the functionality by taking a fresh screenshot. Windows 11 will automatically map the file destination and save your newly captured images inside your default Pictures folder layout once again.
Related:
How to change where screenshots are saved in Windows 10 & 11