How to change where screenshots are saved in Windows 10 and 11
These step-by-step tutorials will show you how to change where screenshots are saved in Windows 10 and 11.
By default, Windows 10 and 11 will save screenshots in the Screenshots folder located in the Pictures folder. However, you can change the location of the Screenshots folder to another folder, partition, or hard drive.
How to change default screenshot folder location in Windows 10
-
Open File Explorer.

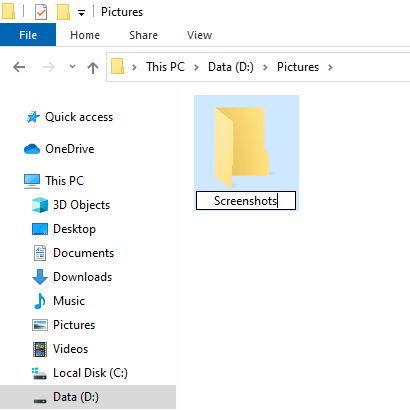
- Go to the location on your computer where you want your screenshots to be saved, like another folder, hard drive, or partition.
-
Create a new folder and name it Screenshots.
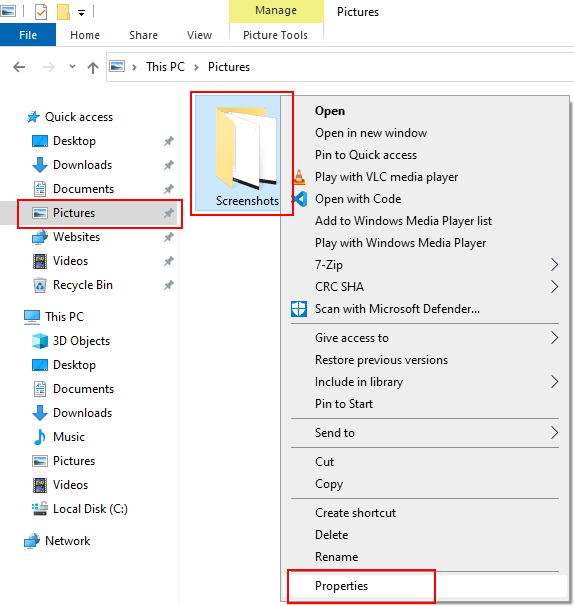
- Open the Pictures folder.
- Right-click on the Screenshots folder.
-
Click on Properties.
Note: If you don't see a Screenshots folder, you probably haven't taken a screenshot yet. The folder appears as soon as you take a screenshot. To take a screenshot in Windows 10, you press the Windows ⊞ + PrintScreen keys on your keyboard. The print screen key can have a different name, such as PrtSc or PrtScr.

-
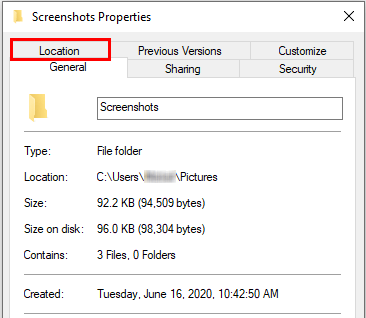
In the next window, you click on the Location tab.
-
Click on Move.
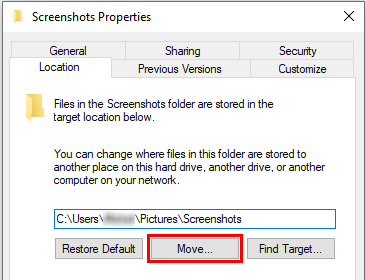
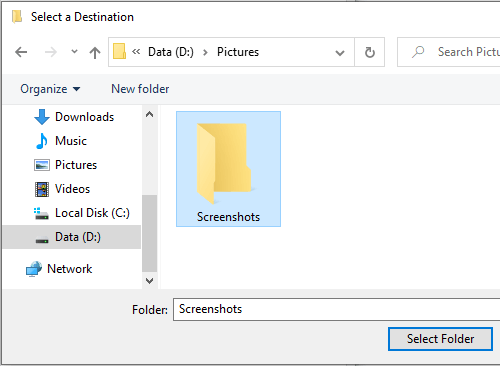
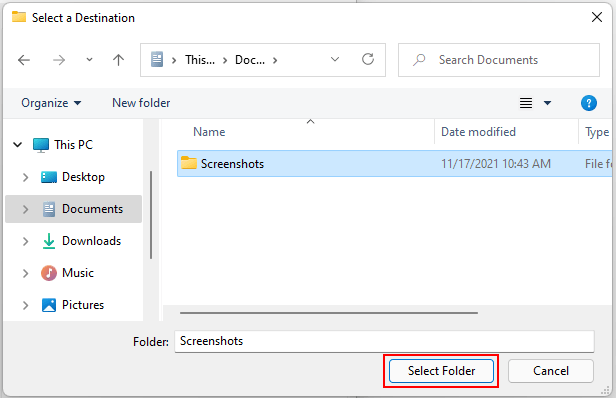
- In the next window, you select the newly created Screenshots folder.
-
Click on Select Folder.
- Click on Apply.
- Windows may ask you if you want to move all files from the old to the new location. If so, click on Yes.
- Click on OK.
The Screenshots folder is now moved to the new location on your PC and all screenshots you take will be saved in this new location.
How to change default screenshot folder location in Windows 11
-
Open File Explorer.

- Go to the location on your computer where you want your screenshots to be saved, like another folder, hard drive, or partition.
-
Create a new folder and name it Screenshots.
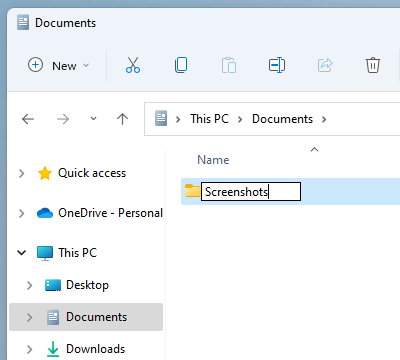
- Open the Pictures folder.
- Right-click on the Screenshots folder.
-
Click on Properties.

Note: If you don't see a Screenshots folder, you probably haven't taken a screenshot yet. The folder appears as soon as you take a screenshot. To take a screenshot in Windows 11, you press the Windows ⊞ + PrintScreen keys on your keyboard. The print screen key can have a different name, such as PrtSc or PrtScr.
-
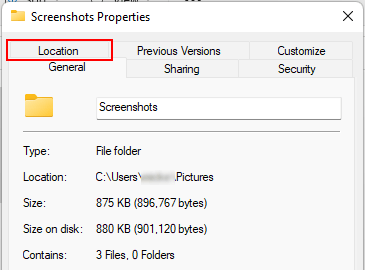
In the next window, you click on the Location tab.
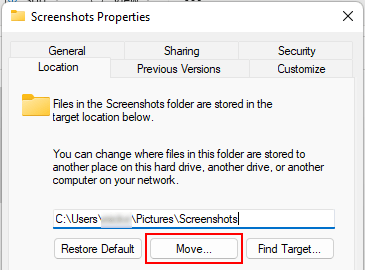
-
Click on Move.
- In the next window, you select the newly created Screenshots folder.
-
Click on Select Folder.
- Click on Apply.
- Windows may ask you if you want to move all files from the old to the new location. If so, click on Yes.
- Click on OK.
The Screenshots folder is now moved to the new location on your PC and all screenshots you take will be saved in this new location.
Related:
How to locate the Screenshots folder in Windows 11 (and fix it)
References:
https://www.howtogeek.com/797229/how-to-change-where-screenshots-are-saved-on-windows/
https://www.makeuseof.com/windows-11-screenshot-location-change/
https://www.hongkiat.com/blog/change-screenshot-folder-location-windows-11/
https://beebom.com/how-change-screenshot-folder-location-windows-11/