How to fix USB flash drive showing less space than its actual disk space
Is your USB flash drive showing less space than its actual disk space? This step-by-step tutorial will show you how to fix this problem on Windows 10 and 11.
Is your USB flash drive suddenly showing less capacity?
Did your 16 GB or 8 GB USB pen drive suddenly become 3 GB, 0.99 GB, 64 MB, 30 MB, or 4 MB?
Is your USB pen drive showing unallocated space?
This tutorial will show you how to fix this problem without third-party software. You can use two tools already built into Windows 10 and 11.
The steps in this tutorial work for all USB pen drive brands, such as Kingston, SanDisk, Toshiba, Philips, Samsung, Lexar, Buffalo, Transcend, SK Hynix, Freecom, Adata, PNY, and HP.
Restore your USB flash drive to its original capacity
Important! Copy all files (documents, pictures, videos, music, etc.) from the USB flash drive to another USB pen drive or hard drive because this process will delete all files.
Warning! Diskpart is a powerful tool. You must select the correct disk. If you delete the partition on the wrong disk, you might delete the Windows operating system partition or another partition.
Warning! Disk Management is a powerful tool. You must select the correct disk. If you delete the partition on the wrong disk, you might delete the Windows operating system partition or another partition.
-
Right-click on the Windows start menu button.

-
Click on Command Prompt (Admin) or Terminal (Admin) (Windows 11).
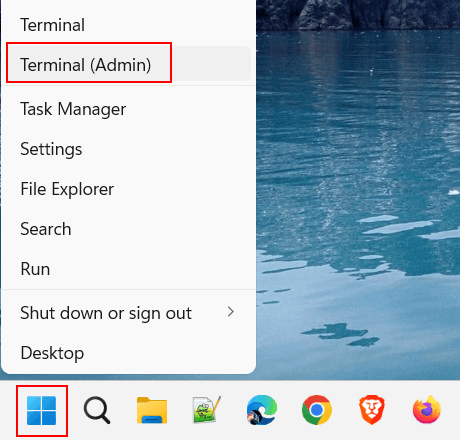
- If the 'User Account Control' window appears, you click Yes. Depending on your settings, you may need to enter your administrator password first and then click Yes.
-
In the Command Prompt or Terminal window, you type the following command:
diskpart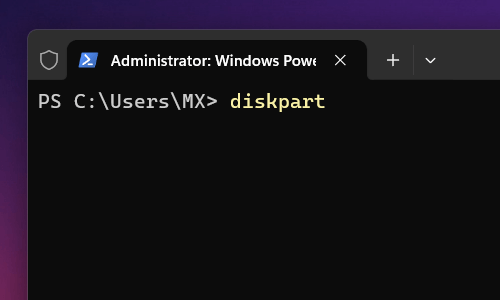
- Press the Enter key on your keyboard.
-
Type the following command:
list disk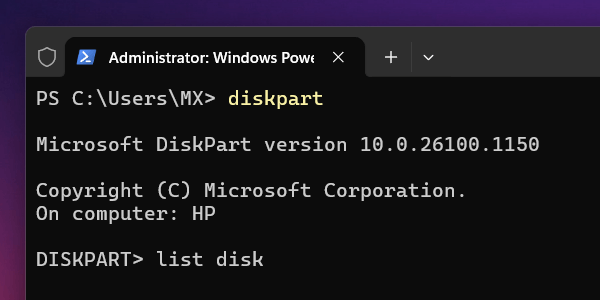
- Press Enter.
-
Type the command below, but replace X with the disk number of your USB flash drive. WARNING!!! Selecting the wrong disk can break your system.
select disk X
- Press Enter.
-
Type the following command:
list partition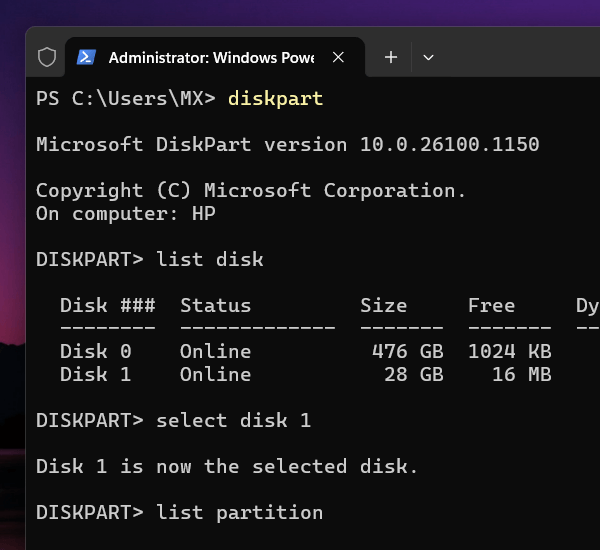
- Press Enter.
-
Type the command below, but replace X with the partition number you want to select.
select partition X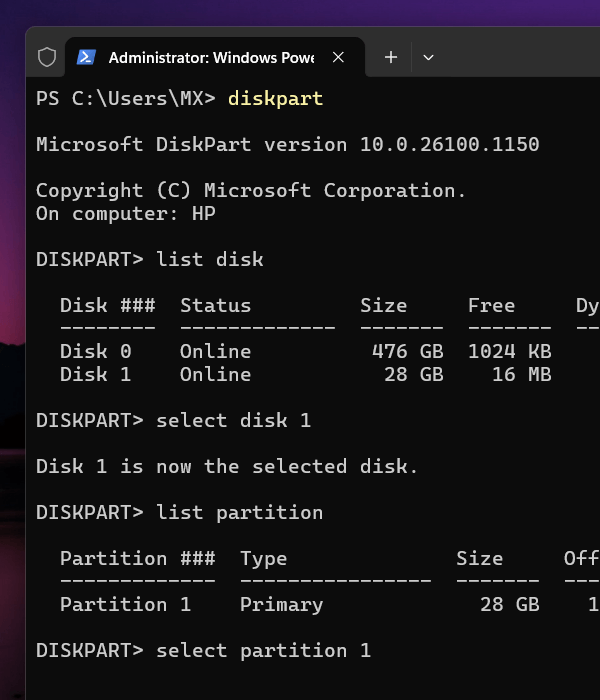
- Press Enter.
-
Type the following command:
delete partition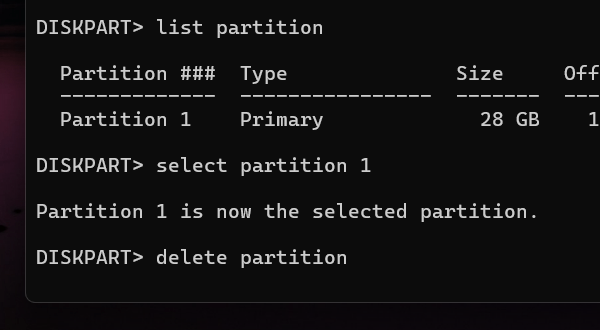
- Press Enter.
- If you get the message 'Diskpart successfully deleted the selected partition,' you can close the Command Prompt or Terminal window. But, if you get the 'Cannot delete a protected partition without the force protected parameter set' message, visit this page from HowToGeek.
-
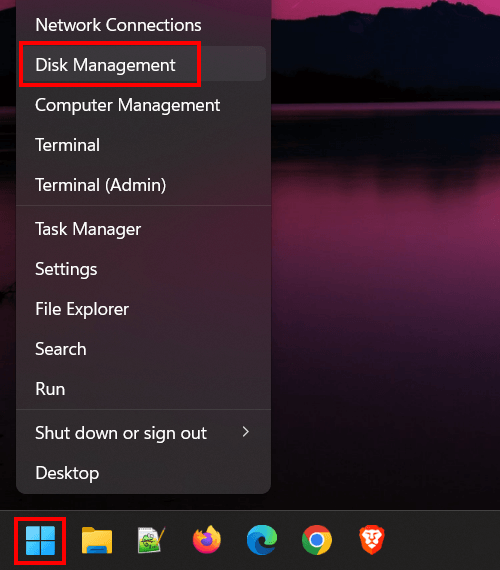
Right-click on the Windows start menu button.
-
Click on Disk Management.
- If the 'User Account Control' window appears, you click Yes. Depending on your settings, you may need to enter your administrator password first and then click Yes.
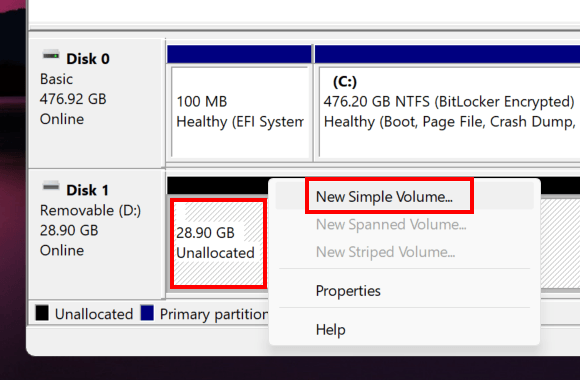
- Right-click on the USB flash drive. A USB flash drive will usually show as 'Removable' with 'unallocated disk space.'
-
Click on New Simple Volume.
- In the 'New Simple Volume Wizard' window, you click Next.
-
Check if the maximum disk size is selected.
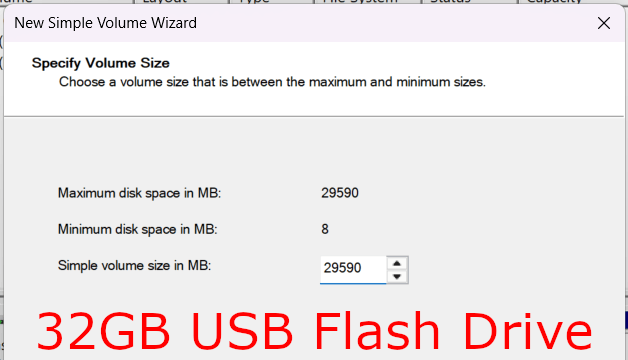
- Click on Next.
-
You can assign a drive letter to this USB flash drive.
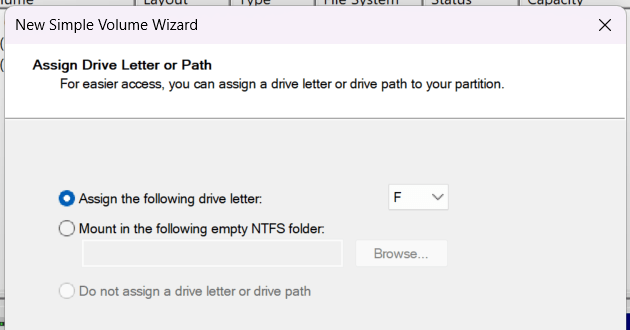
- Click on Next.
- In the next window, you can select a file system (FAT32 or NTFS).
-
In the 'Volume label' field, you type a name for the drive or leave it empty.
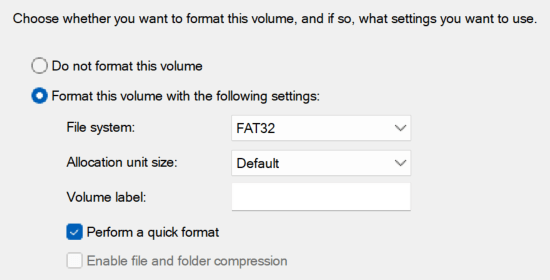
- Click on Next.
- Click on Finish.
The Windows Disk Management tool will now create a new volume.
Hopefully, your USB stick will show its original capacity again.
Related:
Fix: The file is too large for the destination file system
Fix: Problem Ejecting USB Mass Storage Device on Windows
Fix: 'This folder is empty' on a USB drive on Windows 10 & 11