How to merge subtitles with video permanently
Hardcoding subtitles into your video files ensures they display correctly on any television, standalone media player, or console (like the PS5) without relying on a separate .srt file.
This guide covers the fastest, free ways to permanently merge subtitles into MP4, MKV, and AVI files using VLC, HandBrake, MKVToolNix, and FFmpeg.
Some devices, like the Sony PlayStation 3, 4, and 5, and some TVs don't support SRT subtitle files. If you want to play a video or movie with subtitles on devices that don't support the SRT subtitle format, you must hardcode the SRT subtitle file into the video file.
Method 1: VLC Media Player (Convert/Save)
VLC media player is a free and open-source cross-platform multimedia player for Microsoft Windows, Linux, and macOS. It plays most video and audio files, and it offers a lot of extra features, like, for example, converting videos.
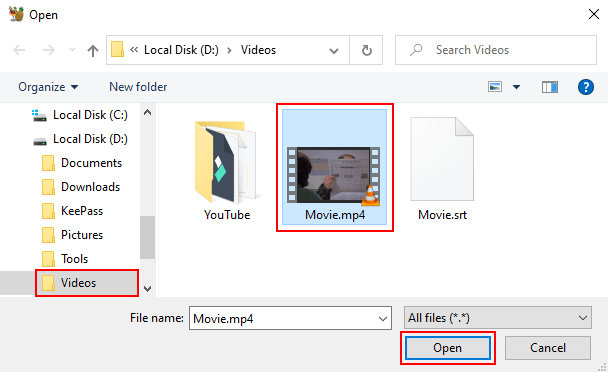
- Make sure the subtitle file is in the same folder as the video file.
- Make sure the subtitle file has the same filename as the video file (e.g., Movie.mp4 and Movie.srt).
- Open VLC media player.
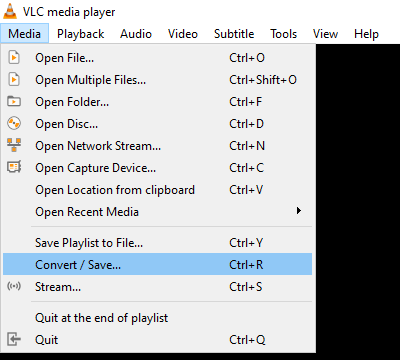
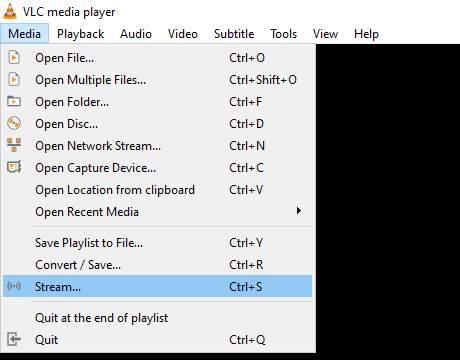
- Click on Media located in the top left corner of VLC.
-
Click on Convert/Save.
-
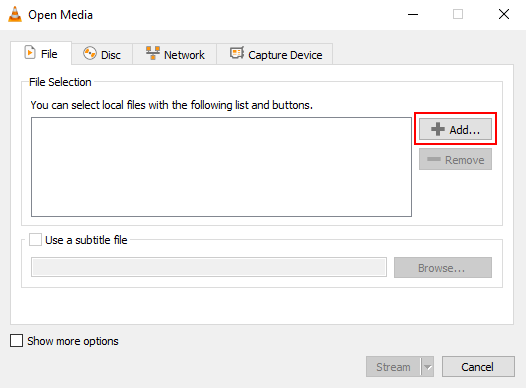
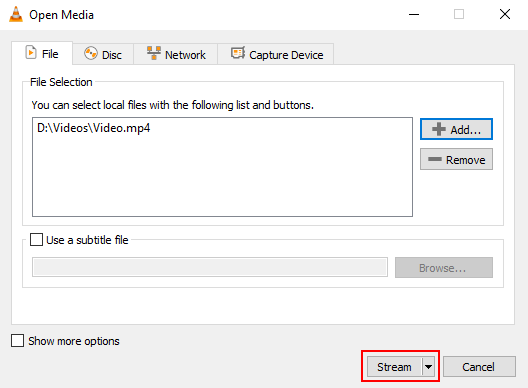
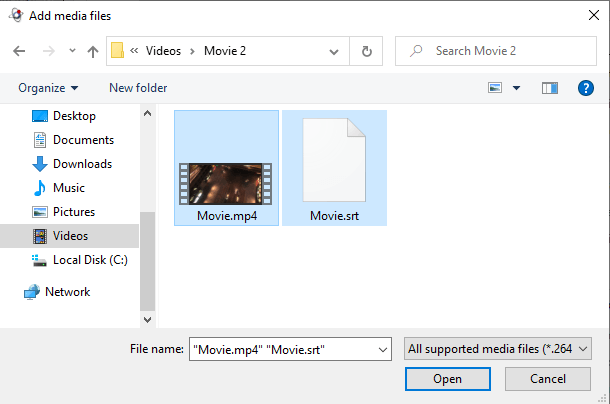
In the next window, you click on Add.
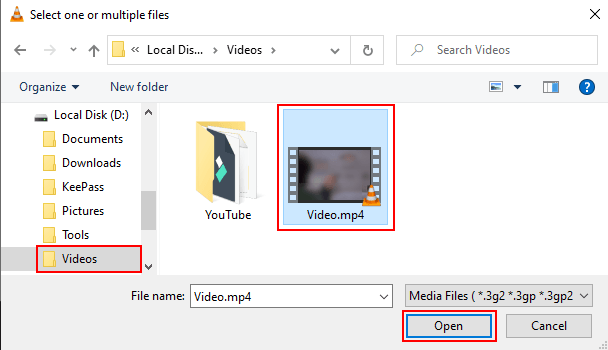
- In the next window, you go to the location on your computer where the video and subtitle files are.
- Select the video file and subtitle file.
-
Click on Open.
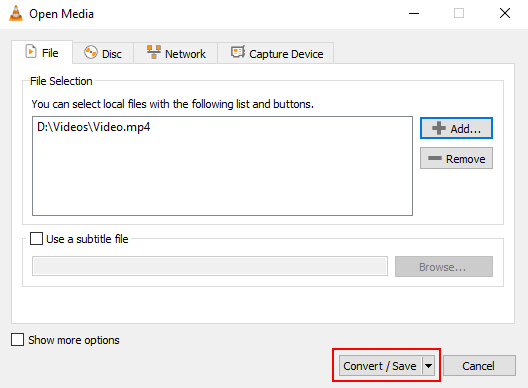
- Make sure the Use a subtitle file option is unchecked (disabled).
-
Click on Convert/Save at the bottom of the window.
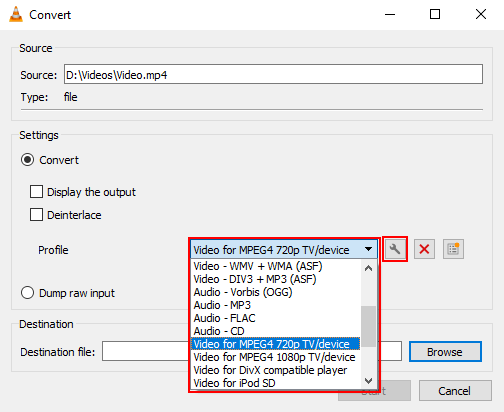
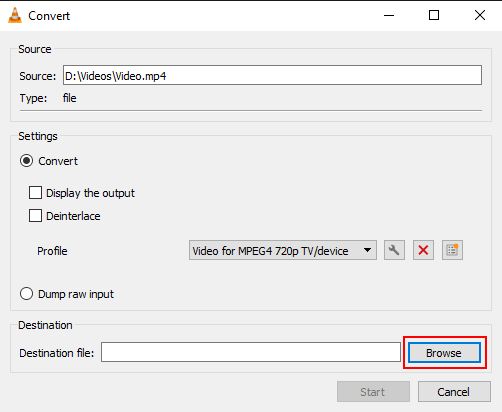
- In the next window, you select Video for MPEG4 720p TV/Device or Video for MPEG4 1080p TV/Device at Profile. This depends on the resolution of the original video file.
-
Click on the wrench button next to the profile selection menu button.
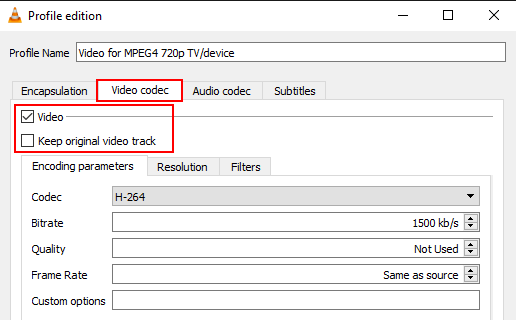
- In the next window, you click on Video codec.
- Make sure the Video option is checked.
-
Make sure the Keep original video track option is unchecked (disabled).
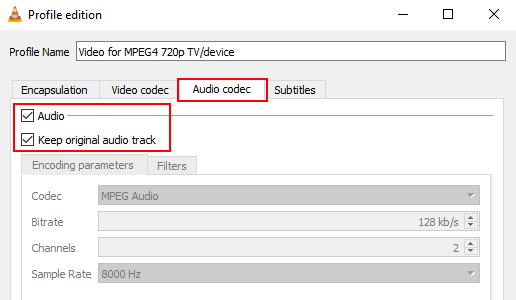
- Click on Audio codec.
- Make sure the Audio option is checked.
-
Check the Keep original audio track option.
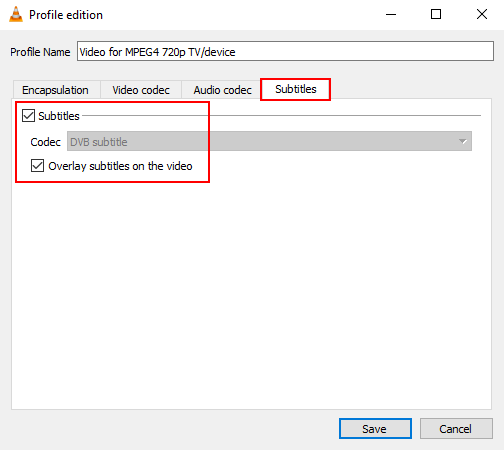
- Click on Subtitles.
- Check the Subtitles option.
- Select DVB subtitle at Codec.
-
Check the Overlay subtitles on the video option.
- Click on Save at the bottom of the window.
-
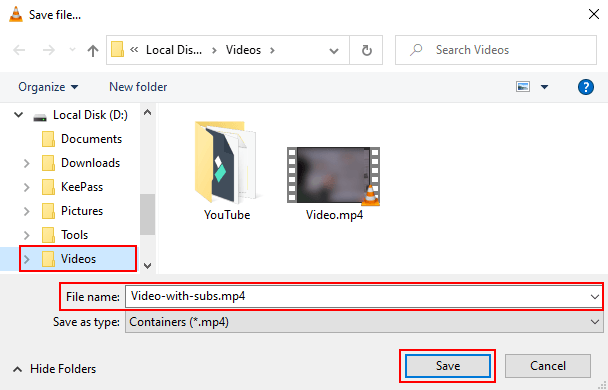
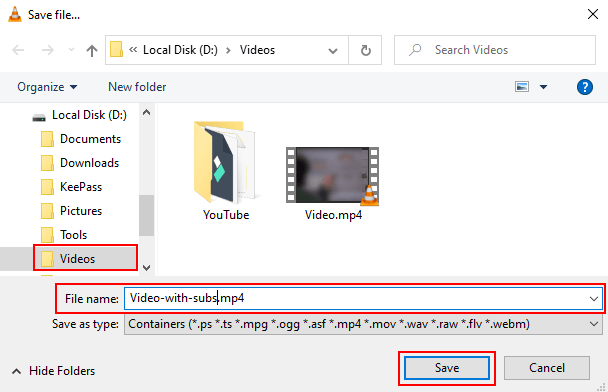
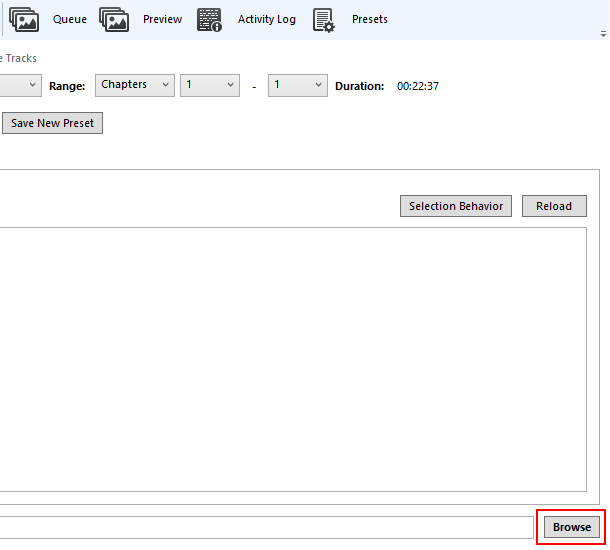
Click on Browse.
- In the next window, you select a location on your computer where you want to save the new video file.
- At File name, you type a name for the new video file.
-
Click on Save.
-
Click on Start at the bottom of VLC.
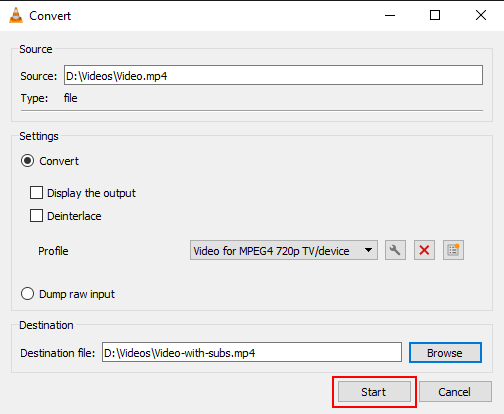
VLC media player will now merge the subtitles with the video file.
This process may take a while to complete.
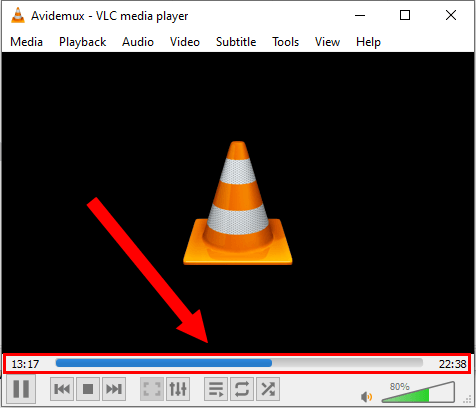
You can see the progress of this process at the bottom of VLC.
Method 2: VLC Media Player (Stream Settings)
- Make sure the subtitle file is in the same folder as the video file.
- Make sure the subtitle file has the same filename as the video file (e.g., Movie.mp4 and Movie.srt).
- Open VLC media player.
- Click on Media located in the top left corner of VLC.
-
Click on Stream.
-
In the next window, you click on Add.
- In the next window, you go to the location on your computer where the video and subtitle files are.
- Select the video file and subtitle file.
-
Click on Open.
- Make sure the Use a subtitle file option is unchecked (disabled).
-
Click on Stream at the bottom of the window.
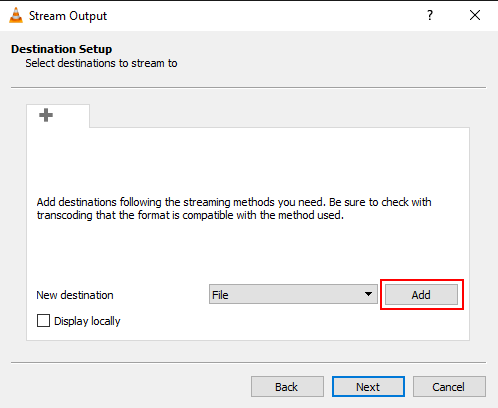
- In the next window, you click on Next.
-
Click on Add.
-
Click on Browse.
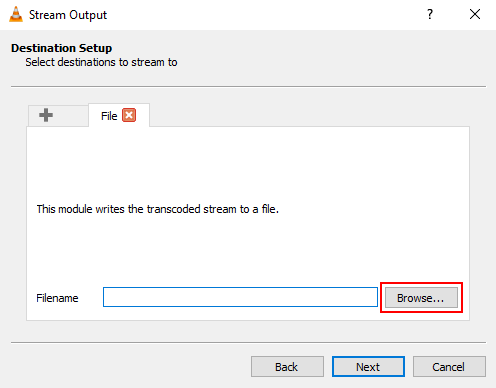
- In the next window, you select a location on your computer where you want to save the new video file.
- At File name, you type a name for the new video file.
-
Click on Save.
- Click on Next.
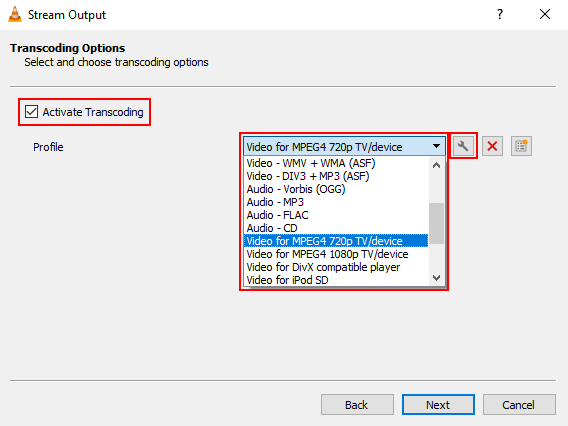
- Make sure the Activate Transcoding option is checked.
- Select Video for MPEG4 720p TV/Device or Video for MPEG4 1080p TV/Device at Profile. This depends on the resolution of the original video file.
-
Click on the wrench button next to the profile selection menu button.
- In the next window, you click on Video codec.
- Make sure the Video option is checked.
-
Make sure the Keep original video track option is unchecked (disabled).
- Click on Audio codec.
- Make sure the Audio option is checked.
-
Check the Keep original audio track option.
- Click on Subtitles.
- Check the Subtitles option.
- Select DVB subtitle at Codec.
-
Check the Overlay subtitles on the video option.
- Click on Save at the bottom of the window.
- Click on Next.
-
Click on Stream.
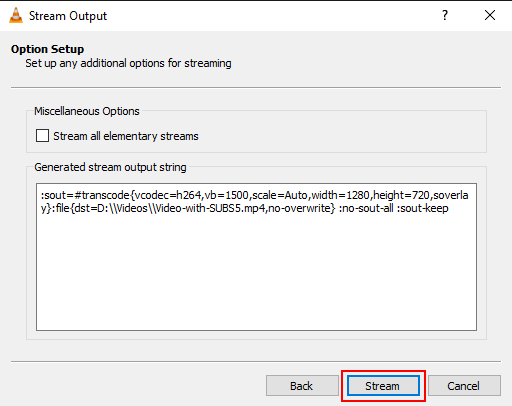
VLC media player will now merge the subtitles with the video file.
This process may take a while to complete.
You can see the progress of this process at the bottom of VLC.
Method 3: MKVToolNix (best for MKV and MP4 Files)
MKVToolNix is a set of tools to create, edit, and inspect MKV video files on Windows and Linux. You can also use MKVToolNix to merge MKV, MP4, and AVI video files with SRT subtitle files. For Windows, MKVToolNix is available as an installer and as a portable 7zip archive. You can download MKVToolNix for Windows here.
Note: If you've downloaded the portable version of MKVToolNix, you will need to unzip the .7z file first. You can use 7-Zip for this.
Steps
- Make sure the subtitle file is in the same folder as the video file.
- Make sure the subtitle file has the same filename as the video file (e.g., Movie.mp4 and Movie.srt).
- Open MKVToolNix (mkvtoolnix-gui.exe or mkvtoolnix-gui).
-
Click on + Add source files at the bottom of MKVToolNix.

- In the next window, you go to the location on your computer where the video and subtitle files are.
- Select the video file and subtitle file.
-
Click on Open.
-
At Destination file located at the bottom of MKVToolNix, you can see and change the location on your computer where MKVToolNix will save the new video file.
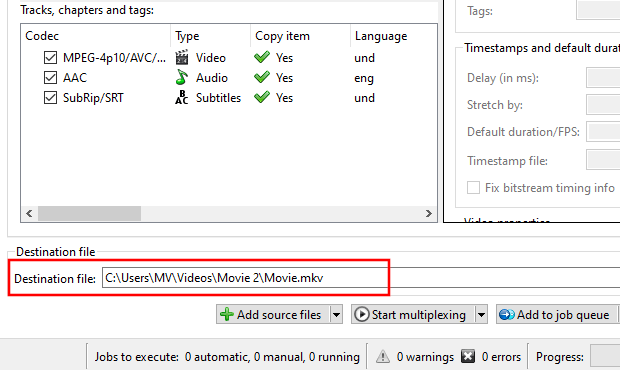
-
Click on Start multiplexing at the bottom of MKVToolNix.
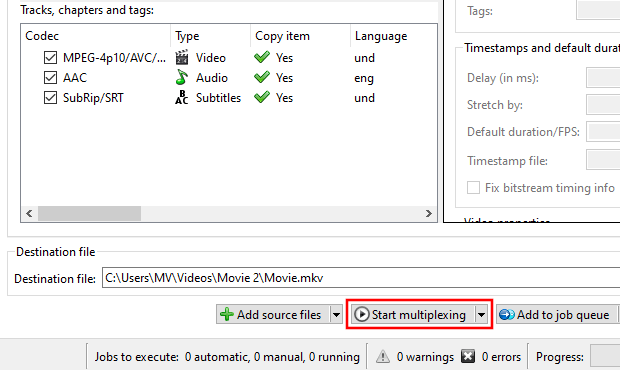
MKVToolNix will now merge the subtitles with the video file.
This process will only take a minute or so to complete.
You can see the progress in the bottom right corner of MKVToolNix.

The result will be an MKV video file.
Method 4: HandBrake (best for MP4 and MKV Files)
HandBrake is a free, open-source, cross-platform video converter for Windows, Linux, and macOS.
Steps
- Make sure the subtitle file is in the same folder as the video file.
- Make sure the subtitle file has the same filename as the video file (e.g., Movie.mp4 and Movie.srt).
- Open HandBrake.
-
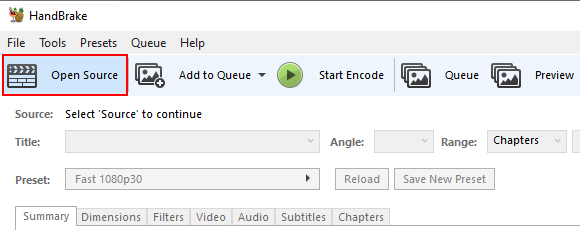
Click on Open Source located in the top left corner of HandBrake.
-
Click on File.
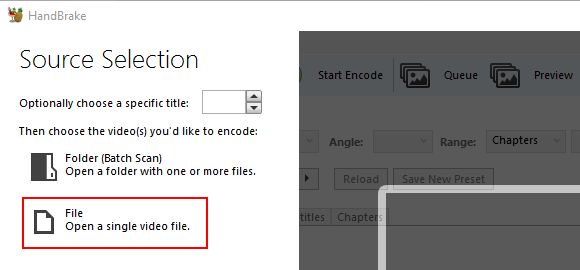
- In the next window, you go to the location on your computer where the MP4 video file and subtitle file are.
- Select the video file.
-
Click on Open.
-
Select MP4 at Format.

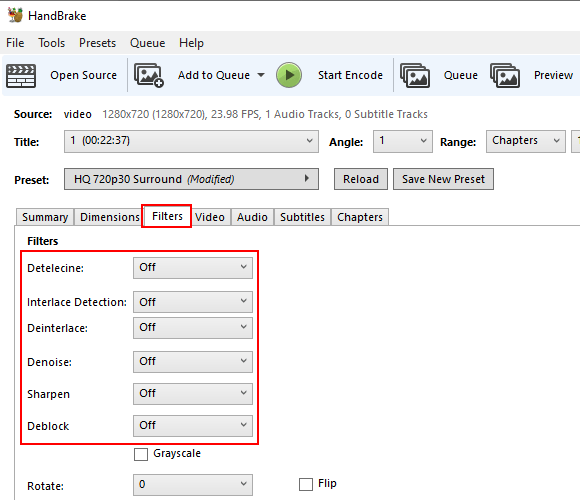
- Click on the Filters tab.
-
Disable all filters.
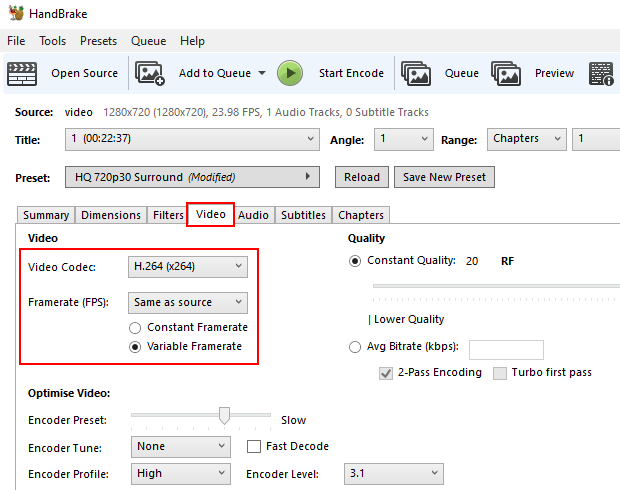
- Click on the Video tab.
- Select H.264 (x264) at Video Codec.
- Select Same as source at Framerate (FPS).
-
Check the Variable Framerate option.
-
You can change the quality at Quality > Constant Quality by using the slider. A lower RF number produces higher-quality video, and a higher RF number produces lower-quality video. Begin by making small adjustments. Plus or minus 1 or 2 RF is usually noticeable.
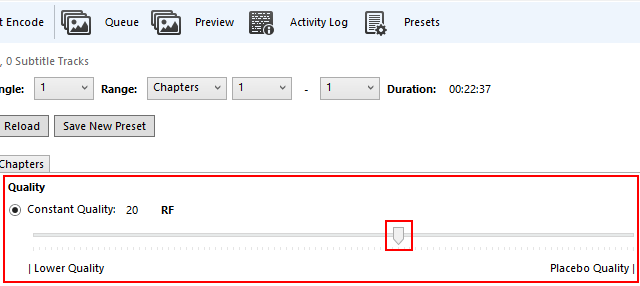
Recommended settings for x264 and x265 encoders:
- RF 18-22 for 480p/576p Standard Definition
- RF 19-23 for 720p High Definition
- RF 20-24 for 1080p Full High Definition
- RF 22-28 for 2160p 4K Ultra High Definition
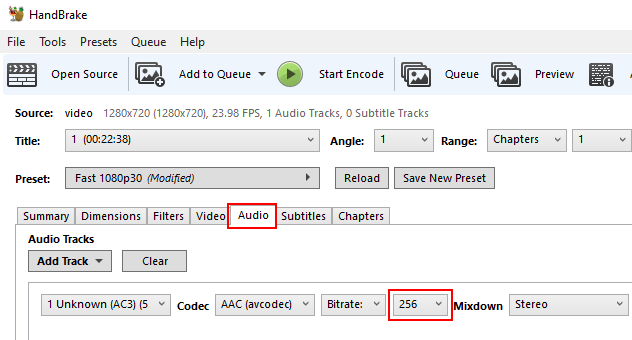
- Click on the Audio tab.
-
Set the bitrate to 256.
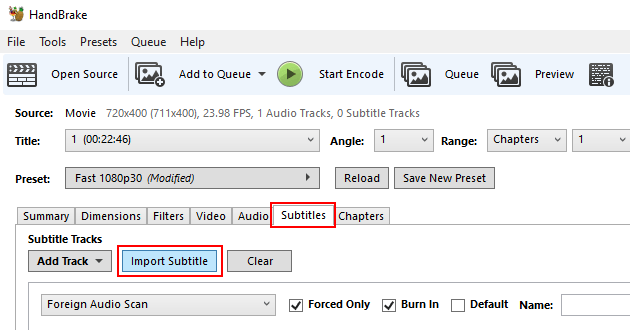
- Click on the Subtitles tab.
-
Click on Import Subtitles.
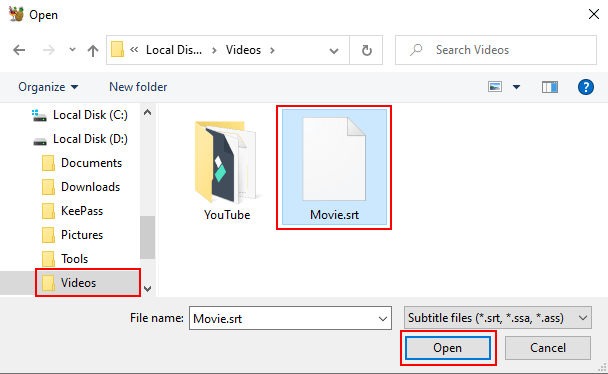
- In the next window, you go to the location on your computer where the video file and subtitle file are.
- Select the subtitle file.
-
Click on Open.
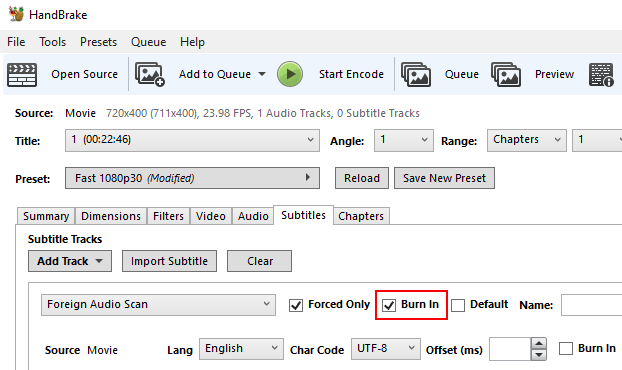
-
Check the Burn in option.
-
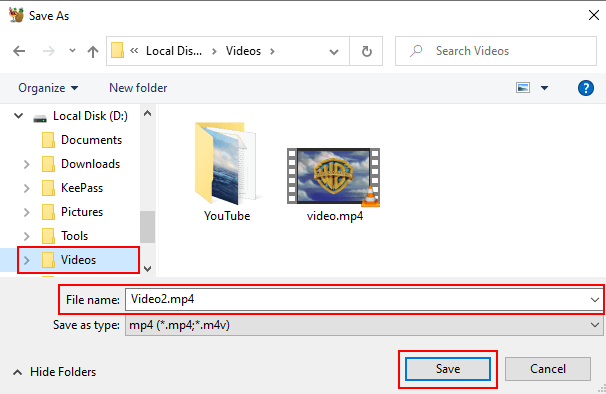
Click on Browse in the bottom right corner of HandBrake.
- In the next window, you select a location on your computer where you want to save the new video file.
- At File name, you type a name for the video with .mp4 at the end of the file name.
-
Click on Save.
-
Click on Start Encode located at the top of HandBrake.
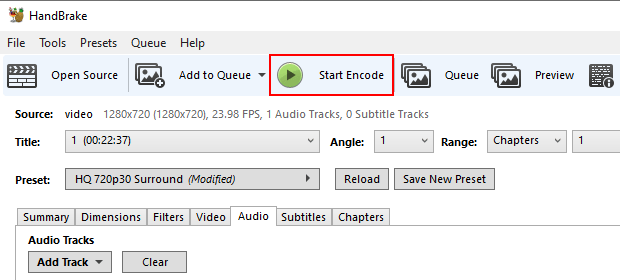
HandBrake will now convert the video to another video with hardcoded subtitles.
This may take a while.
The time it takes to convert the video depends on the file size of the video, the output quality settings, and your computer's hardware.
You can see the progress at the bottom of HandBrake.

Method 5: FFmpeg (command line)
FFmpeg is a free, open-source, cross-platform program for recording, converting, and streaming audio and video on Microsoft Windows, Linux, and macOS.
Steps
- Make sure the subtitle file is in the same folder as the video file.
- Make sure the subtitle file has the same filename as the video file (e.g., Movie.mp4 and Movie.srt).
- Open the folder where the video file and subtitle file are.
- Open a Command Prompt window (Windows) or Terminal window in the folder.
-
In the Command Prompt or Terminal window, you type (or copy and paste) the command below but replace video.mp4 and video.srt with the file name of your video and subtitle file (e.g., Movie.mp4 and Movie.srt). Replace video2.mp4 with the desired name for the new video.
ffmpeg -i video.mp4 -vf subtitles=video.srt video2.mp4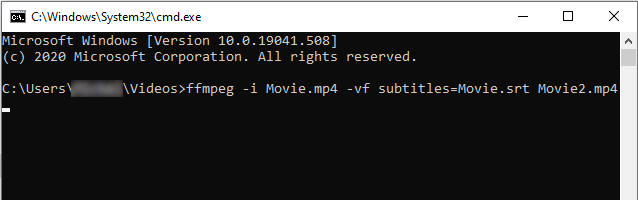
- Press the Enter key on your keyboard.
FFmpeg will now convert the video to another video with hardcoded subtitles.
This may take a while.
The time it takes to convert the video depends on the file size of the video, the output quality settings, and your computer's hardware.
Method 6: AVIAddXSubs (for legacy AVI files)
AVIAddXSubs is a small free portable program for merging subtitle files with AVI video files.
Steps
- Make sure the subtitle file is in the same folder as the video file.
- Make sure the subtitle file has the same filename as the video file (e.g., Movie.mp4 and Movie.srt).
- Click here to download AVIAddXSubs.
-
Unzip the AVIAddXSubs.zip file you've downloaded.
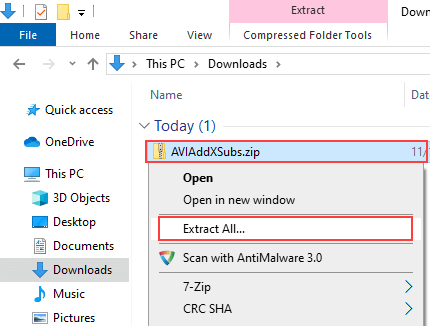
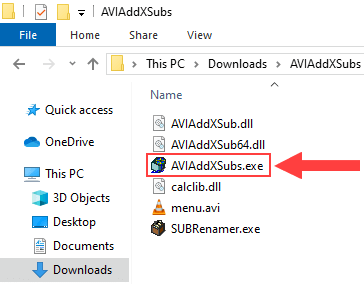
- Open the AVIAddXSubs folder.
-
Double-click on AVIAddXSubs.exe to open AVIAddXSubs.
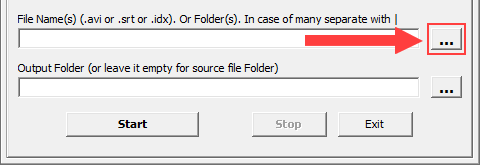
-
Click on the three-dot button next to the Filename(s)(.avi or .srt or .idx).Or folder(s) field.
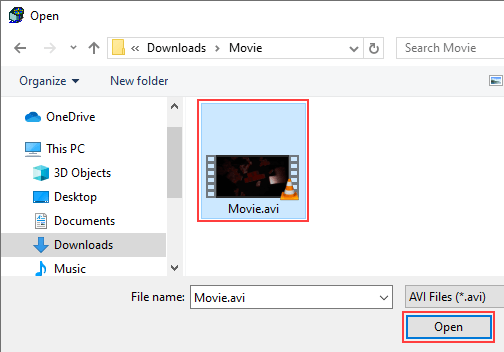
- In the next window, you go to the location on your computer where the AVI video file and SRT subtitle file are.
- Select the AVI video file.
-
Click on Open.
-
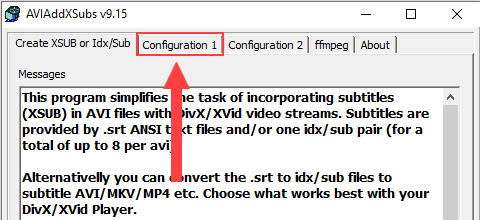
Click on the Configuration 1 tab located at the top.
-
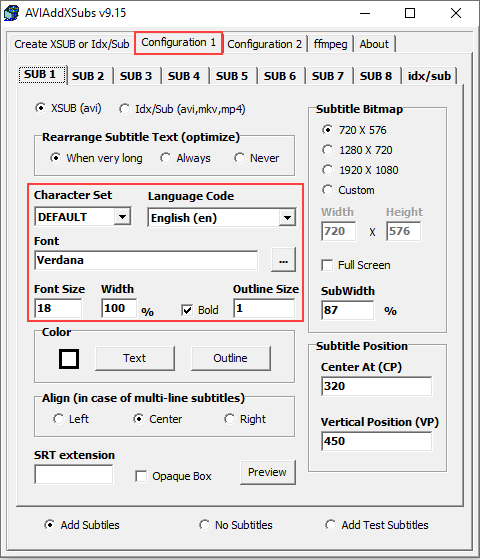
You may want to change a few settings like the ones below.
- Character Set this setting is for some languages who use different characters in their subtitles.
- Language Code here you can select your subtitle language. Don't worry if your language is not on the list, because it probably won't matter much.
- Font here you can select a font. I prefer Verdana or Arial.
- Font Size here you can enter a size for the text of your subtitles. I prefer 18 as font size.
- Bold is checked by default, but if you don't like it you can just uncheck it.
- Outline Size this is the size of the font border. I prefer 1 as outline size.
-
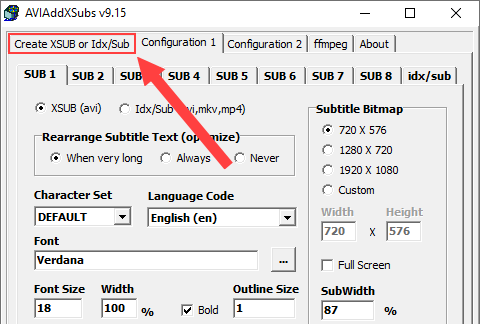
Click on the Create XSUB or Idx/Sub tab located at the top.
-
Click on Start in the bottom left corner of AVIAddXSubs.
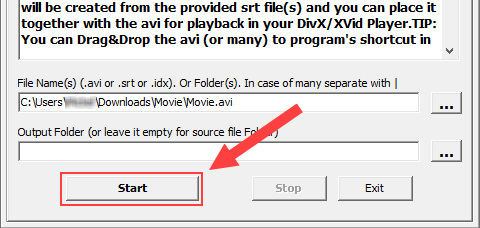
- AVIAddXSubs will now merge the SRT subtitle file with the AVI video file. This process won't take long. Maybe one or two minutes. Once the process is complete, click Exit in the bottom right corner.
The output will be a DIVX video file.
Related:
How to play videos with subtitles on PS5 (SRT file fix)
How to remove hardcoded subtitles from MKV video files
How to convert SRT subtitles to SUB and IDX subtitles