How to extract audio from a video
These step-by-step tutorials will show you how to extract audio from a video using VLC media player or Shotcut video editor.
Extract audio from a video using VLC media player
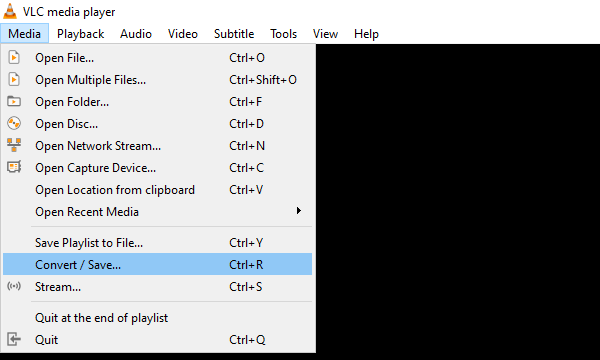
- Open VLC media player.
- Click on Media located in the top left corner.
-
Click on Convert / Save.
-
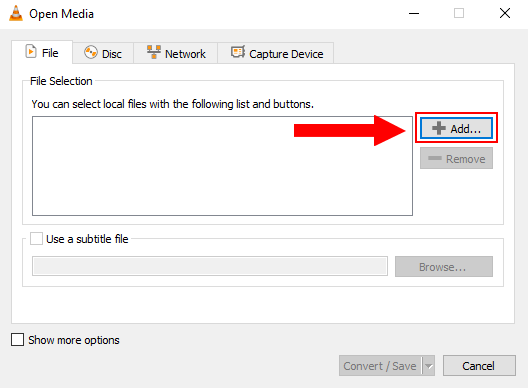
In the next window, you click on Add.
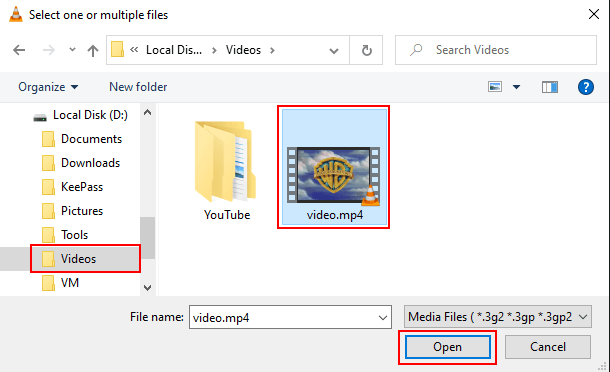
- In the next window, you go to the location on your computer where the video file from which you want to extract the audio.
- Select the video file.
-
Click on Open.
-
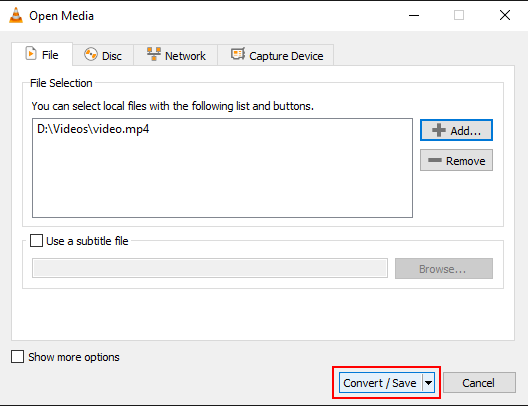
Click on Convert/Save at the bottom of the window.
-
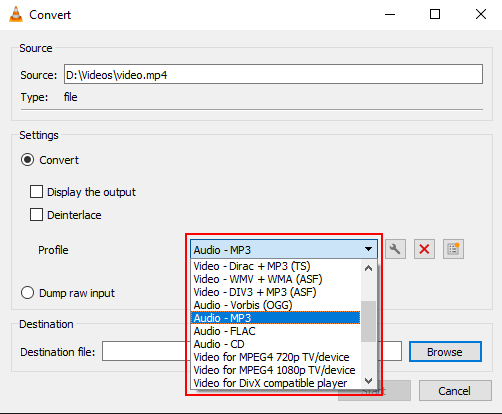
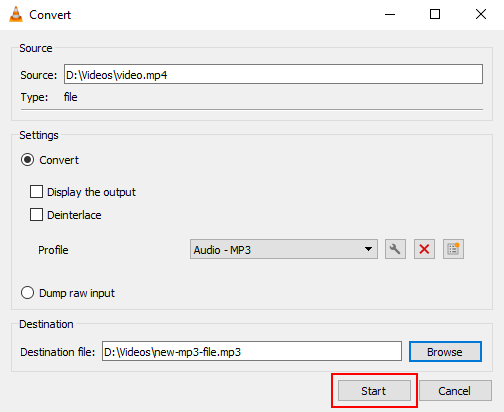
In the next window, you select Audio - MP3 or Audio - FLAC or Audio - Vorbis (OGG) at Profile.
-
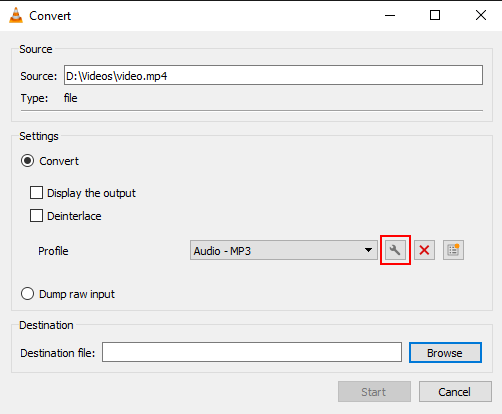
Click on the tool button next to the profile selection menu button.
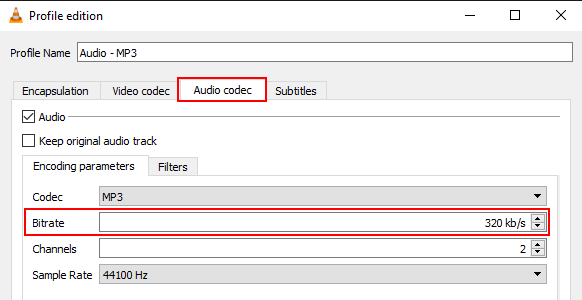
- In the next window, you click on Audio codec.
-
Change Bitrate to 320 kb/s.
- Click on Save at the bottom of the window.
-
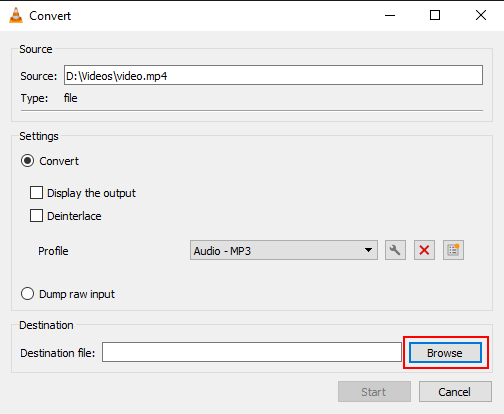
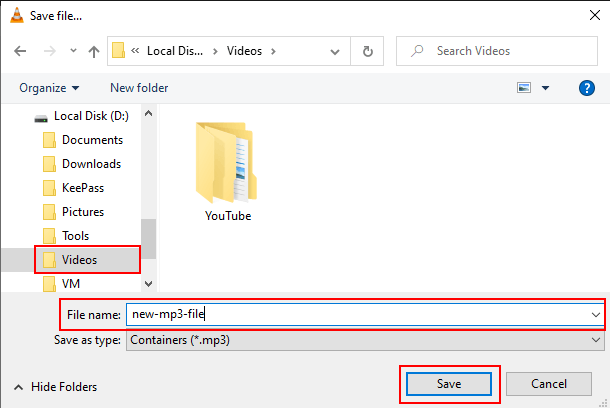
Click on Browse.
- In the next window, you select a location on your computer where you want to save the audio file.
- Enter a name for the audio file at File name.
-
Click on Save.
-
Click on Start.
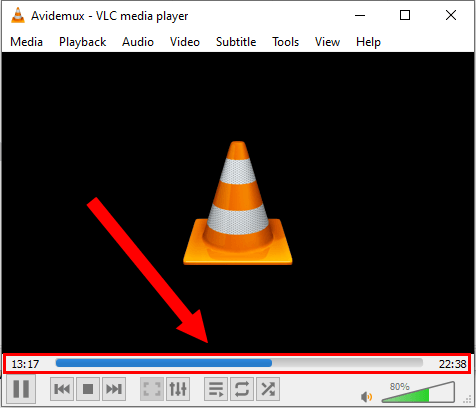
VLC media player will now extract the audio from your video.
Actually, it will convert your video file to an audio file.
You can see the progress of the process at the bottom of VLC.
Extract audio from a video using Shotcut video editor
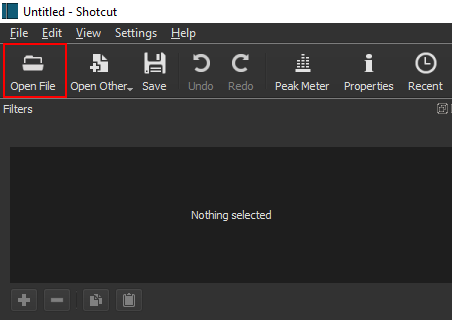
- Open Shotcut.
-
Click on Open File in the top left corner.
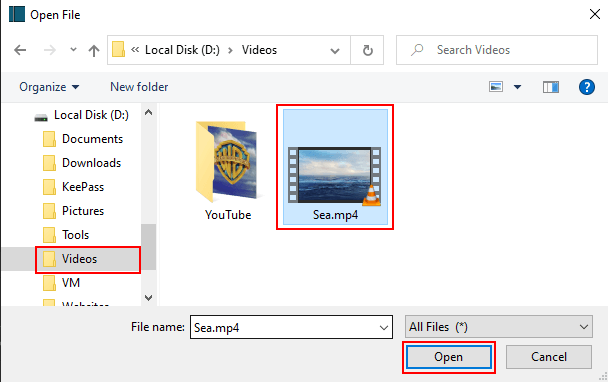
- In the next window, you go to the location on your computer where the video file from which you want to extract the audio.
- Select the video file.
-
Click on Open.
-
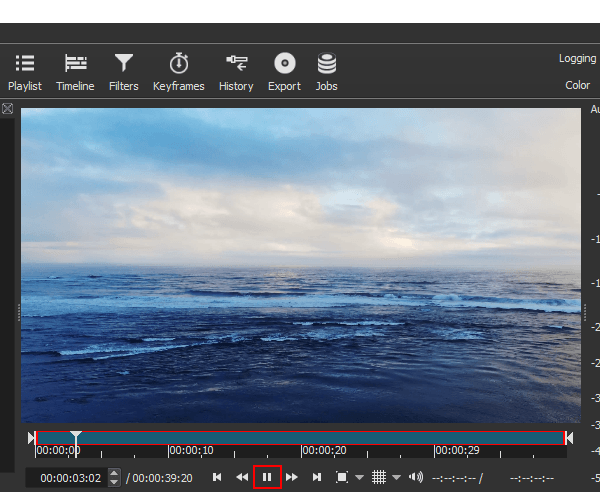
The video will start playing immediately. Pause the video by clicking the pause button below the video.
-
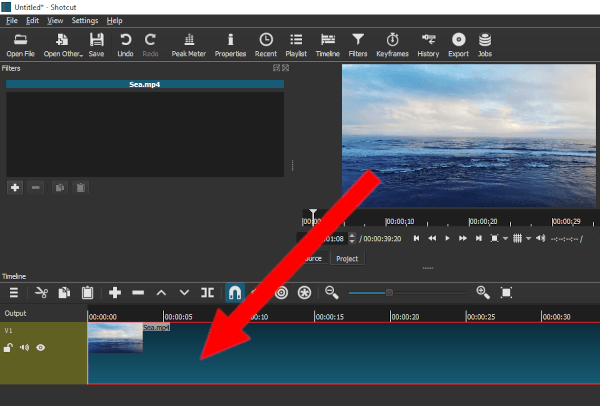
Drag the video to the timeline.
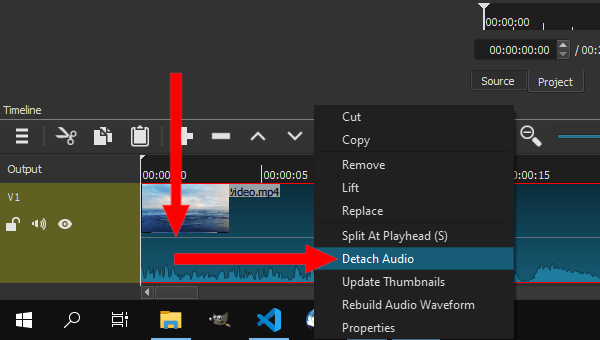
- In the timeline section, you right-click on the video.
-
Click on Detach Audio.
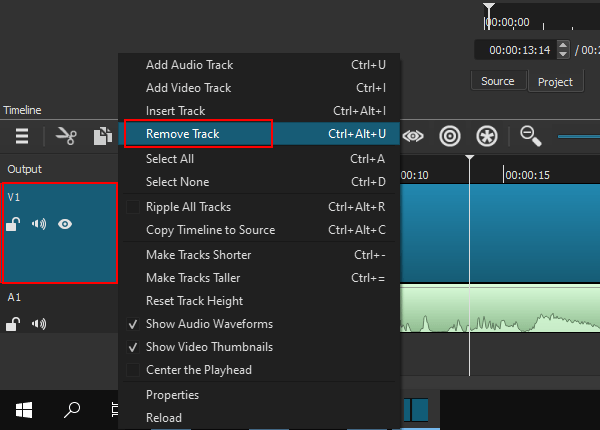
- In the Output section located at the left side, you right-click on the video track.
-
Click on Remove Track.
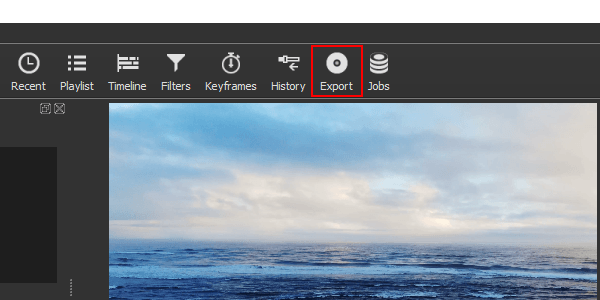
-
Click on Export located in the top menu.
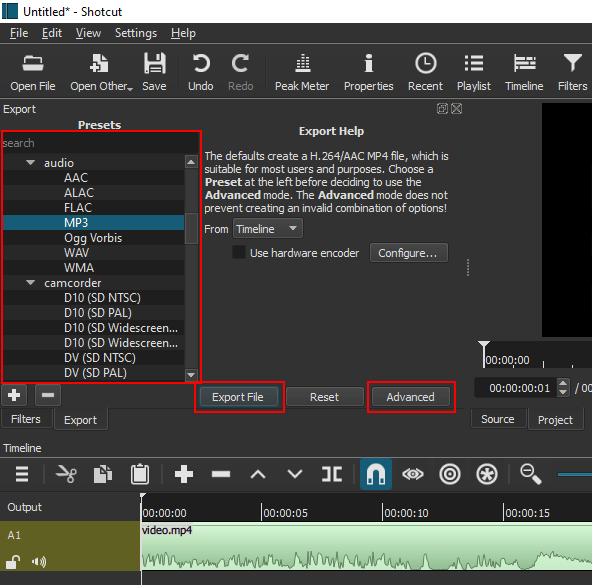
- In the next window, you select an audio format, like MP3, ALAC, FLAC, WAV, or WMA in the Presets section.
- If you want more advanced settings, like bitrate settings or other settings, you click on Advanced.
-
Click on Export File.
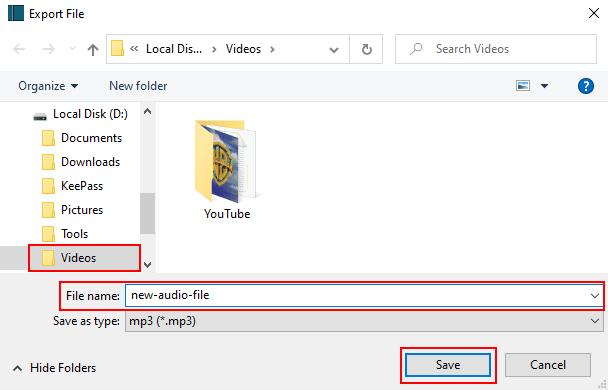
- In the next window, you select a location on your computer where you want to save the audio file.
- At File name, you type a name for the audio file.
-
Click on Save.
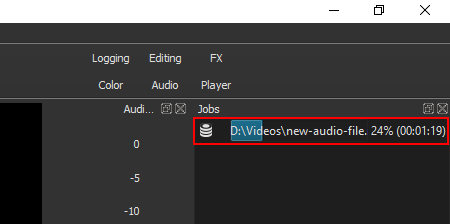
Shotcut will now extract the audio from your video.
Actually, it will convert your video file to an audio file.
You can see the progress of the process at Jobs located in the top right corner.
Related:
How to remove sound from a video (step by step)