How to create a password-protected ZIP file in Windows 11
This step-by-step tutorial will show you how to create a password-protected ZIP file in Windows 11.
ZIP is an archive file format that supports lossless data compression. A ZIP file may contain one or more files or folders.
How to create a password-protected ZIP file in Windows 11 with 7-Zip
- Open your web browser.
- Go to 7-zip.org.
-
Download 7-Zip.

-
Open the 7-Zip installation file you've just downloaded.
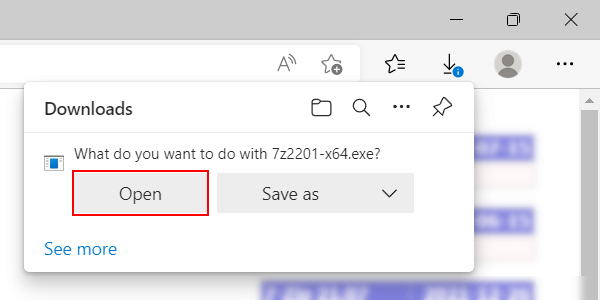
- If a 'User Account Control' window appears, you click on Yes.
-
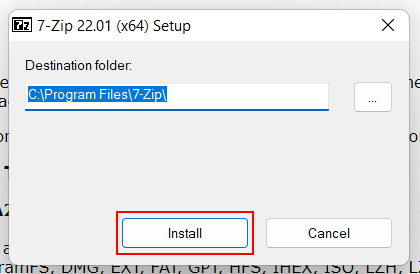
In the next window, you click on Install.
-
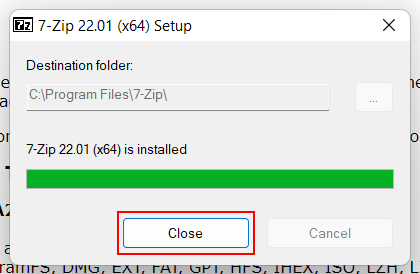
When the installation is complete, you click on Close.
- You can close your web browser now.
-
Open File Explorer.

- Go to the files or folders you want to zip.
-
Select the files or folders.

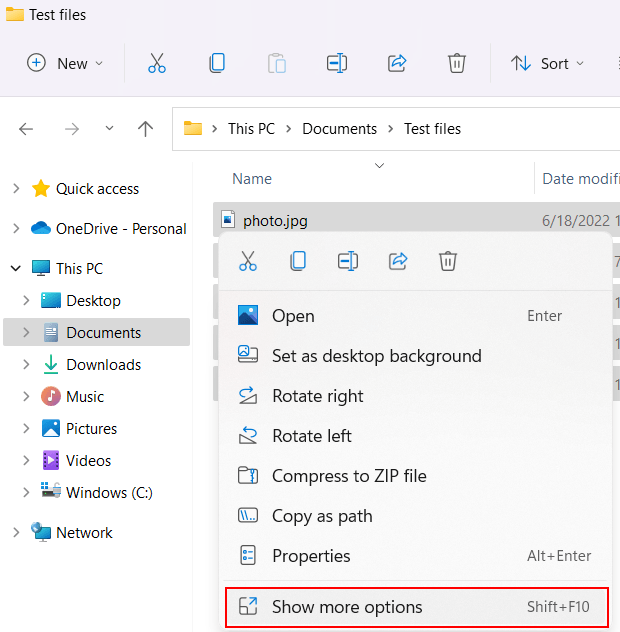
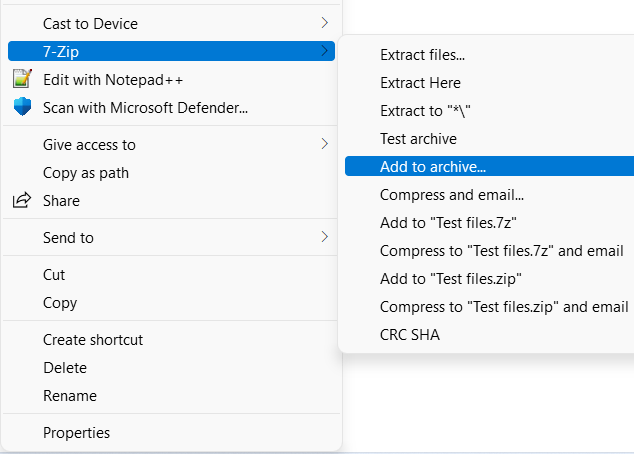
- Right-click on the selected files or folders.
-
Click on Show more options.
- Move your mouse cursor (pointer) to 7-Zip.
-
Click on Add to archive.
- In the next window, you select zip at Archive format.
- In the Encryption section, you enter the password you want to use for the ZIP file in both password fields.
-
At Encryption method, you select AES-256.
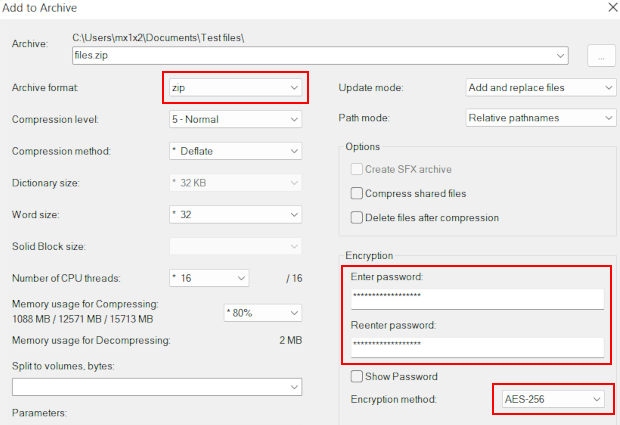
- Click on OK at the bottom of the 'Add to Archive' window.
7-Zip will now create the password-protected ZIP file.
Related:
How to password protect a PDF file (4 easy ways)
How to open a ZIP, RAR or 7Z file on Windows 11
How to make a ZIP file on Windows 11 (step by step)
How to create a RAR file in Windows 11 (step by step)
References:
https://www.howtogeek.com/817446/password-protect-zip-file-windows/
https://www.thewindowsclub.com/add-password-to-zip-file-windows
https://www.digitalcitizen.life/create-password-protected-zip-file-windows/