How to block any website with NextDNS (no extension required)
If you want to take control of your internet experience, you don't need a dozen different browser extensions. Whether you are trying to block distracting social media sites, stop intrusive ads, or filter out dangerous content, there is a cleaner, more professional way to do it: NextDNS.
NextDNS acts like a private "remote control" for your internet connection. Instead of blocking sites after they load in your browser, NextDNS stops them from ever reaching your computer in the first place. By using the built-in Secure DNS settings in Chrome, Edge, Brave, and Firefox, you can connect your browser to a custom NextDNS dashboard where you can block any website with a single click.
In this guide, you’ll learn:
- The benefit: Why this method is faster, more private, and uses zero computer memory.
- The NextDNS dashboard: How to create a free account and set up your "Blacklist."
- The "magic link": Where to find your custom DNS-over-HTTPS address.
- Browser configuration: How to paste that link into Chrome, Edge, Brave, and Firefox.
- Troubleshooting: What to do when the website is still loading.
Why use NextDNS instead of an extension?
If you’ve ever used a browser extension to block sites, you know they can be clunky. Switching to a DNS-based solution like NextDNS offers three major advantages:
1. Zero impact on system memory (RAM)
Browser extensions are essentially mini-programs that run constantly in the background. Every extension you add eats up a bit more of your computer’s RAM. Because NextDNS uses your browser’s native settings, it requires 0MB of extra memory. Your browser stays as fast as the day you installed it.
2. Superior privacy
Many "free" site-blocking extensions make money by tracking your browsing habits and selling that data to advertisers. NextDNS is a privacy-first service. By using DNS-over-HTTPS (DoH), your browsing requests are encrypted, meaning your Internet Service Provider (ISP) and "creepy" extensions can't see which sites you're trying to visit.
3. Better performance & speed
Extensions block websites after your browser starts to load them. This can cause a "flicker" or a delay while the extension decides whether to let the site through.
NextDNS works at the connection level. When you try to visit a blocked site, NextDNS simply tells the browser the site doesn't exist before a single byte of data is ever downloaded. This actually saves bandwidth and helps pages load faster.
4. Security
There are malicious browser extensions, and some extensions even become malicious after they’ve been bought by another developer. Malicious extensions can capture your passwords, track your browsing activity, insert ads into the pages you visit, or even infect your computer with malware. [1] [2] [3].
Comparison at a glance
| Feature | Browser extension | NextDNS method |
|---|---|---|
| RAM usage | Increases with every extension | Zero |
| Privacy | Can track your data | Encrypted & private |
| Speed | Can cause browser lag | Ultra-fast |
| Difficulty to bypass | Easy (just disable it) | Harder (hidden in settings) |
| Security | Can be or become malicious | Safe |
Note: Because this method doesn't rely on an extension, it even works in "Incognito" or "Private" mode by default. Most extensions are disabled in private windows, but NextDNS keeps your filters active 24/7.
Step 1: Setting up your "Blacklist"
- Open your web browser.
- Go to my.nextdns.io.
- Create a free account by clicking the Sign up button.
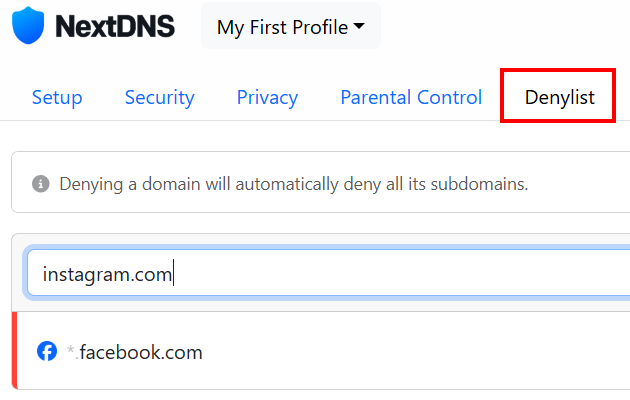
- Once you've created an account and logged in, go to Denylist.
-
Add the domain(s) you want to block in your browser by entering them and pressing Enter.
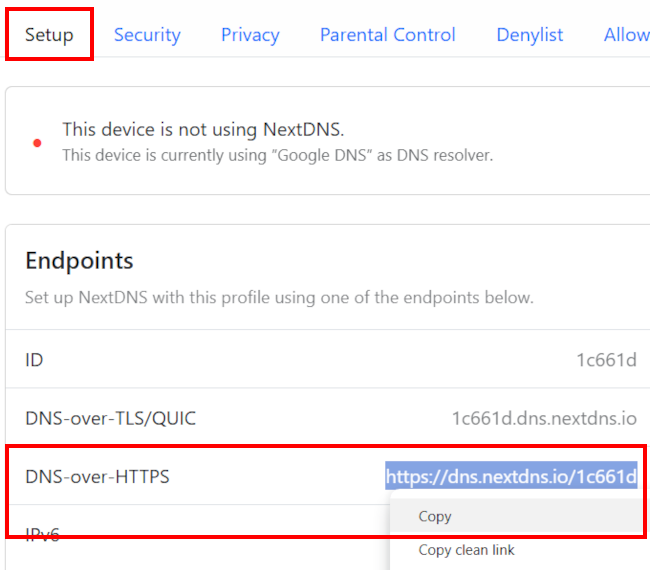
- Go to Setup.
-
Copy the 'DNS-over-HTTPS' link.
Tip: NextDNS also lets you block entire categories — including adult content, dating, gambling, social media, piracy, and video streaming — by going to Parental Control > Categories.
Now it's time to put that link in your browser.
The steps for Firefox are below the Chrome, Edge, and Brave steps.
Chrome, Edge & Brave
Chrome, Edge, and Brave are Chromium‑based browsers, so the steps are identical.
To block websites in Chrome, Edge, and Brave using the NextDNS link, follow these steps:
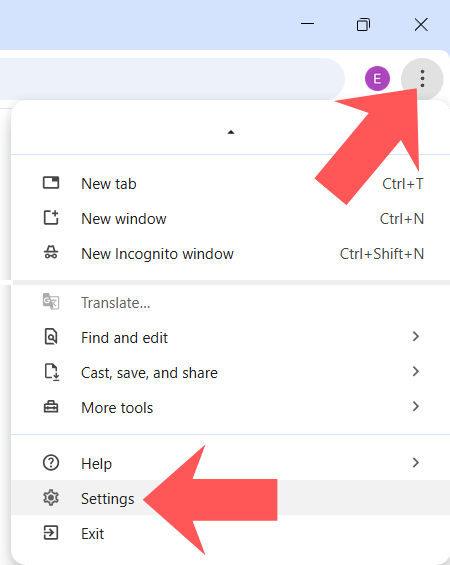
- Click the three-dot menu button (Chrome/Edge) or three-line menu button (Brave) in the top right corner.
-
Click Settings.
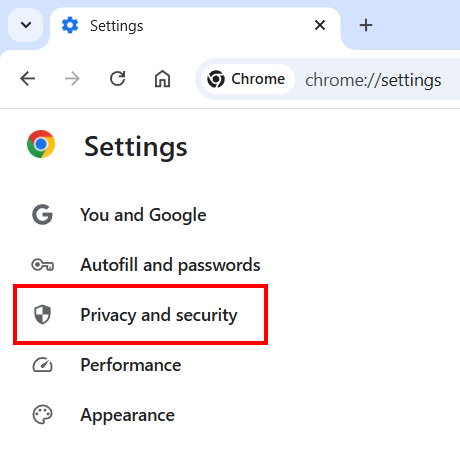
-
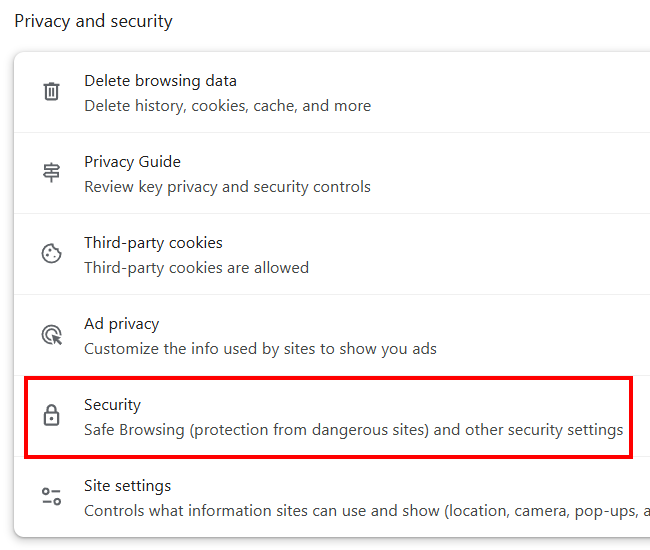
Click Privacy and security (Chrome/Brave) or Privacy, search, and services (Edge) in the left menu.
-
Click Security.
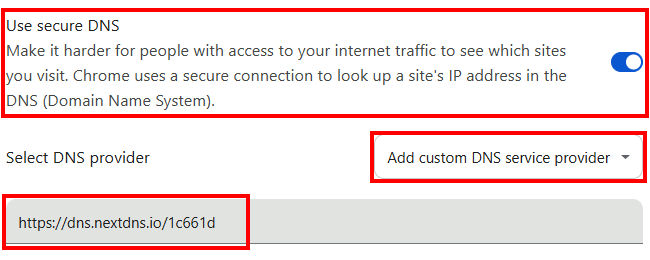
- Ensure the Secure DNS option is enabled.
- Select Add custom DNS service provider (Chrome/Brave) or Choose a service provider (Edge).
-
Paste the NextDNS link.
- Try to visit the site you’ve blocked to test whether the blocking is working.
Note: It might take a minute for the cache to clear, or you may need to restart your browser.
Firefox
To block websites in Firefox using the NextDNS link, follow these steps:
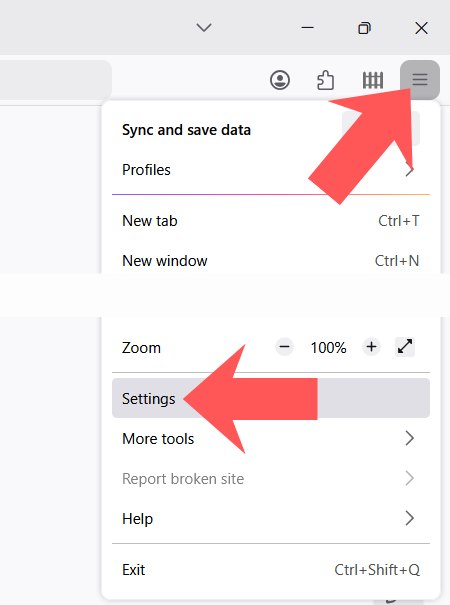
- Click the menu button in the top right corner.
-
Click Settings.
- Click Privacy & Security in the left menu.
- Scroll down to the DNS over HTTPS section.
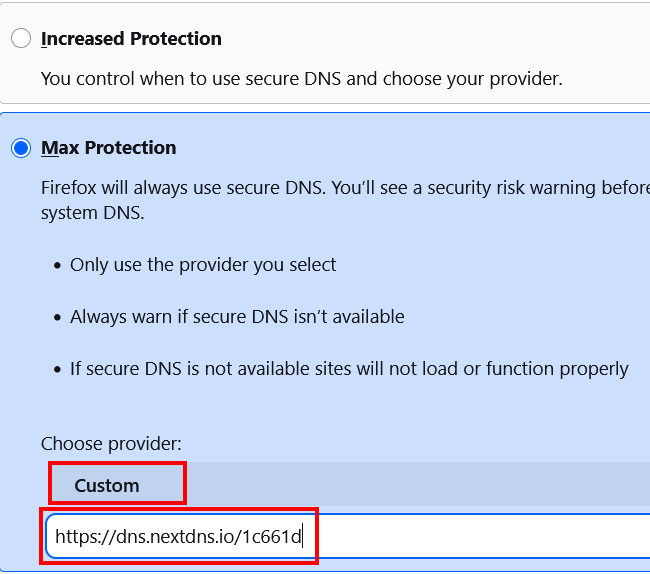
- Choose either Max Protection or Increased Protection.
- Select Custom.
-
Paste the NextDNS link.
- Try to visit the site you’ve blocked to test whether the blocking is working.
Note: It might take a minute for the cache to clear, or you may need to restart your browser.
How to test your settings
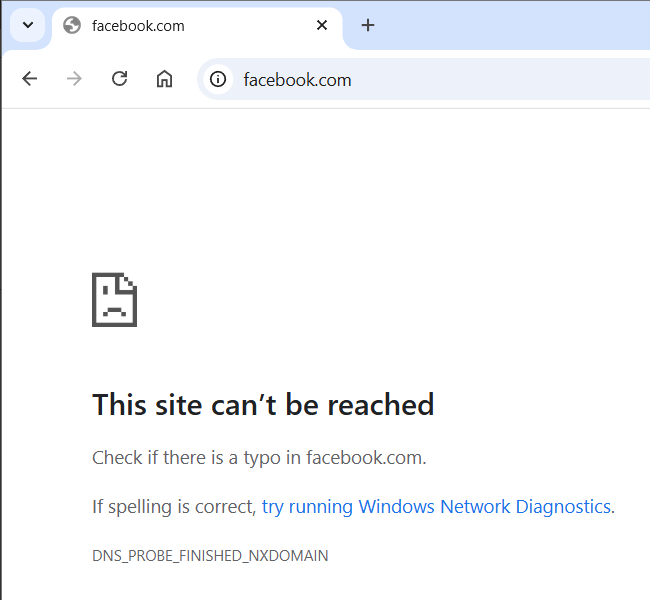
Open a new tab and try to visit one of the websites you added to your NextDNS 'Denylist.' If everything is set up correctly, your browser will show the 'This site can’t be reached' message.
Still seeing the website? Don't worry—check the troubleshooting steps below.
Troubleshooting: Why is the site still loading?
If you’ve set up NextDNS but can still access your "blocked" sites, don't panic. You usually don't need to redo the whole process; your browser is likely just clinging to old data. Here is how to fix it:
1. The "Ghost" Cache (Most Common)
Your browser often "caches" (saves) the DNS records of websites you’ve visited recently. Even if NextDNS is now blocking the site, the browser is using its "memory" to find it anyway.
- The fix: Close your browser completely and reopen it.
- The Pro Fix: Open a Private/Incognito window. If the site is blocked there but not in your normal window, you definitely have a cache issue. You may need to clear your "Browsing History" and "Cached images and files" in your browser settings.
2. Flush your Windows DNS
Sometimes the "memory" issue isn't just in the browser—it's in Windows itself. You can force Windows to forget all old website locations with one quick command:
- Right-click the Windows start menu button.
- Click Terminal or Command Prompt.
-
Type
ipconfig /flushdns. - Press Enter.
- You should see a message saying "Successfully flushed the DNS Resolver Cache."
3. Check for typos in the NextDNS DoH link
NextDNS gives you a very specific DNS-over-HTTPS URL. If even one character is missing, the browser will either ignore it or fail to connect.
The fix: Go back to your NextDNS Setup tab, copy the link again, and re-paste it into your browser settings. Make sure there are no extra spaces at the beginning or end.
4. Conflict with VPNs or other DNS apps
If you use a VPN (like NordVPN or ExpressVPN) or another DNS app (like 1.1.1.1), they will often hijack your connection and ignore your browser’s specific DNS settings.
The fix: Disable your VPN temporarily to see if NextDNS starts working. If you want to use both, you usually have to configure the VPN itself to use NextDNS, rather than just the browser.
5. Check the NextDNS status
Not sure if you’re actually connected? NextDNS makes it easy to check:
- The fix: Go to test.nextdns.io.
- Look for the line that says "status": "ok". If it says "unconfigured", your browser isn't correctly sending requests to your NextDNS account yet.
Give it a minute! > DNS changes can sometimes take 30–60 seconds to propagate through your system. If it doesn't work the very millisecond you paste the link, try refreshing the page after a minute. Even the internet needs a second to catch its breath sometimes.
Related:
How to block a website in Windows 10 and 11 (step by step)
How to block adult content websites on Windows 11 (easy way)
How to block a program from accessing the internet on Windows
How to unblock blocked websites (4 safe and free methods)