How to automatically move emails to a folder in Gmail
This tutorial will teach you step by step how to automatically move emails to a folder in Gmail.
How to automatically move emails to a folder in Gmail
-
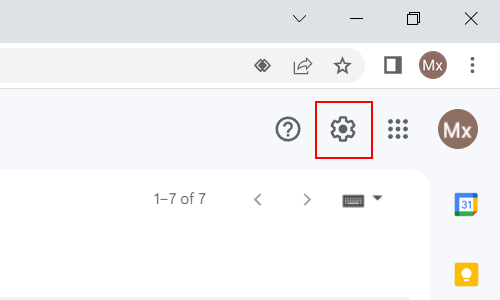
Open Gmail settings by clicking on the settings (gear) icon in the top right corner.
-
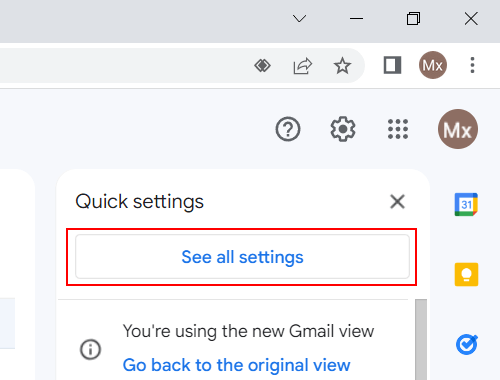
Click See all settings.
-
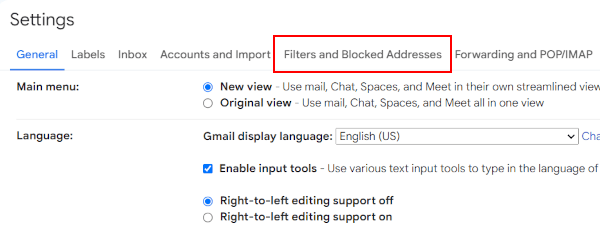
Click on Filters and Blocked Addresses.
-
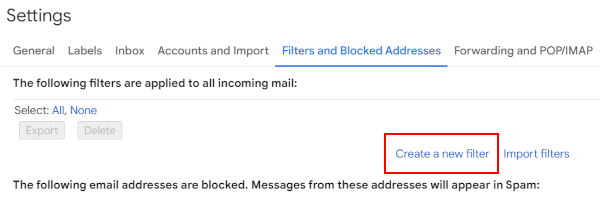
Click on Create a new filter.
-
In the next window, you will have the following options to filter emails: From, To, Subject, Has the words, Doesn't have, Size, Has attachment, and Don't include chats.
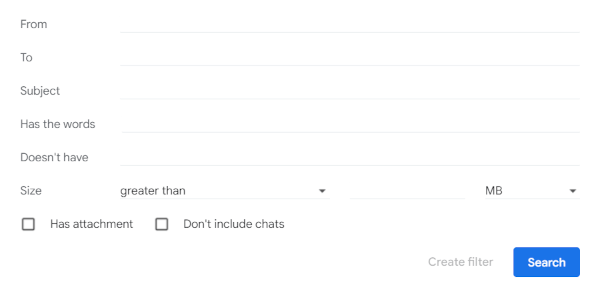
You can enter an email address in the 'From' field, and then all emails you receive from that email address will automatically go into the folder.
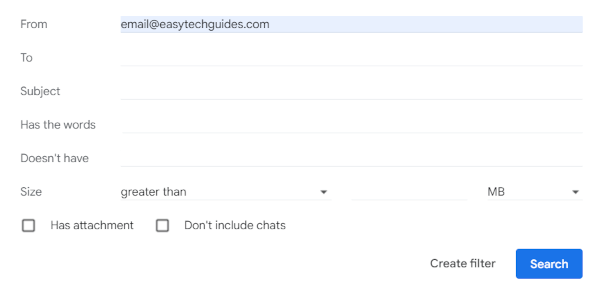
You can type a word in the 'Subject' field, and then all emails that have that word in the subject will automatically go into the folder.
You can type a word in the 'Has the words' field, and then all emails that have that word anywhere in the email will automatically go into the folder.
You can type a word in the 'Doesn't have' field, and then all emails that don't have that word anywhere in the email will automatically go into the folder.
You can use one of the other filter rules.
-
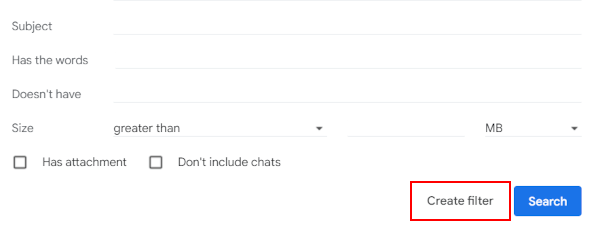
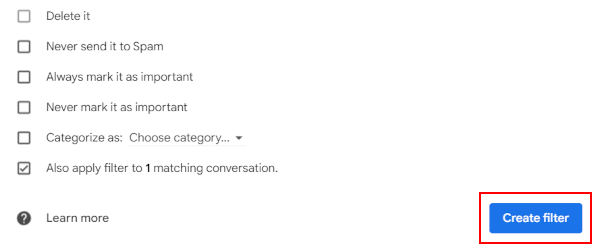
Click Create filter at the bottom left corner of the window.
-
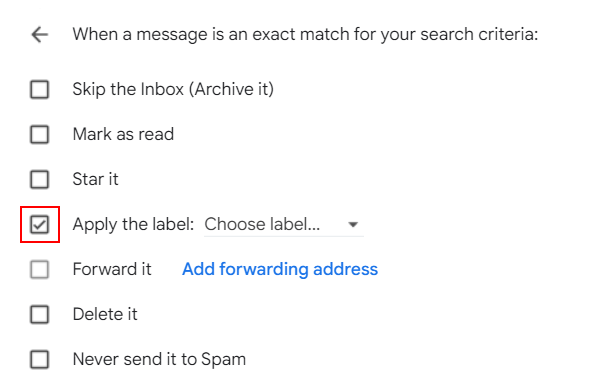
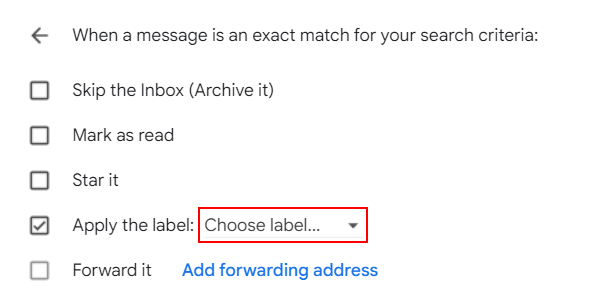
In the next window, you will have to choose what happens with emails that match your filter rule(s). To automatically move emails to a folder, you check the box next to Apply the label.
-
Click on the selection menu button next to the Apply the label option.
-
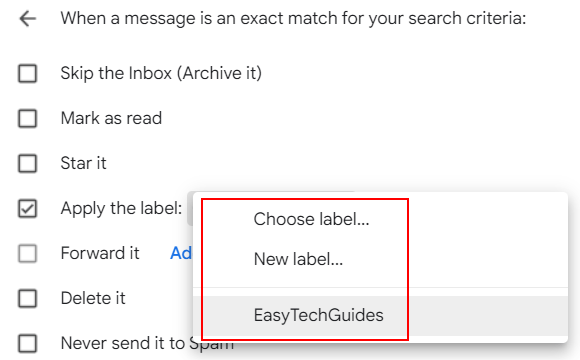
Select a label (folder) you want the emails to go or create a new one.
-
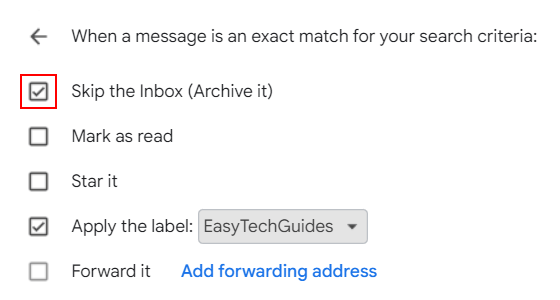
If you don't want the emails that match your filter rule(s) to also appear in your inbox, check the box next to Skip the Inbox (Archive it).
-
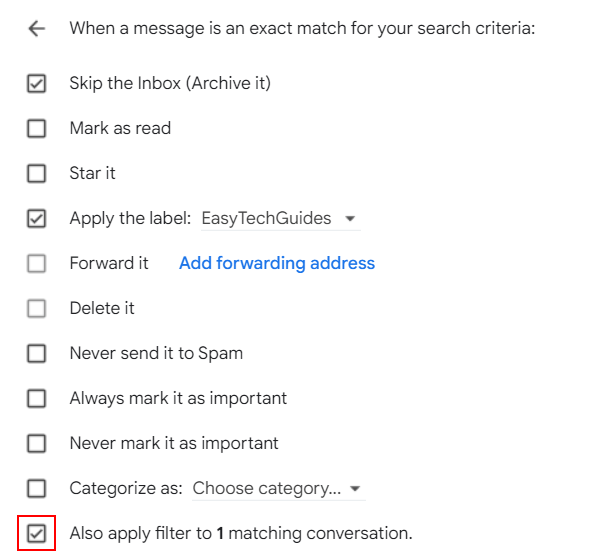
Check the box next to Also apply filter to ... matching conversations. This will move all existing older emails that match your filter rules to the folder.
-
Click Create at the bottom left corner of the window.
Any email that matches your filter rule(s) will automatically go into the selected folder.
Related:
How to block Google Forms spam emails in Gmail
Fix: 'Server denied POP3 access' on Gmail (step by step)
References:
https://www.wikihow.com/Automatically-Move-Emails-to-Folders-in-Gmail
https://www.howtogeek.com/786282/how-to-automatically-label-and-move-emails-in-gmail/