
How to fix VirtualBox only showing 32-bit and no 64-bit versions
This may be obvious for most of you, but your host operating system must be 64-bit to run 64-bit guest operating systems in VirtualBox. While Windows 10 still features older 32-bit versions, Windows 11 is exclusively a 64-bit operating system.
If VirtualBox isn't showing a 64-bit option on your Windows 10 or Windows 11 PC, try the verified solutions below to unlock and fix the problem.
1. Enable Virtualization (Intel VT-x or AMD SVM Mode) in BIOS/UEFI
Enter your PC's BIOS or UEFI settings menu to ensure your CPU's hardware virtualization layer is turned on. Depending on your processor manufacturer, look for these specific toggles:
- Intel Processors: Enable Intel Virtualization Technology (VT-x) and VT-d.
- AMD Processors: Enable SVM Mode (Secure Virtual Machine) or AMD-V.
The following steps will guide you through the process:
- Start or restart your PC.
-
Press the required keyboard key to enter the BIOS setup before Windows starts. It is best to press the key repeatedly immediately after powering on your computer.
The exact key depends on your computer manufacturer. Common BIOS keys include:
- HP: Press F10 or ESC
- Dell: Press F2 or F12
- Lenovo: Press F2 or Fn + F2 (or F1 for desktops)
- ASUS & Acer: Press DEL (Delete) or F2
- Custom Builds (Gigabyte, MSI, ASRock): Press DEL
-
Ensure hardware virtualization is turned on. Enable Intel Virtualization Technology (VT-x) and VT-d for Intel CPUs, or SVM Mode or AMD-V for AMD processors.
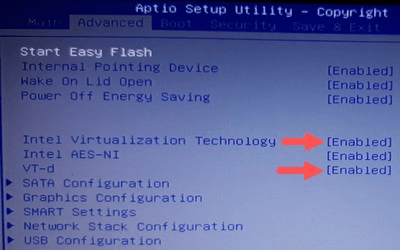
- If you made changes, press F10 to save your settings and exit, or look for the Save & Exit option in the BIOS menu. Your PC will restart automatically.
2. Disable Hyper-V and Windows Virtualization Features
Hyper-V is Microsoft's native hardware virtualization platform. While it allows you to create and run virtual machines, it frequently conflicts with third-party hypervisors like VirtualBox, leading to errors or performance drops. To ensure VirtualBox runs smoothly, you will need to completely disable Hyper-V.
- Right-click the Windows start menu button.
- Click Run.
-
Type optionalfeatures.exe in the 'Run' command window.
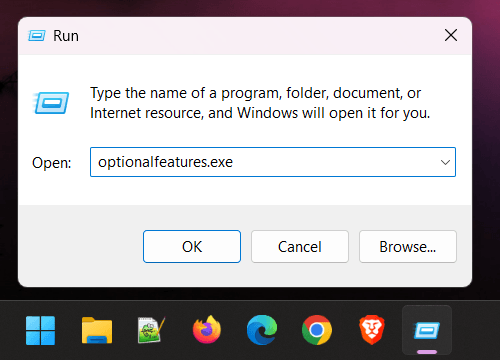
- Press Enter or click OK.
- If the 'User Account Control' window appears, click Yes. Depending on your settings, you may need to enter your administrator password first and then click Yes.
-
In the 'Windows Features' window, scroll down and ensure that all of the following virtualization options are completely unchecked:
- Hyper-V (including Hyper-V Management Tools and Hyper-V Platform)
- Virtual Machine Platform
- Windows Hypervisor Platform
- Windows Sandbox
- Click OK to apply the changes. Windows will take a few moments to search for and process the files.
- When prompted, click Restart now to reboot your computer and finalize the changes.
3. Repair VirtualBox installation
Method 1
- Right-click on the Windows start menu button.
- Click Settings.
- Click on Apps in the left menu.
- Click Installed apps.
- Click the three-dot icon next to VirtualBox.
-
Click Modify.
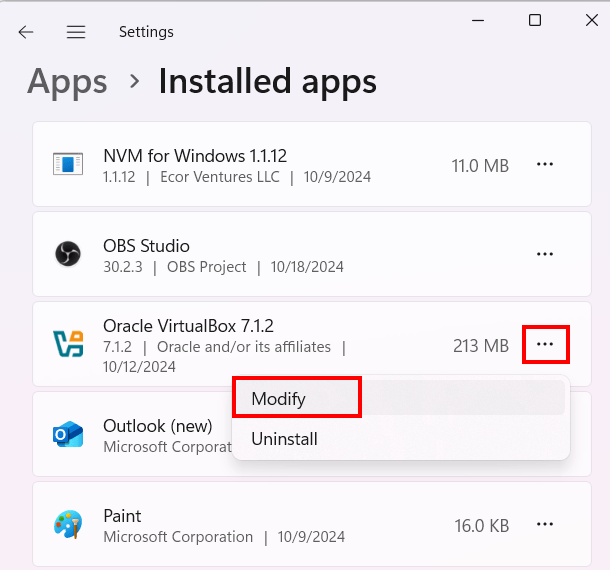
-
In the VirtualBox setup window, click Next.
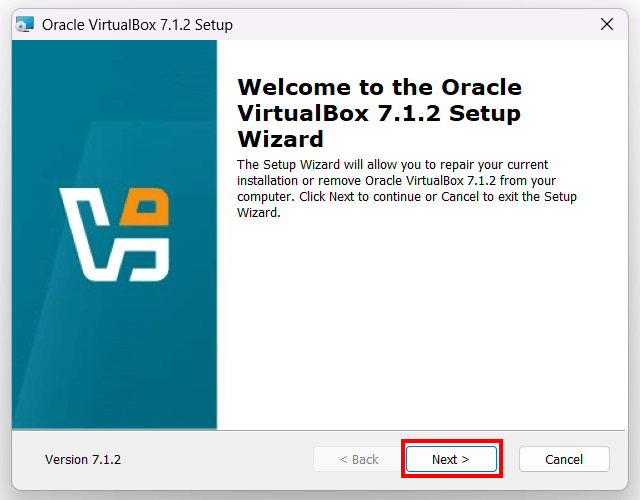
-
Click on the repair icon.
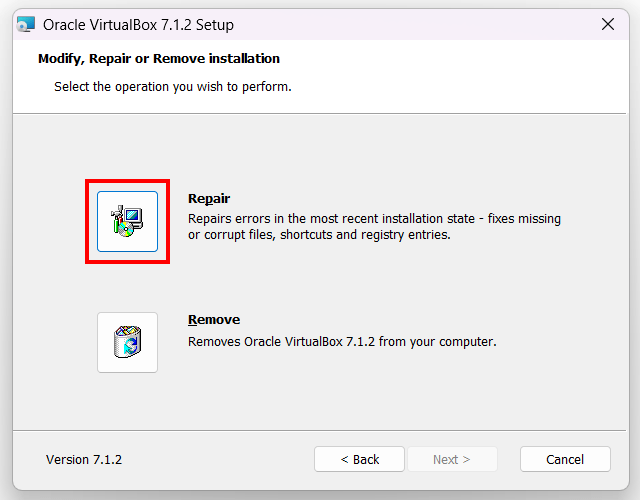
-
Click Repair at the bottom of the setup window.
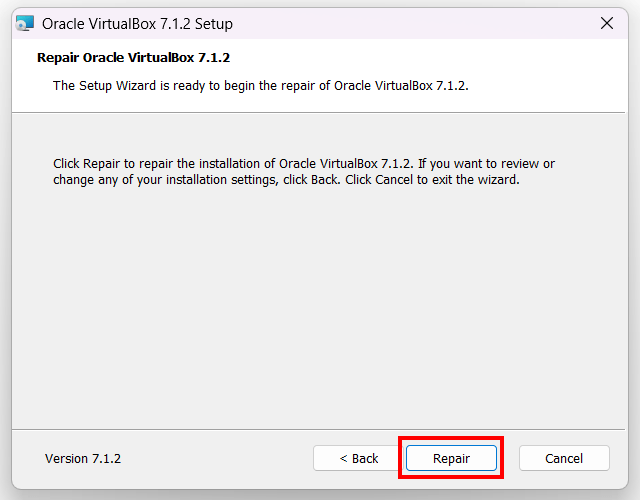
- VirtualBox will now start the repair process. This process will only take a few seconds. When the process is complete, click Finish.
- VirtualBox may ask you to restart your PC.
Method 2
- Right-click on the VirtualBox installation file. If you don't have the file, download it from virtualbox.org. The installation file must be the same version as VirtualBox on your PC.
-
Click on Run as administrator.
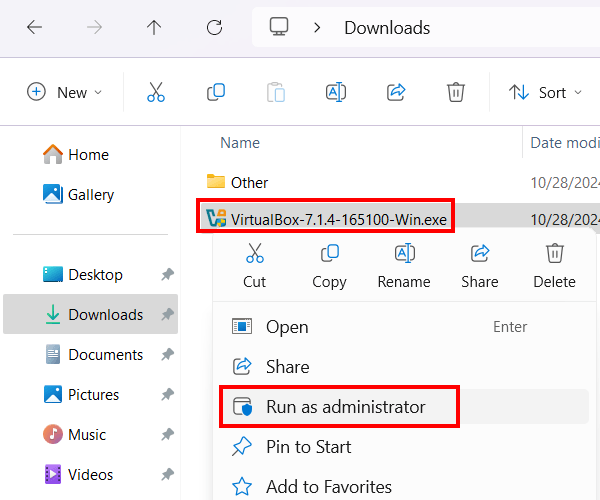
- If the 'User Account Control' window appears, click Yes. Depending on your settings, you may need to enter your administrator password first and then click Yes.
-
In the VirtualBox setup window, click Next.
-
Click on the repair icon.
-
Click Repair at the bottom of the setup window.
- VirtualBox will now start the repair process. This process will only take a few seconds. When the process is complete, click Finish.
- VirtualBox may ask you to restart your PC.
4. Disable Memory integrity
-
Open Windows Security.
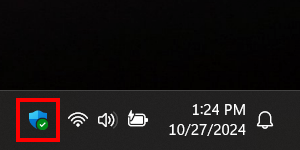
-
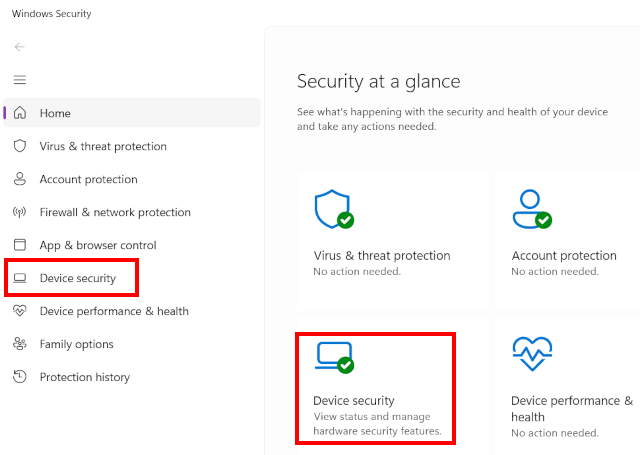
Click on Device security.
-
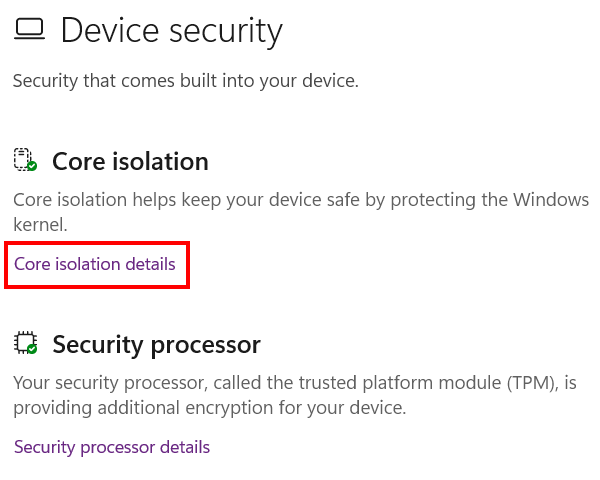
Click on Core isolation details located under Core isolation.
-
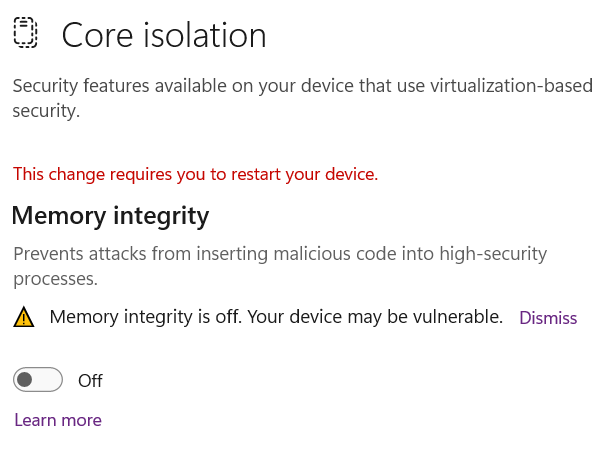
Turn off Memory integrity.
- If the 'User Account Control' window appears, click Yes. Depending on your settings, you may need to enter your administrator password first and then click Yes.
- Restart your PC.
Note: If the Memory Integrity toggle is greyed out or won't switch off, it may be managed by an administrator Group Policy, or virtualization might be disabled entirely in your system's BIOS/UEFI settings. Additionally, if you are trying to turn it on instead of off, Windows may block the toggle and display a "Review incompatible drivers" list that must be resolved first.
Related:
VirtualBox top menu missing? Here's how to get it back!
How to fix Windows 10 stuck on boot screen in VirtualBox