How to automatically clear temporary files on Windows 11
This step-by-step tutorial will show you how to automatically clear temporary files on Windows 11 without using third-party software.
Video ↓
How to automatically clear temporary files on Windows 11
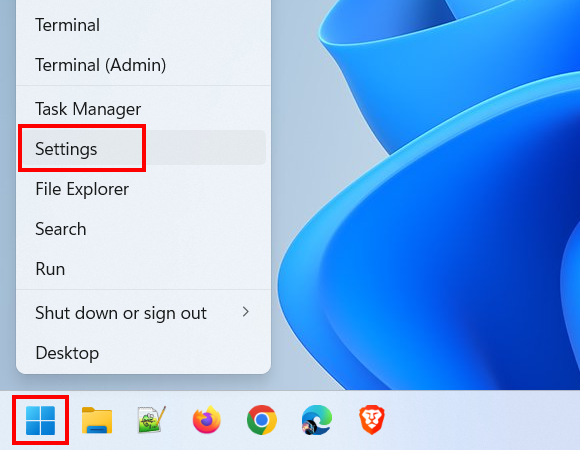
- Right-click the Windows start menu button.
-
Click Settings.
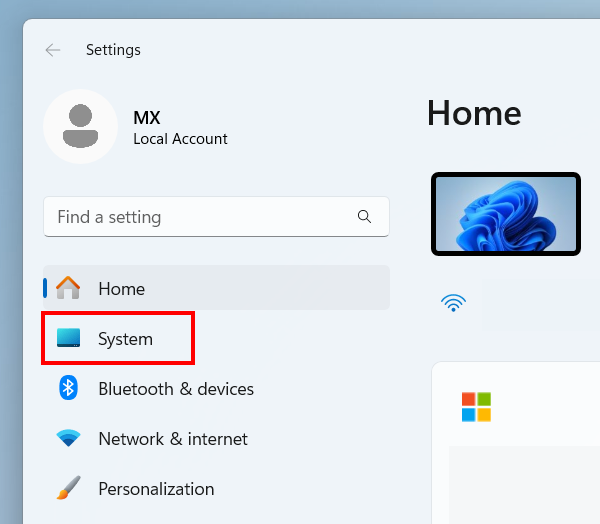
-
Click System.
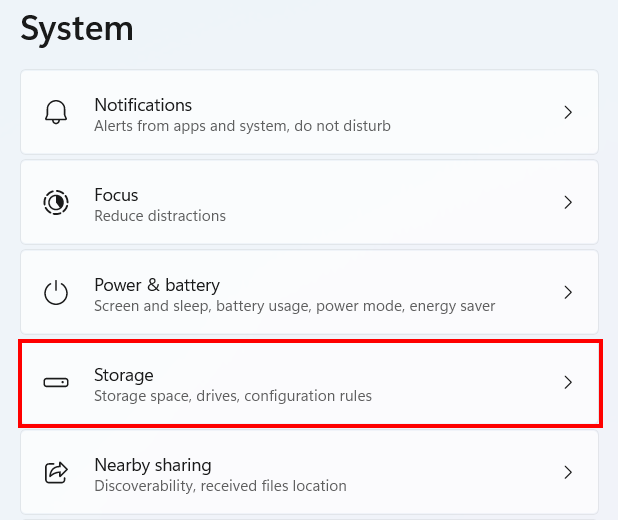
-
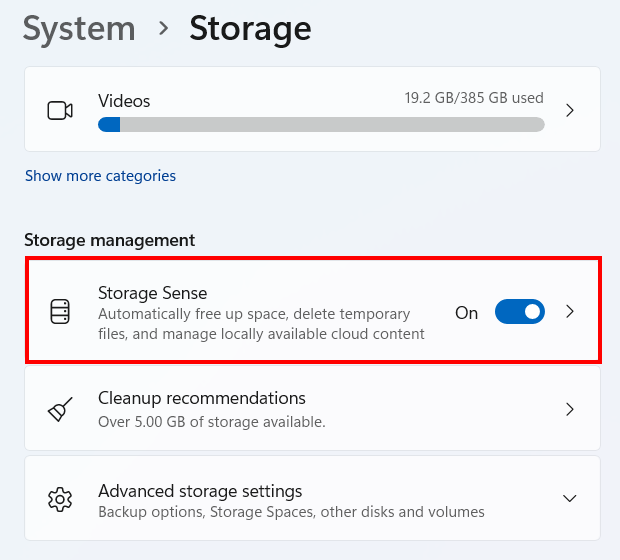
Click Storage.
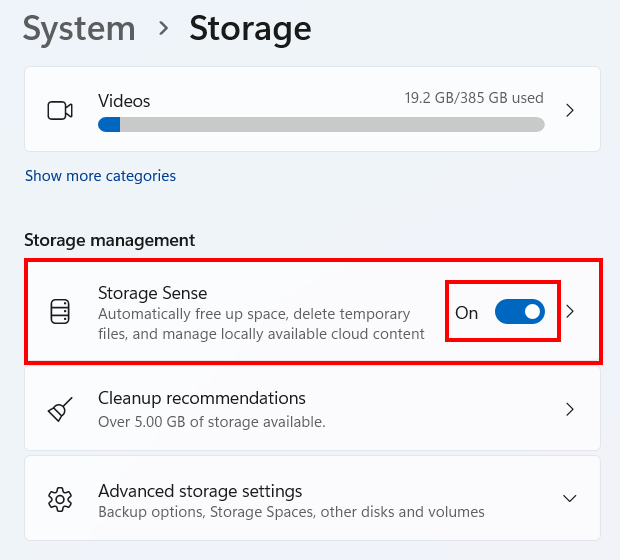
-
Turn on Storage Sense by clicking the toggle button next to it.
-
Click Storage Sense.
-
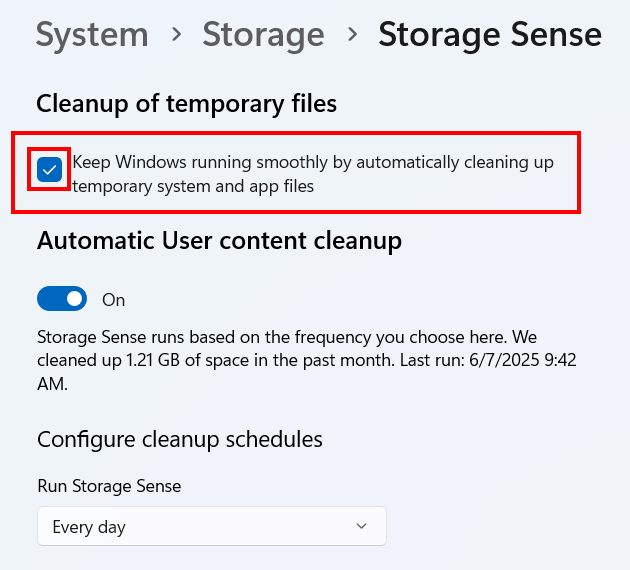
Check the Keep Windows running smoothly by automatically cleaning up temporary system and app files option.
-
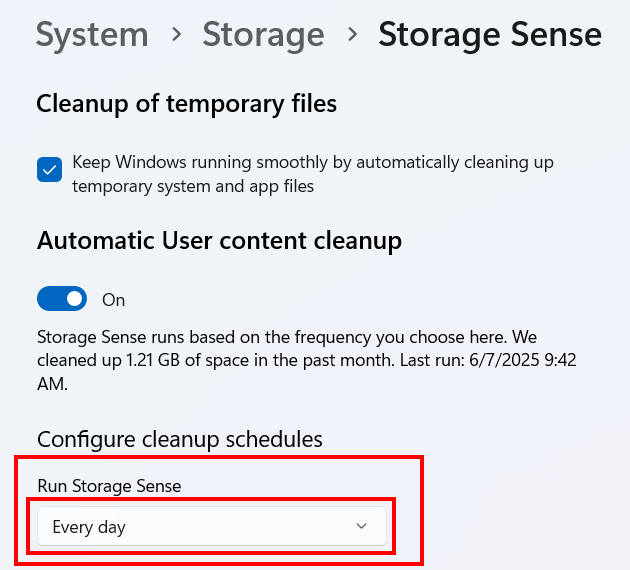
Click the 'Run Storage Sense' drop-down menu and select how often Storage Sense should run (e.g., every day, every week, etc.).
- Close settings.
Storage Sense will now automatically clear temporary files.

Related:
How to delete temporary files in Windows 11 (step by step)
How to delete the Windows.old folder in Windows 10 and 11
References:
https://www.howtogeek.com/how-to-automatically-clear-temporary-files-on-windows-11/