How to delete temporary files in Windows 11
You don't need an extra program to delete temporary files in Windows 11. Microsoft added a tool to Windows 11 for deleting temporary files, and with this tool, you can clear all temp files in Windows 11.
How to delete temporary files in Windows 11
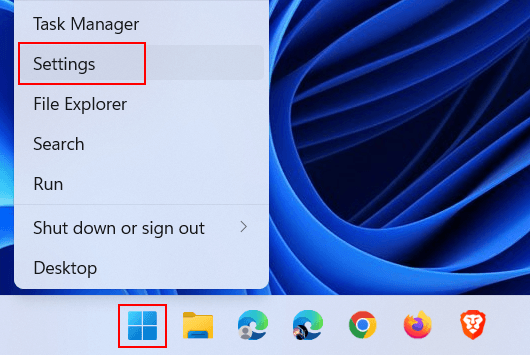
- Right-click on the Windows start menu button.
-
Click on Settings.
-
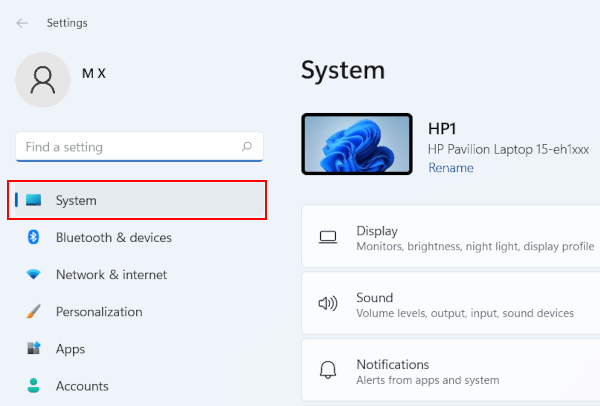
Make sure you're in the System settings.
-
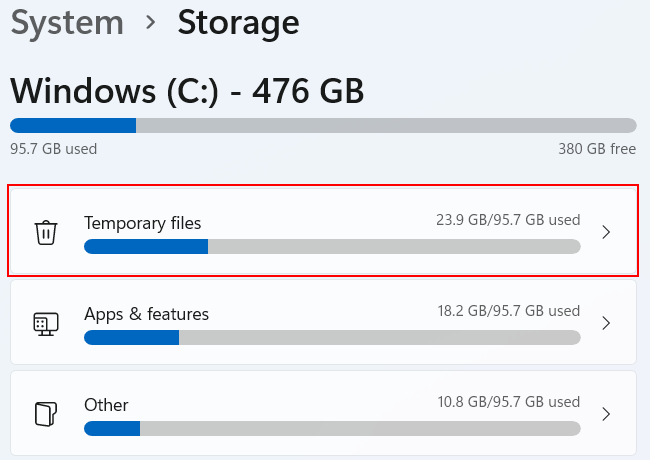
Click on Storage.

-
Click on Temporary files.
-
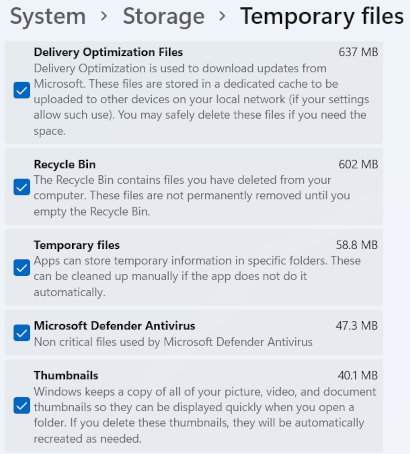
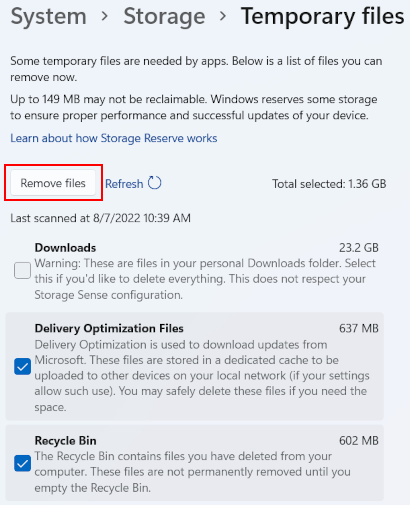
Windows will now scan for temporary files. Once the scan is complete, select the temporary files you want to delete.
-
Click on Remove files.
-
In the next window, click Continue.

Windows 11 will now delete the temporary files from your PC.
This process may take a while.
Related:
How to automatically clear temporary files on Windows 11 & 10
How to delete the Windows.old folder in Windows 10 and 11
References:
https://www.makeuseof.com/windows-11-delete-temporary-files/
https://www.guidingtech.com/top-ways-to-delete-temporary-files-on-windows-11/
https://windowsreport.com/windows-11-delete-temporary-files/