How to convert video to audio in Windows 10 and 11
This step-by-step tutorial will show you how to convert video to audio in Windows 10 and 11 using VLC media player.
VLC is a free, open-source, cross-platform multimedia player for Microsoft Windows, Linux, and macOS. VLC plays most video and audio files and has extra features, like converting videos.
You can use the VLC media player to convert video to audio.
Convert video to audio in Windows 10 and 11 using VLC media player
- Open VLC media player.
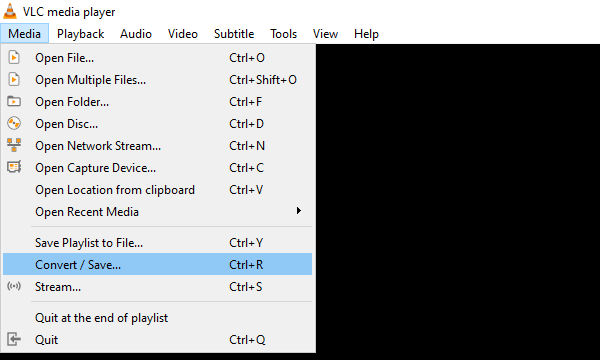
- Click on Media located in the top left corner.
-
Click on Convert / Save.
-
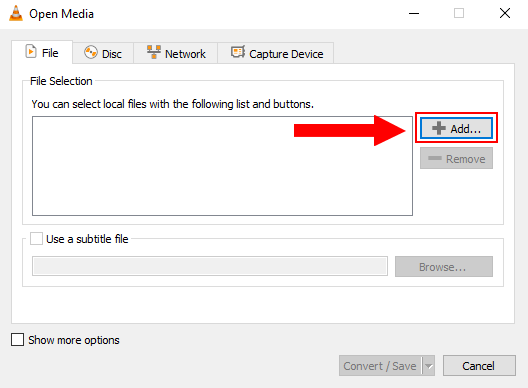
In the next window, you click on Add.
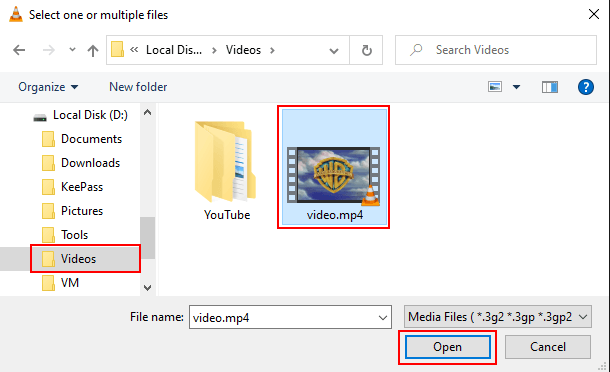
- In the next window, you go to the location on your computer where the video file is that you want to convert to audio.
- Select the video file.
-
Click on Open.
-
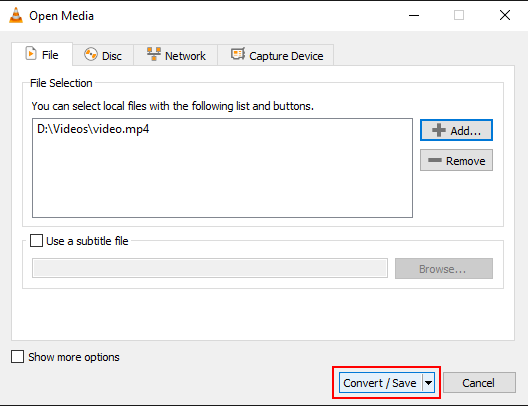
Click on Convert/Save at the bottom of the window.
-
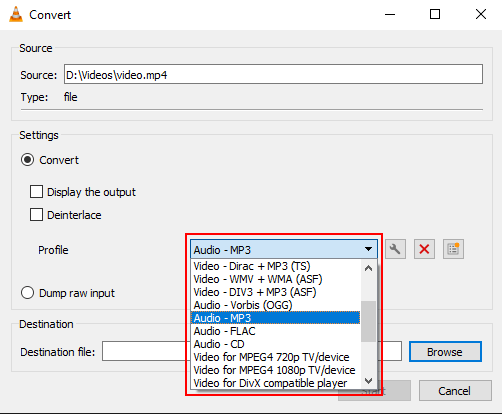
In the next window, you select an audio format (e.g., Audio - MP3) at Profile.
-
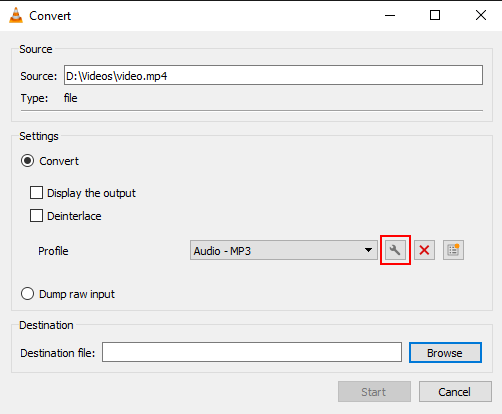
Click on the wrench (tool) button next to the profile selection menu button.
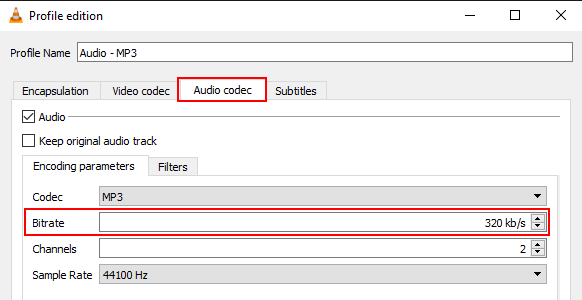
- In the next window, you click on Audio codec.
-
Change Bitrate to 320 kb/s.
- Click on Save at the bottom of the window.
-
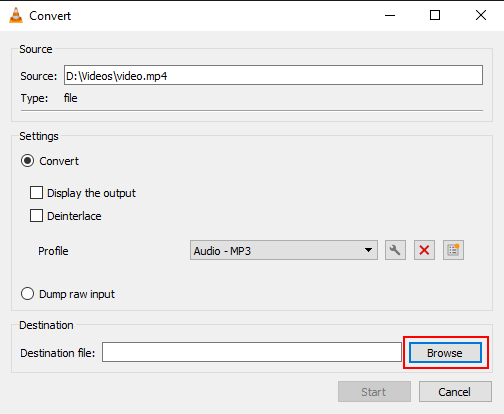
Click on Browse.
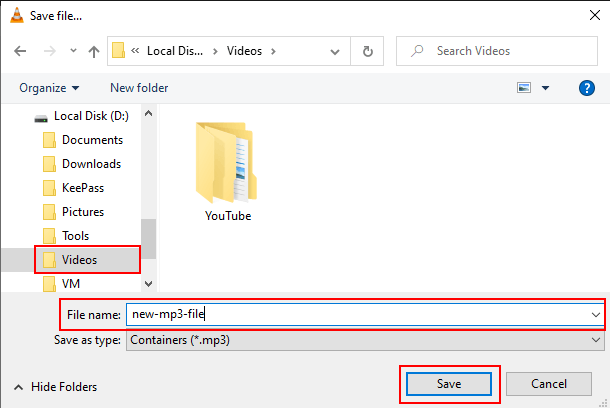
- In the next window, you select a location on your computer where you want to save the new audio file.
- At File name, you type a name for the audio file.
-
Click on Save.
-
Click Start.
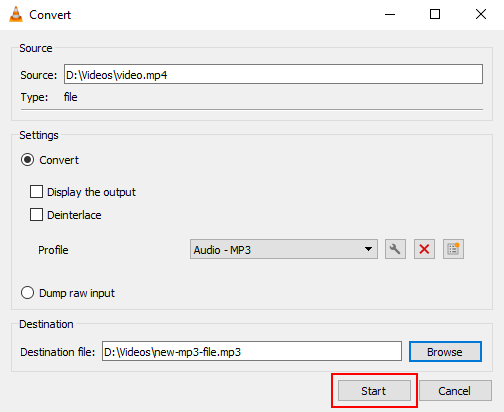
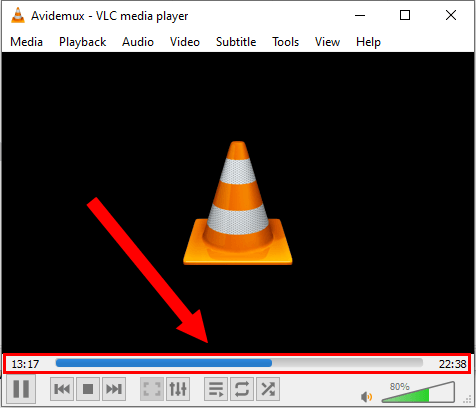
VLC media player will now convert your video file to an audio file.
You can see the progress at the bottom of VLC.
Related:
How to remove sound from a video (step by step)
References:
https://www.alphr.com/vlc-how-to-convert-mp4-to-mp3/
https://www.groovypost.com/howto/convert-video-file-to-mp3-with-vlc/