How to convert a JPG or PNG image to PDF in Windows 10 or 11
These step-by-step tutorials will show you how to convert a JPG or PNG image to PDF in Windows 10 or 11.
Convert a JPG or PNG image to PDF using the Windows 10 Photos app
- Open the JPG or PNG image in the Photos app.
-
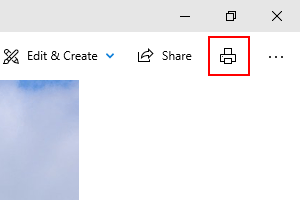
Click on the
 print button in the upper right corner.
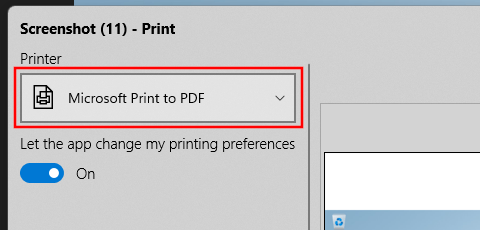
- In the next window, you select Microsoft Print to PDF at Printer.
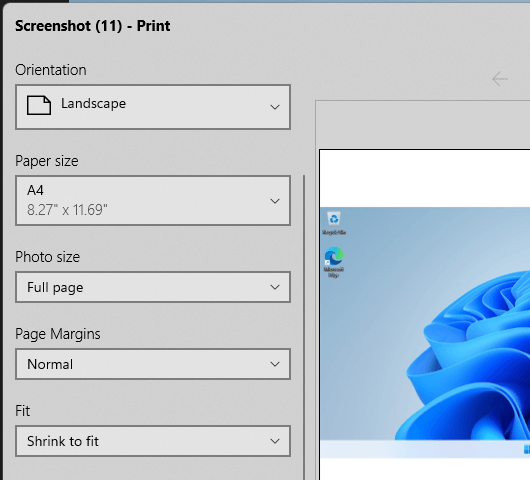
- At Paper size, you select a size (e.g., A4).
- At Photo size, you select Full page.
-
At Fit, you select Shrink to fit. If you select Fill page, it will zoom the image to eliminate blank space, so this might cut off the edges of an image.
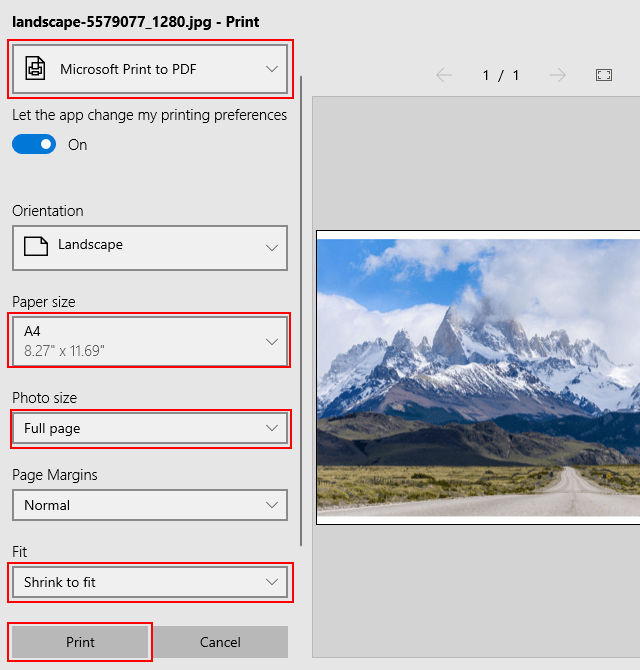
- Click on Print.
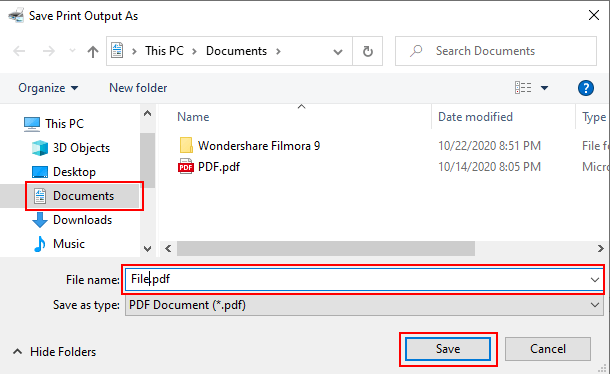
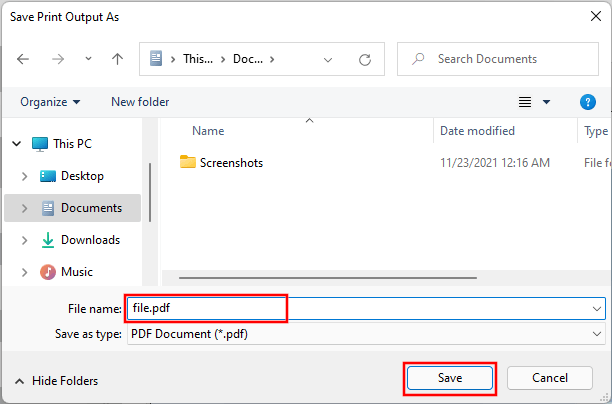
- In the next window, you select a location on your computer where you want to save the PDF file.
- At File name, you type a name for the PDF file.
-
Click on Save.
The Photos app will now save the PDF file to your PC.
Convert a JPG or PNG image to PDF using the Windows 11 Photos app
- Open the JPG or PNG image in the Photos app.
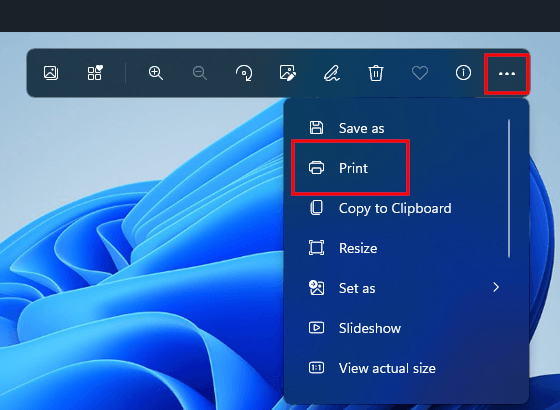
- Click on the three-dots (...) located on the right side of the toolbar that appears at the top of the image. If you don't see a toolbar, click on the photo.
-
Click on Print.
-
In the next window, you select Microsoft Print to PDF at Printer.
- At Paper size, you select a size (e.g., A4).
- At Photo size, you select Full page.
-
At Fit, you select Shrink to fit. If you select Fill page, it will zoom the image to eliminate blank space, so this might cut off the edges of an image.
- Click Print.
- In the next window, you select a location on your computer where you want to save the PDF file.
- At File name, you type a name for the PDF file.
-
Click on Save.
The Photos app will now save the PDF file to your PC.
Convert a JPG or PNG image to PDF using the Print Pictures feature
- Open File Explorer.
- Go to the JPG or PNG image you want to convert to PDF.
- Right-click on the image.
-
Click on Print. On Windows 11, you click on Show more options > Print.

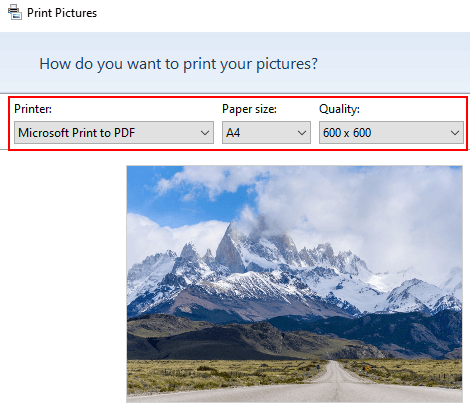
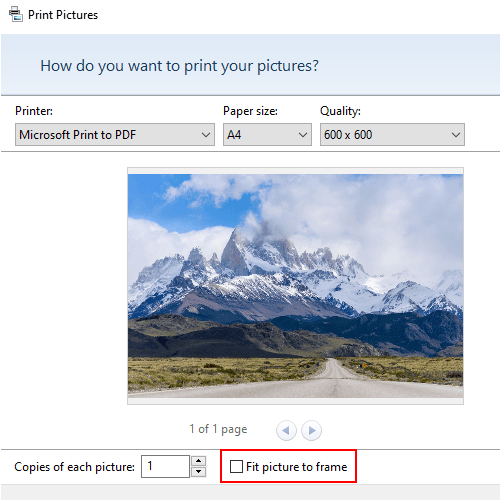
- In the next window, you select Microsoft Print to PDF at Printer.
- At Paper size, you select a size (e.g., A4).
-
You can select the quality (e.g., 600 x 600).
-
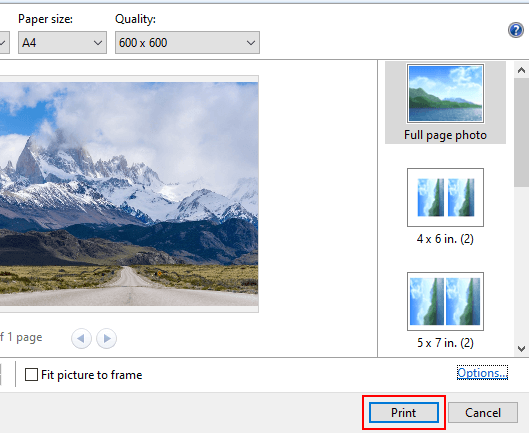
In the right pane, you make sure that the Full page photo option is selected.
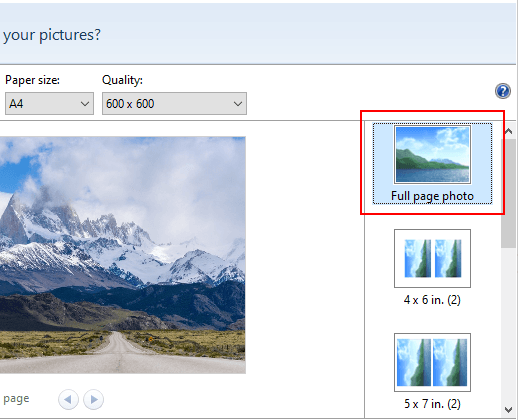
-
Uncheck the Fit picture to frame option at the bottom. This option zooms images to eliminate blank space, so this might cut off the edges of an image.
-
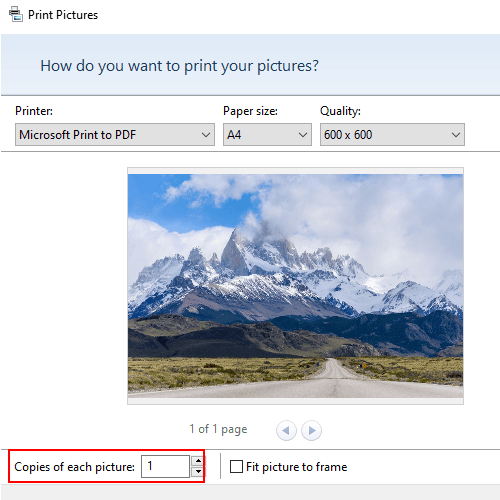
You can select the number of copies you want.
-
Click on Print.
- In the next window, you select a location on your computer where you want to save the PDF file.
- At File name, you type a name for the PDF file.
-
Click on Save.
The 'Print Pictures' feature will now save the PDF file to your PC.
Related:
How to merge multiple images into one PDF file in Windows 10 & 11
References:
https://www.howtogeek.com/767396/how-to-convert-png-to-pdf-on-windows-10-or-11/
https://www.thewindowsclub.com/convert-image-files-to-pdf-windows-10