How to check what CPU and GPU are in your PC on Windows 11
Learn how to check what processor (CPU) and graphics card (GPU) are in your PC on Windows 11 without using any extra tools.
You don't need to use an extra program to check what CPU and GPU are in your computer because Windows 11 has built-in tools for checking what processor and graphics card are in your computer, and this guide will teach you how to use these tools.
Task Manager
1. Open Task Manager. You can open Task Manager by right-clicking on the taskbar and then clicking on Task Manager.
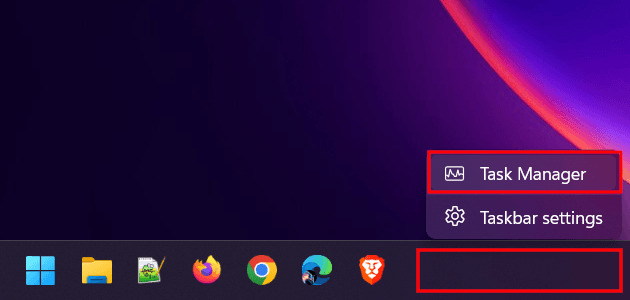
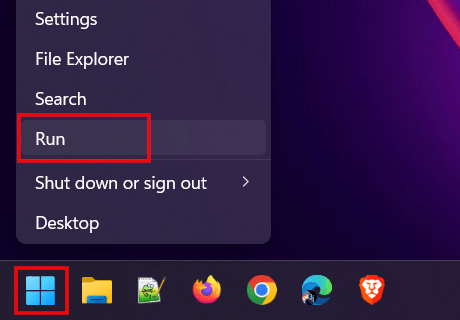
You can also open Task Manager by right-clicking on the Windows start menu button and then clicking on Task Manager.

2. If the “User Account Control” window appears, you click Yes.
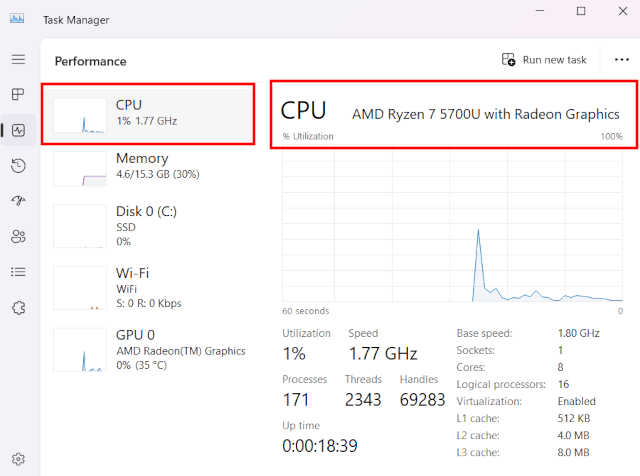
3. Click on Performance in the left menu.

4. At CPU, you can see what processor is in your computer.
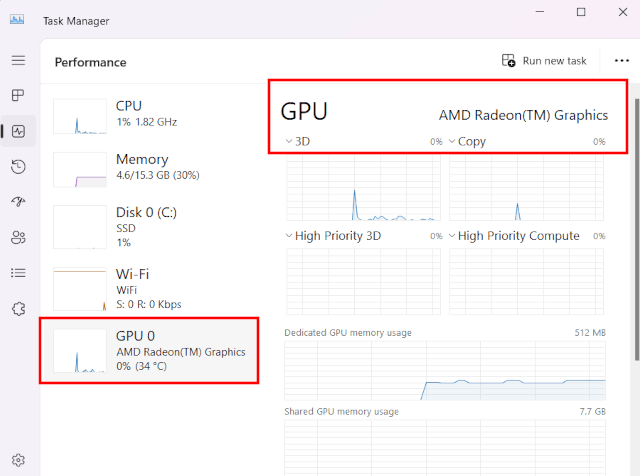
5. At GPU, you can see what graphics card is in your computer.
DirectX Diagnostic Tool
1. Open a Run command window. You can open a Run command window by pressing the Windows ![]() + R keys on your keyboard simultaneously. You can also right-click on the Windows start menu button and then click on Run.
+ R keys on your keyboard simultaneously. You can also right-click on the Windows start menu button and then click on Run.
2. Type dxdiag in the “Run” command window.
3. Click on the OK button or press the Enter key on your keyboard.
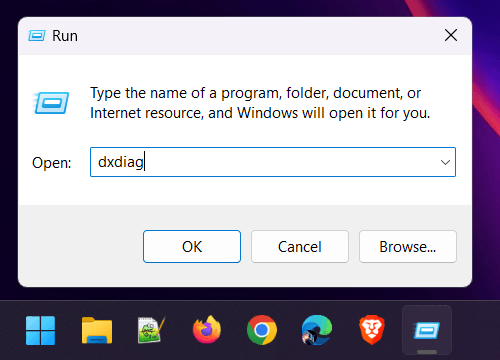
This will open the “DirectX Diagnostic Tool”.
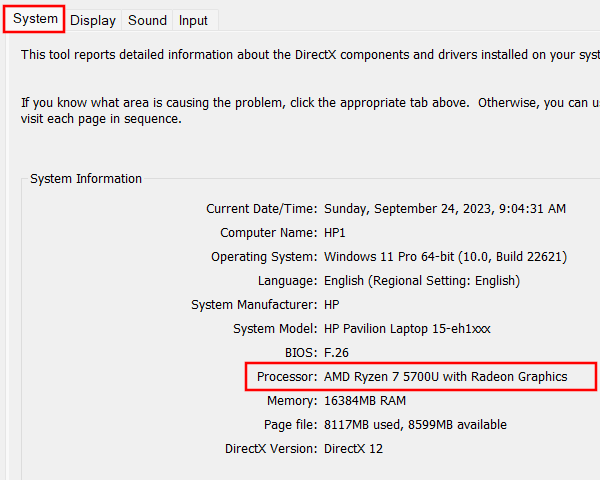
4. On the System tab, you can see what processor is in your PC.
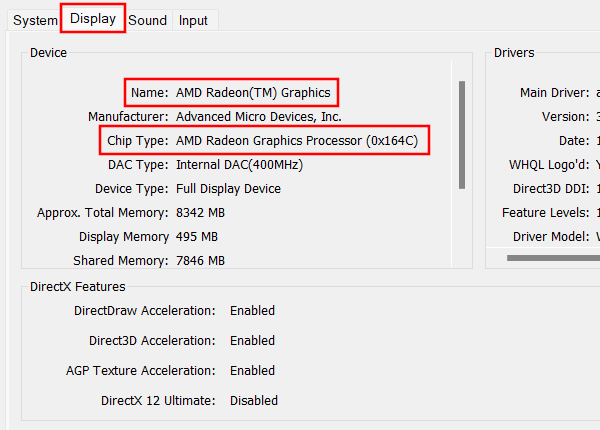
5. On the Display tab, you can see what graphics card is in your PC.
Device Manager
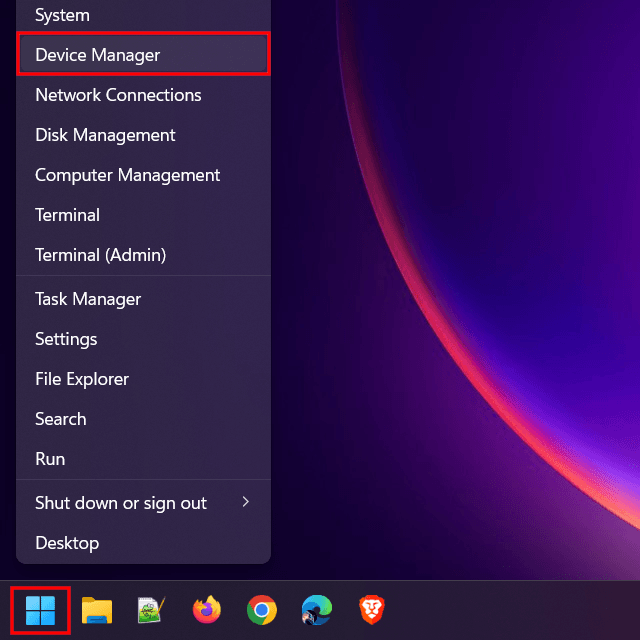
1. Open Device Manager. You can open Device Manager by right-clicking on the Windows start menu button and then clicking on Device Manager.
2. To check what processor you have in your computer, click on the › icon next to Processors or double-click on Processors.

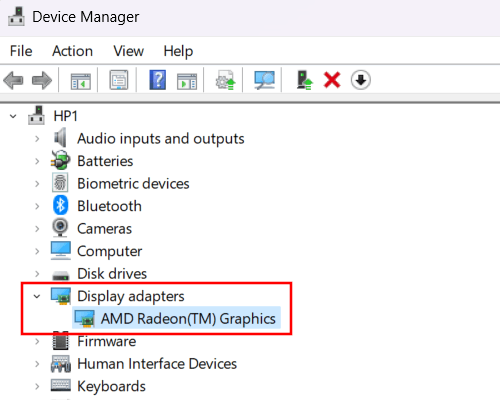
3. To check what graphics card you have in your computer, click on the › icon next to Display adapters or double-click on Display adapters.
System Information
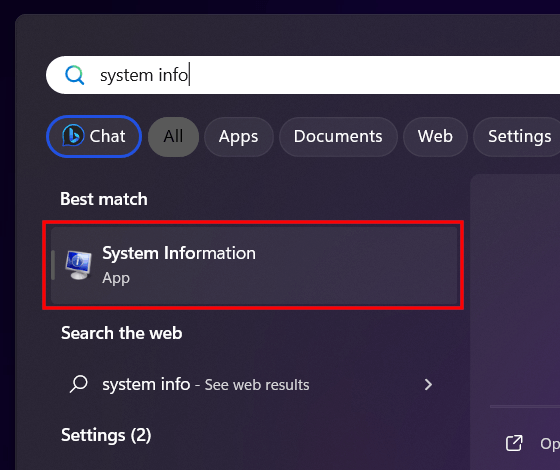
1. Click on the Windows start menu button.

2. Type system info.
3. Click on System Information.
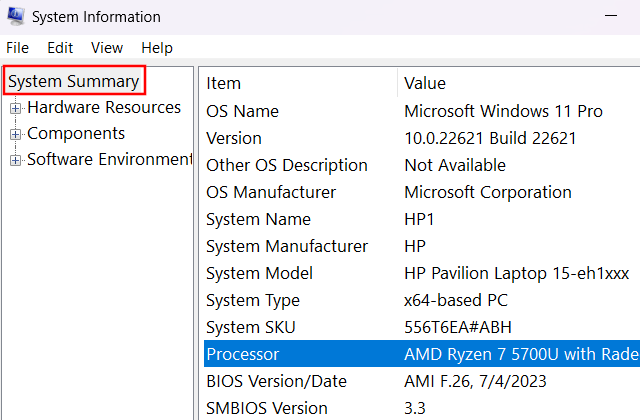
4. In the System Summary section, you can see what processor is in your computer.
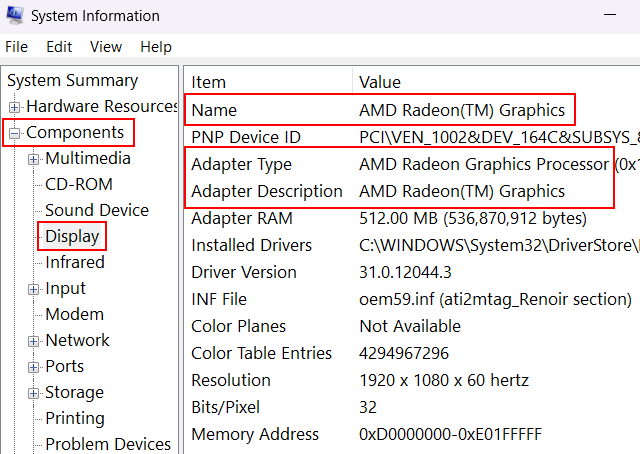
5. To check what graphics card you have in your computer, click on the + icon next to Components or double-click on Components.
6. Click on Display. In the Display section, you can see what graphics card is in your computer.