How to screen record on Windows (laptop or PC)
Learning how to screen record on a Windows laptop or PC is simple, and you do not need to download any third-party software. Windows includes powerful built-in tools that let you capture your computer screen completely for free.
Here are the fastest ways to capture your screen instantly using native shortcuts and free apps already on your computer.
Method 1: Use Snipping Tool to screen record on Windows 11
-
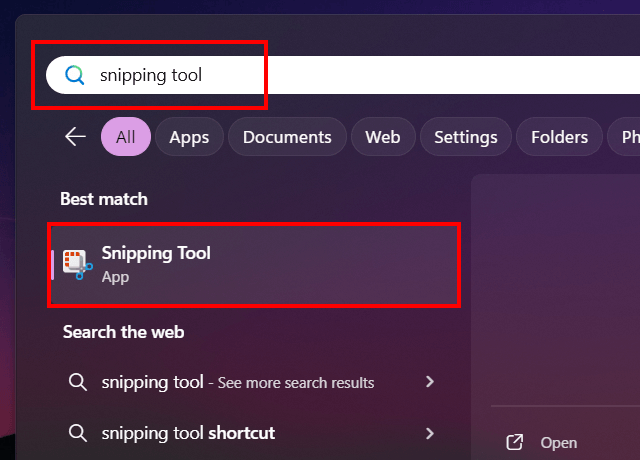
Click the Windows start menu button or search icon or search bar.

- Type snipping tool.
-
Click Snipping Tool.
-
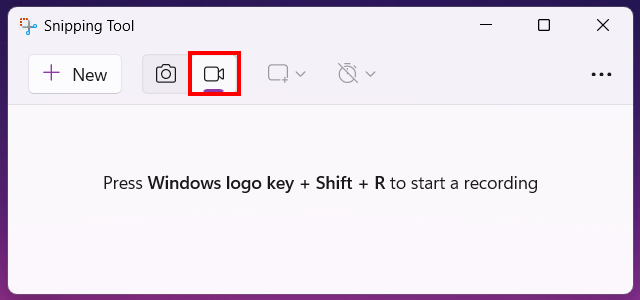
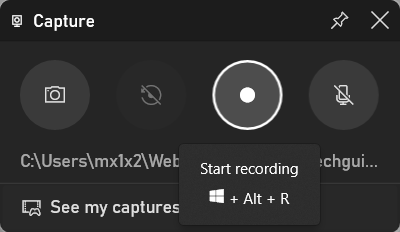
Click the
 camcorder icon.
-
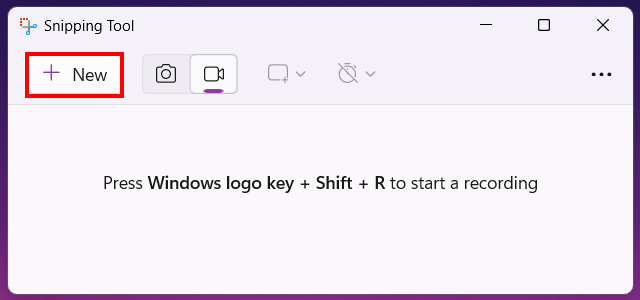
Click New.
-
Use your mouse to select the area of the screen you want to record.
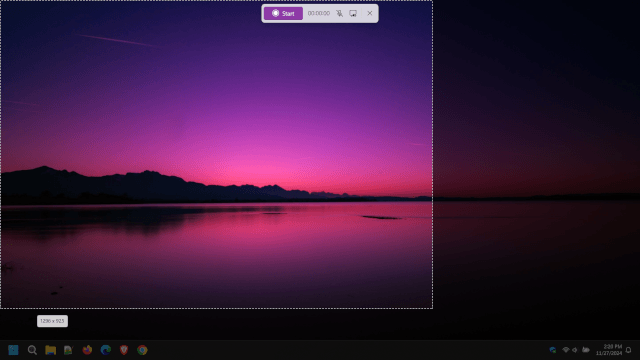
-
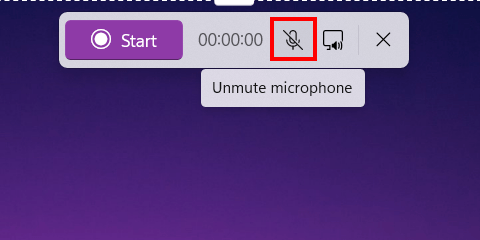
If you want to record your microphone, click the microphone icon to unmute your microphone.
-
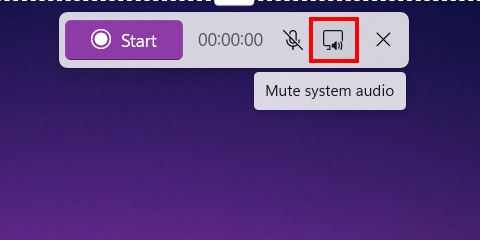
If you don't want system sounds in your recording, click the mute system audio button.
-
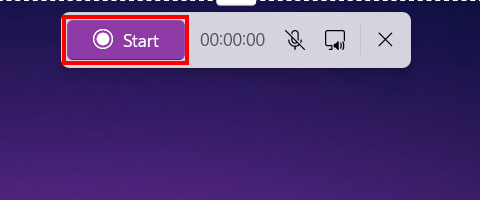
Click Start to start recording your screen.
-
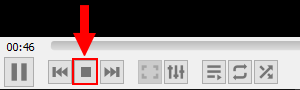
To stop recording, click the stop button.

Snipping Tool will save the video in the 'Screen Recordings' folder in the Video folder on your PC.
Method 2: Use Game Bar to screen record on Windows 10 and 11
Game Bar is a customizable gaming overlay that gives players access to experience-enhancing widgets. It's built-into Windows 10 and 11. Game Bar only records a game or one application window at a time. It won't let you record your whole screen, so you can't record your desktop or File Explorer.
- Open the game or application window you want to record.
- Press the Windows ⊞ + G keys on your keyboard to open Game Bar.
-
Click on the 'Capture' button.

-
Click the record button in the 'Capture' window.
-
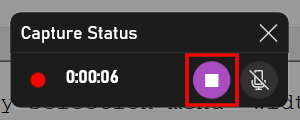
Game Bar will now record the application window or game. To stop the recording, you click the stop button in the small 'Capture Status' window.
Method 3: Use Clipchamp to screen record on Windows 10 and 11
Clipchamp is available as a built-in video editing and recording app for Windows 11 and a downloadable app for Windows 10.
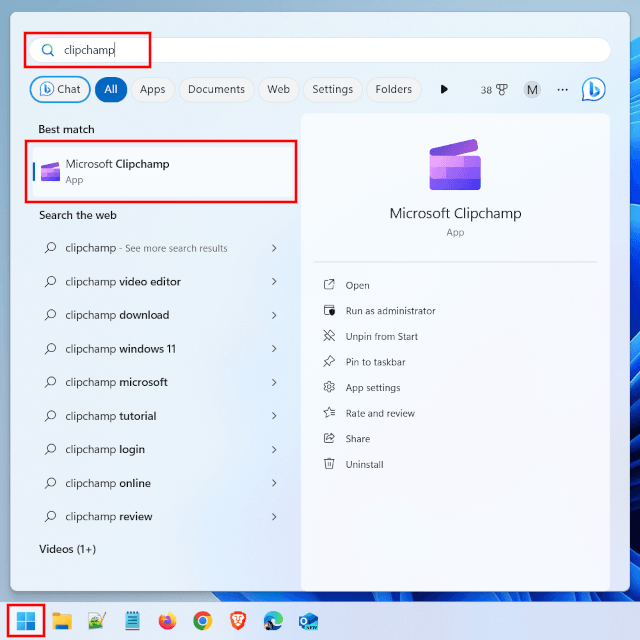
- Click on the Windows start menu button or search icon located in the taskbar.
- Type clipchamp.
-
Click Microsoft Clipchamp.
-
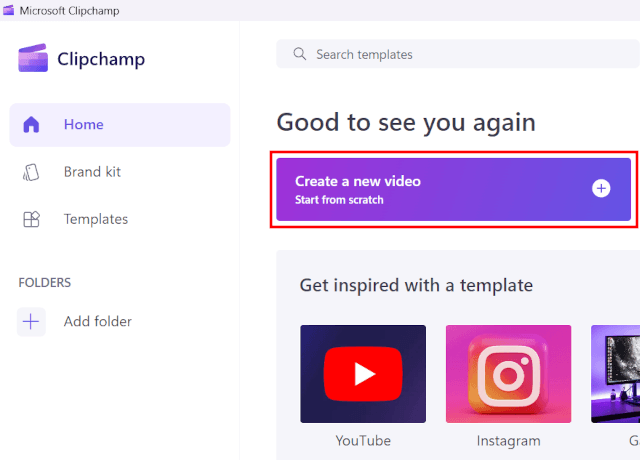
Click Create a new video.
-
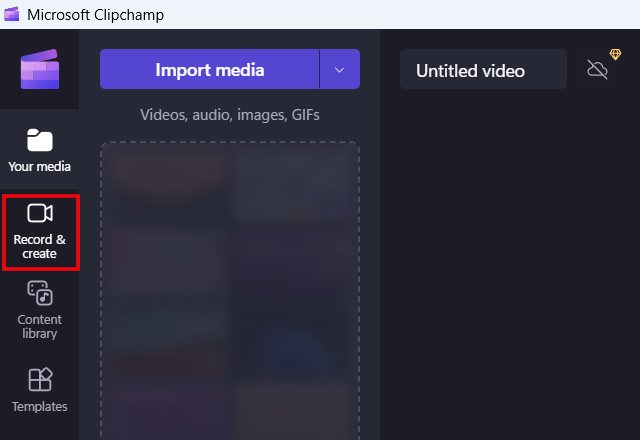
In the left menu, you click Record & create.
-
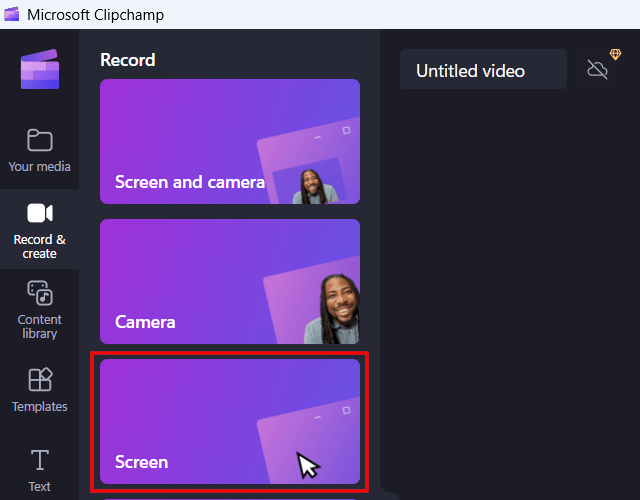
In the 'Record' menu, you click on the Screen option. If you also want to record your camera (webcam) at the same time, you click on the Screen and camera option.
-
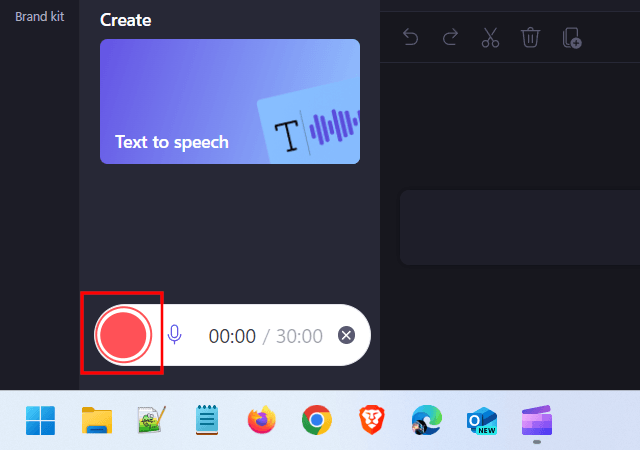
Click the record button in the record pop-up at the bottom of Clipchamp.
-
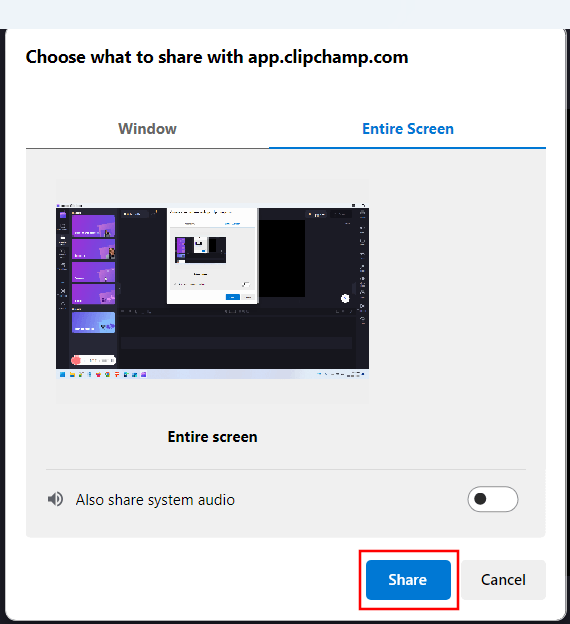
Clipchamp will ask you what to share with it (what you want to record). Click Entire screen.
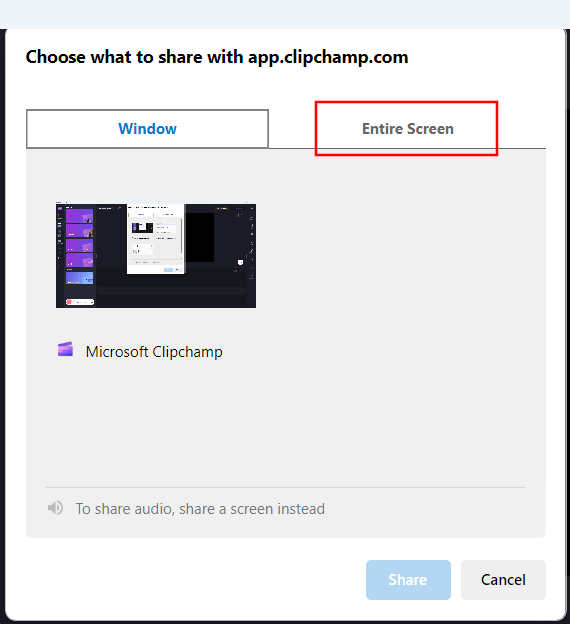
-
Click the Entire screen option to select it.

- You can also enable the option to record system audio if you want.
-
Click on Share.
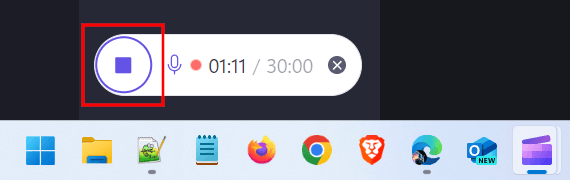
-
Clipchamp will now record your screen. To stop recording, you click the stop button or Stop sharing.
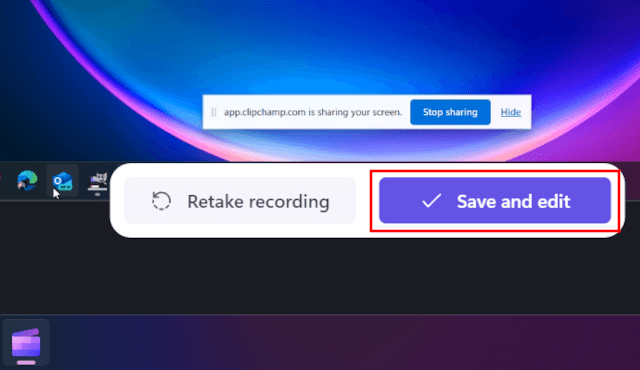
-
Clipchamp will play the recorded video automatically. Click the Save and edit button to save and edit the recorded video. If you don't see the Save and edit button, hover over the video.
-
You can now edit the video if you want. But, if you only need the recorded video because you may want to edit it in another video editing program, you can also export it by clicking the Export button in the top right corner of Clipchamp.
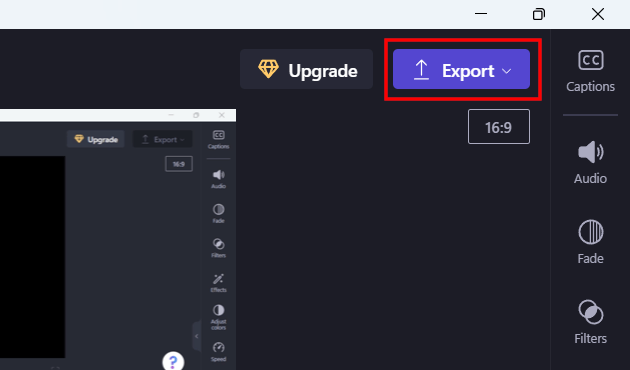
-
Select a video quality from the drop-down menu.

Clipchamp will now save the video to your PC.
Method 4: Use VLC Media Player to screen record on Windows 10 and 11
VLC is a free and open-source cross-platform media player.
- Open VLC media player.
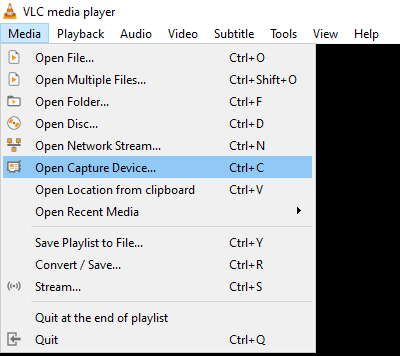
- Click on Media located in the top left corner of VLC.
-
Click on Open Capture Device.
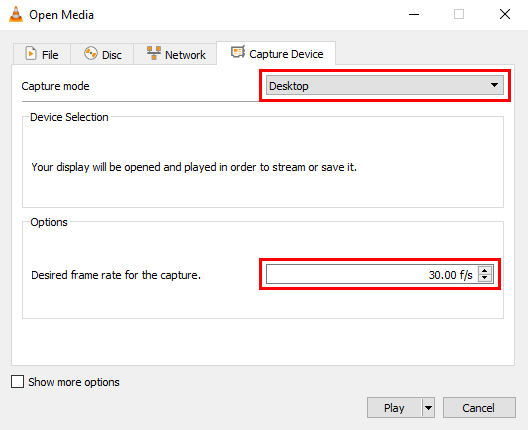
- In the next window, you select Desktop at Capture mode.
-
At Desired frame rate for the capture, you type or select 25.00 f/s or 30.00 f/s.
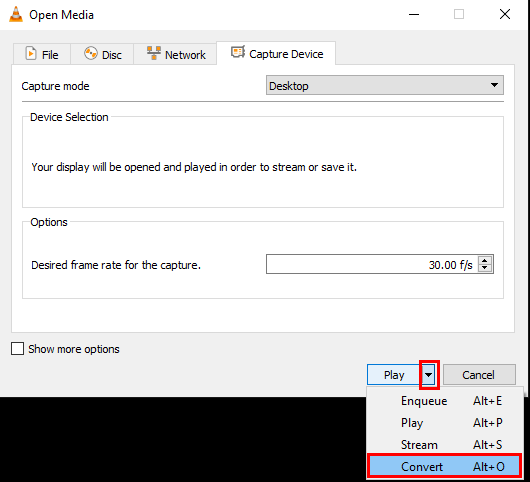
- Click on the drop-down arrow located next to the Play button.
-
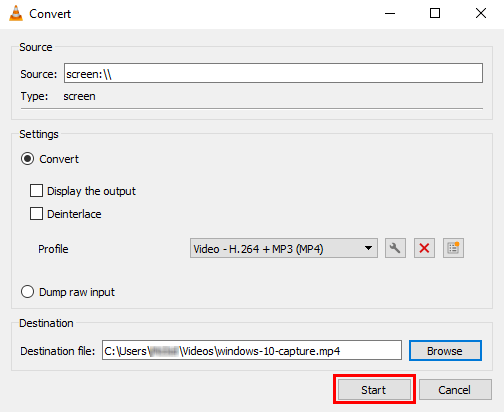
Click on Convert.
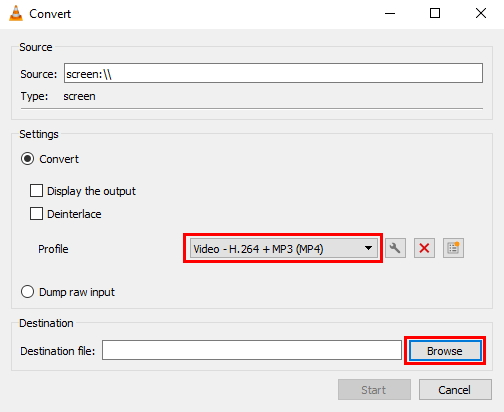
- In the next window, you select Video - H.264 + MP3 (MP4) at Profile.
-
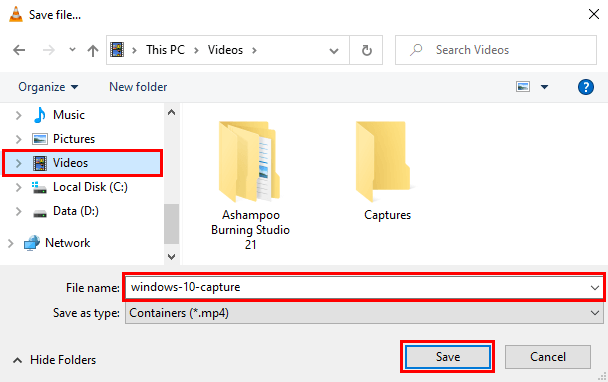
At Destination file, you click on Browse.
- In the next window, you select a location on your computer where you want to save the screen recording.
- At File name, you type a name for the screen recording.
-
Click on Save.
-
Click on the Start button to start recording your computer screen.
-
Minimize the VLC media player window by clicking on the [-] button in the top right corner of VLC.

-
To stop recording, you maximize the VLC media player window and click on the stop button.