How to move emails from a sender to a folder in Outlook (web)
This step-by-step tutorial will show you how to automatically move all incoming emails from a specific sender to a folder in the Outlook web app.
The Outlook web app (outlook.com) is a free web-based email client provided by Microsoft that allows you to access your Outlook, Hotmail, or Live email account.
How to move emails from a sender to a folder in Outlook (web)
-
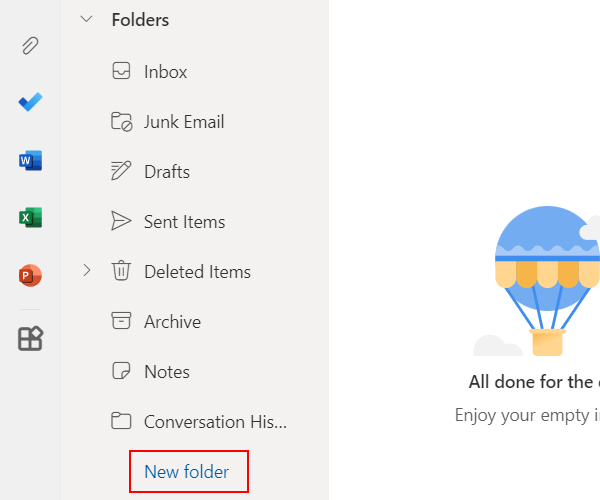
First, you will need to create a new folder where you want to receive the emails from that specific sender. To do so, click on New folder in the 'Folders' section located in the left menu. Note: You may need to scroll down in the 'Folders' section to see the New folder option.
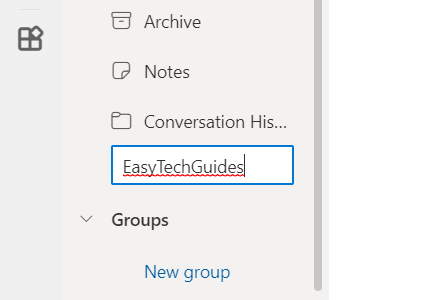
- Enter a name for the new folder.
-
Press the Enter key on your keyboard.
-
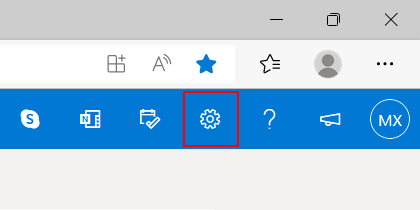
It's time to create a rule in Outlook to move all incoming emails from a specific sender to the new folder. To do so, click on the settings icon indicated by a gear icon in the top right corner.
-
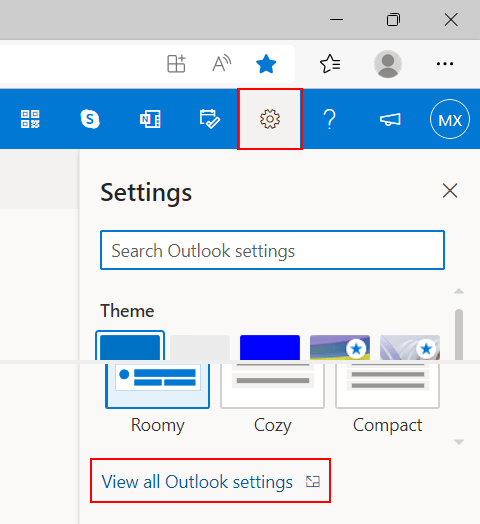
Click on View all Outlook settings located at the bottom of the menu.
-
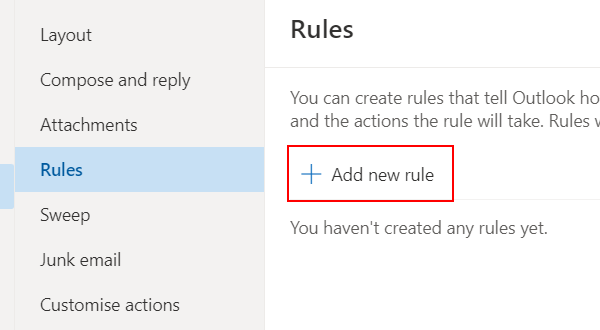
Click on Rules.

-
Click on + Add new rule.
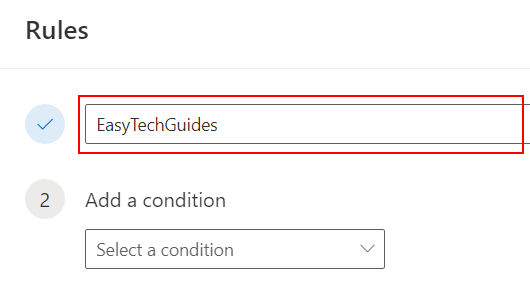
-
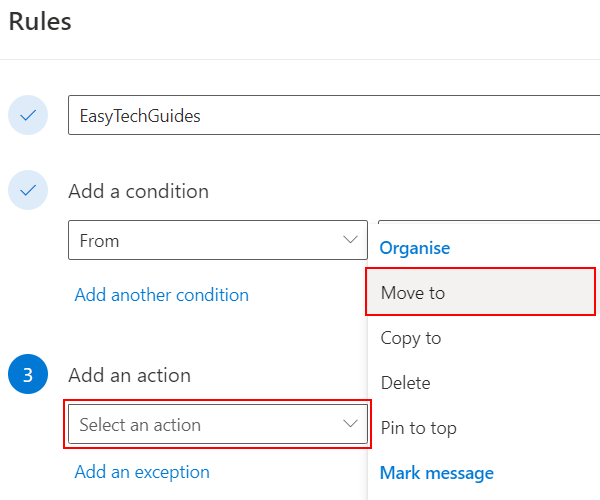
Enter a name for the new rule.
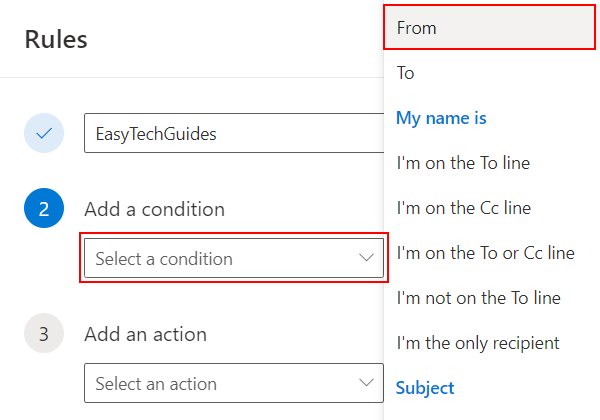
-
Select From at Add a condition.
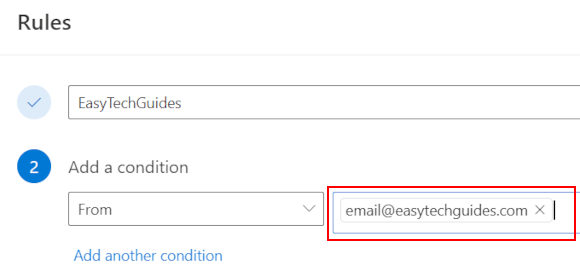
-
Enter an email address in the second field.
-
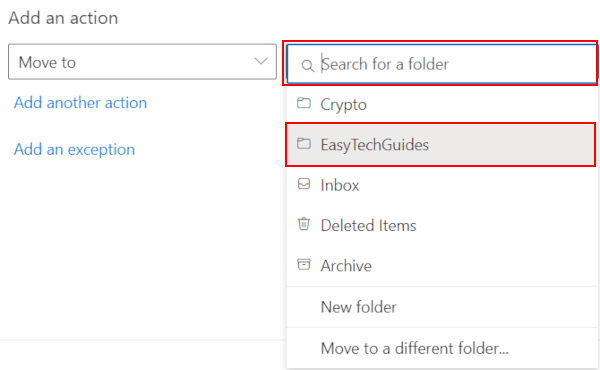
Select Move to at Add an action.
-
Select a folder (e.g., your new folder, Junk Mail, Archive, etc.).
-
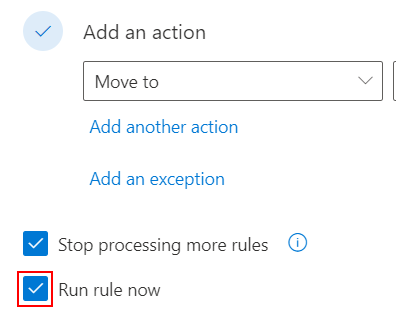
Check the checkbox next to Run rule now if you want to move all existing older emails that match your rule to the folder.
-
Click on Save at the bottom right corner of the window.
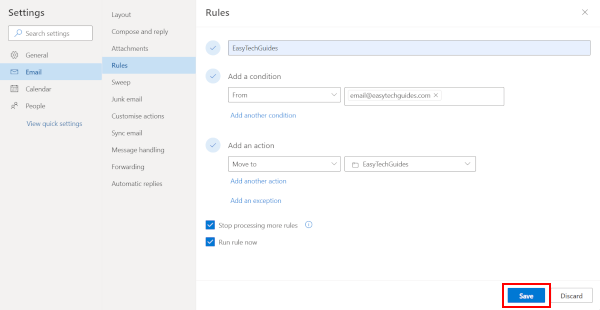
All incoming emails from that specific sender will automatically go into the selected folder.