How to move a Hyper-V virtual machine in Windows 10
This step-by-step tutorial will show you how to move or relocate a Hyper-V virtual machine in Windows 10.
This step-by-step tutorial will show you how to move or relocate a Hyper-V virtual machine in Windows 10.
You can even move a Hyper-V virtual machine while it's running.
How to move a Hyper-V virtual machine in Windows 10
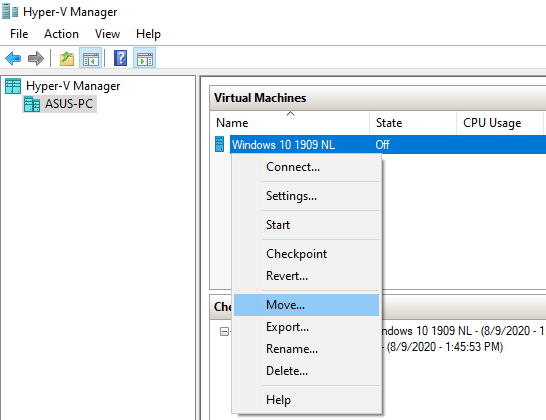
- Right-click on the virtual machine.
-
Click on Move.
- In the next window, you click on Next at the bottom.
- Click again on Next.
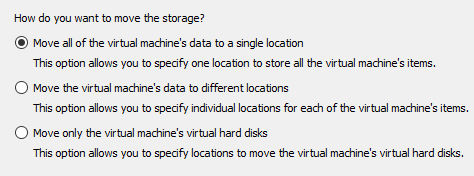
-
Select one of the following three options:
- Move all of the virtual machine's data to a single location. This option allows you to specify one location to store all the virtual machine's items.
- Move the virtual machine's data to different locations. This option allows you to specify individual locations for each of the virtual machine's items.
- Move only the virtual machine's virtual hard disks. This option allows you to specify locations to move the virtual machine's virtual hard disks.
- Click on Next.
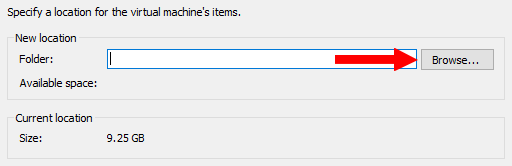
-
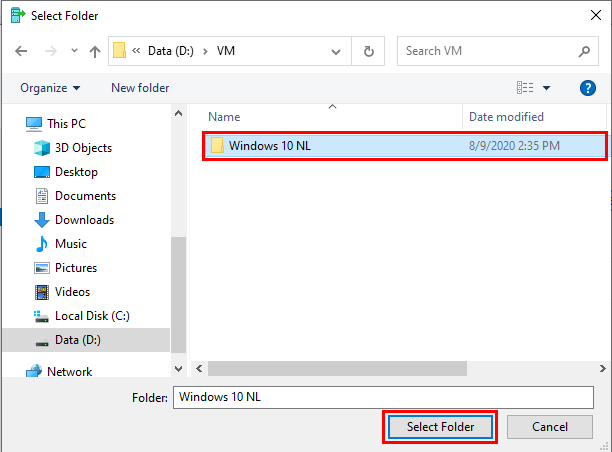
Click on Browse.
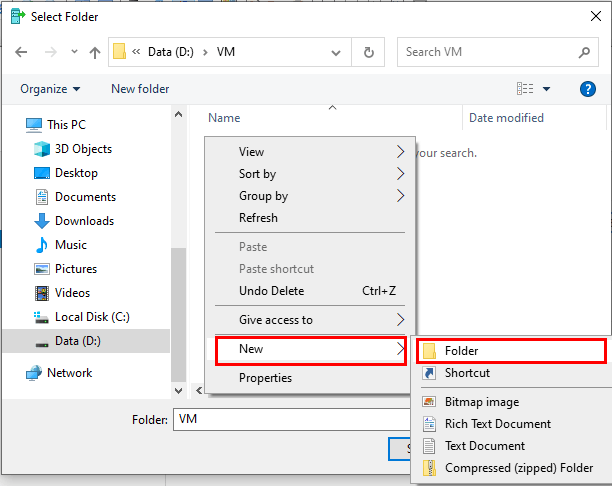
- In the next window, you go to the location on your PC where you want to move the virtual machine.
- Right-click in the folder.
- Go to New.
-
Click Folder.
- Name your folder.
- Select the new folder.
-
Click on Select Folder.
- Click on Next.
-
Check the summary.
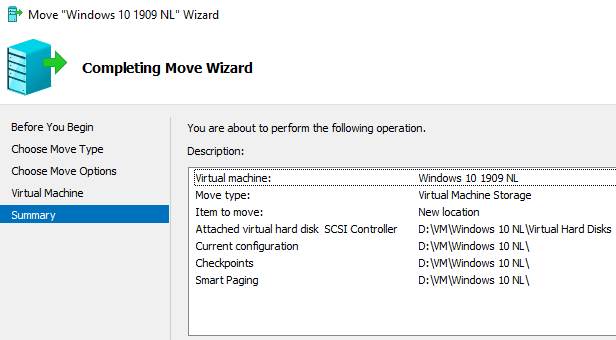
- Click on Finish at the bottom of the window.
Hyper-V will now move the virtual machine.

Related:
How to add a user to the Hyper-V administrators group