How to fix 'Invalid Uninstall Control File' on Windows 10 and 11
This step-by-step tutorial will show you how to fix the 'Invalid Uninstall Control File' problem on Windows 10 and 11.
You might uninstall a program and still see it in the 'Add or Remove Programs' or 'Programs and Features' list, and when you try to delete it, the following error message shows: Invalid Uninstall Control File: C:\Program Files\uninstall.xml.
It's called an invalid entry.
Invalid entries are entries of programs that are no longer in use.
This tutorial will show you how to safely delete invalid entries on Windows 10 and 11.
Important note! These steps will show you how to make changes to the Windows registry. If done incorrectly, serious problems might occur.
Don't worry.
This article will first show you how to create a backup of the Windows registry. If you do something wrong, you can double-click on the backup file to restore the Windows registry.
Just follow the steps carefully.
How to backup and restore the Windows 10 or 11 registry
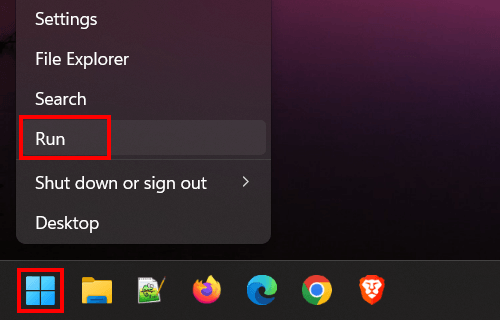
- Right-click on the Windows start menu button.
-
Click on Run.
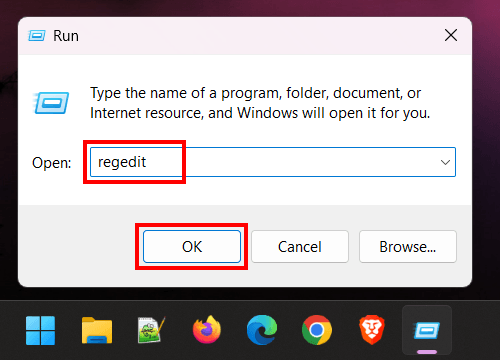
- In the 'Run' window, you enter regedit.
-
Click on OK or press Enter.
- If the 'User Account Control' window appears, you click Yes to continue. Depending on your settings, you may need to enter your administrator password first and then click Yes.
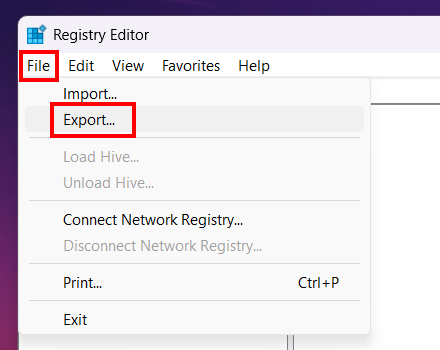
- In the 'Registry Editor' window, you click on File located in the top left corner.
-
Click on Export.
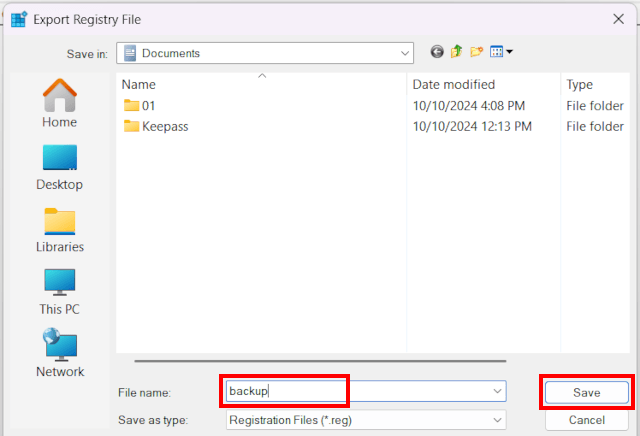
- In the next window, you select a location on your PC where you want to save the backup file.
- At File name, you enter a name for your backup file.
-
Click on Save.
You can restore the backup by double-clicking on the backup file.
How to remove registry entries for uninstalled software in Windows 10 and 11
- Right-click on the Windows start menu button.
-
Click on Run.
- In the 'Run' window, you enter regedit.
-
Click on OK or press Enter.
- If the 'User Account Control' window appears, you click Yes to continue. Depending on your settings, you may need to enter your administrator password first and then click Yes.
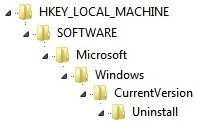
- In the 'Registry Editor' window, you double-click on HKEY_Local_Machine to expand.
- Double-click on Software.
- Double-click on Microsoft.
- Double-click on Windows.
- Double-click on Current Version.
-
Double-click on Uninstall.
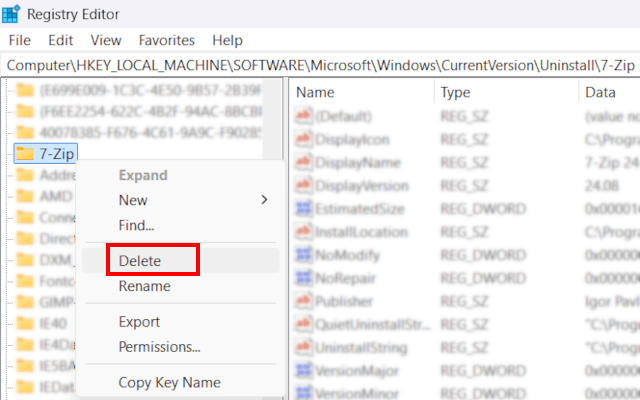
- Right-click on the folder (entry) of the software you want to delete.
-
Click on Delete.
If you can't delete the entry, start Windows 10 or 11 in 'Safe Mode' and try again.
If you've made a mistake, like deleting the wrong entry (folder), or encounter any problems, double-click on the backup file you created to restore the Windows registry.