How to install FFmpeg on Windows 10 and 11 (step by step)
Learn how to install FFmpeg on Windows 10 and 11.
This will install FFmpeg system-wide.
Installing FFmpeg system-wide is useful for converting audio and video from any folder on your computer.
This will also fix the 'ffmpeg' is not recognized as an internal or external command, operable program or batch file error.
How to install FFmpeg on Windows 10 and 11
FFmpeg is a free and open-source cross-platform solution to record, convert and stream audio and video on Microsoft Windows, Linux, and macOS.
1. Open your web browser and go to https://www.gyan.dev/ffmpeg/builds/.
2. Click on the download link (e.g., https://www.gyan.dev/ffmpeg/builds/ffmpeg-release-full.zip).
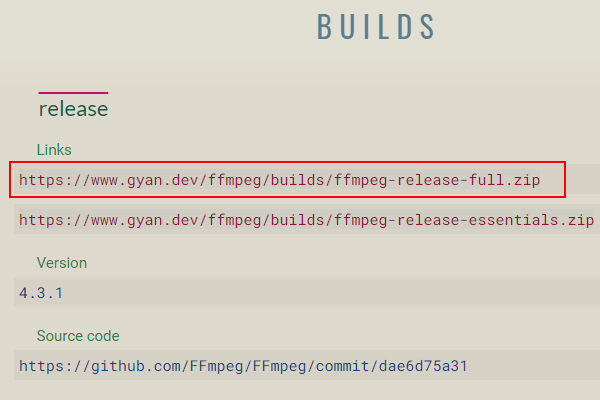
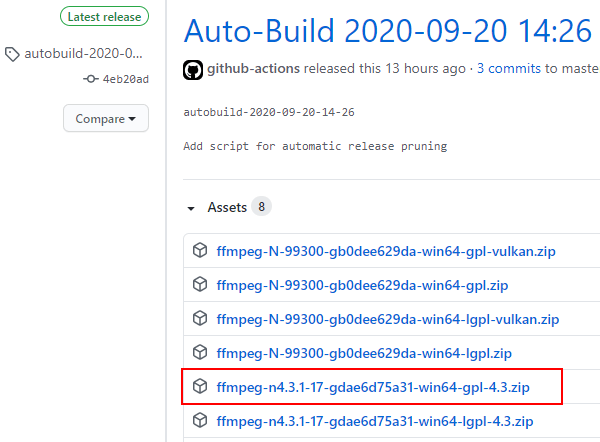
You can also download FFmpeg from GitHub, here.
Your browser will now download the ZIP file.
Depending on your web browser's settings, you may need to select a save location or confirm the download first before the downloading begins.
3. Once the download is complete, you will need to unzip the ZIP file. To unzip the FFmpeg ZIP file, you right-click on the file, and then you click on Extract All.
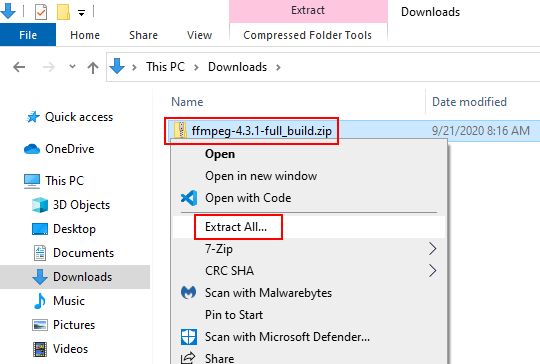
A “Extract Compressed (Zipped) Files” window will appear.
4. Click on the Extract button at the bottom right corner of the window.
Windows will now extract the contents of the ZIP file.
You can also use a third-party program like 7-zip or WinRAR to unzip the ZIP file.
When the extraction of the ZIP file is complete, you will see an FFmpeg folder named something like ffmpeg-4.3.1-full_build.
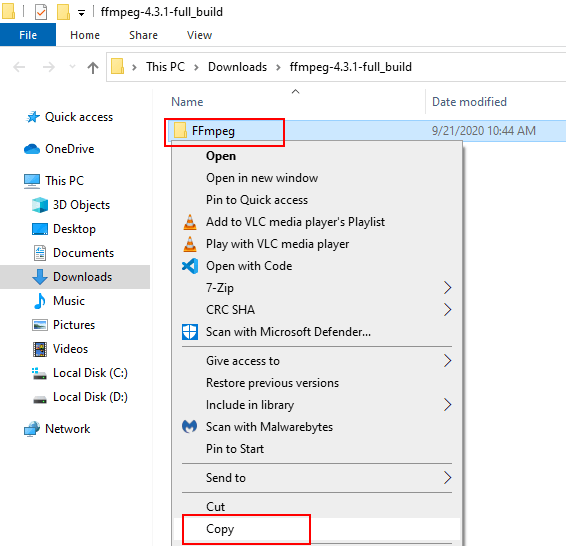
5. Right-click on the FFmpeg folder, and then click on Rename.
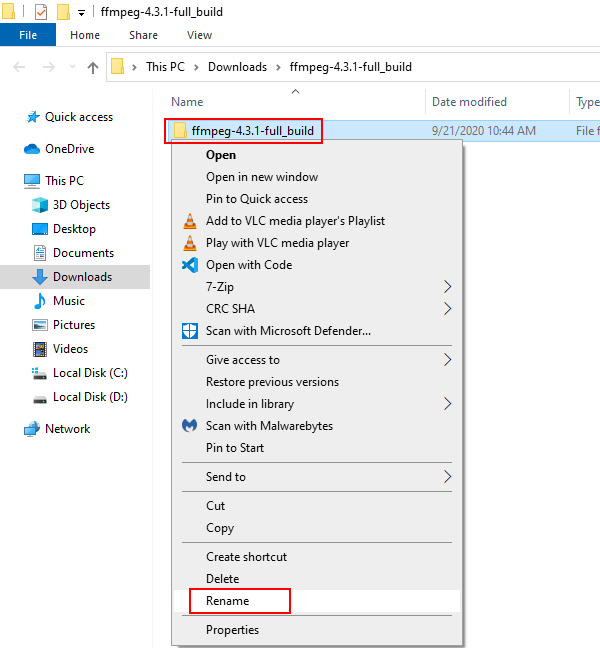
6. Type FFmpeg.
7. Press the Enter key on your keyboard.
8. Right-click on the FFmpeg folder, and then click on Copy.
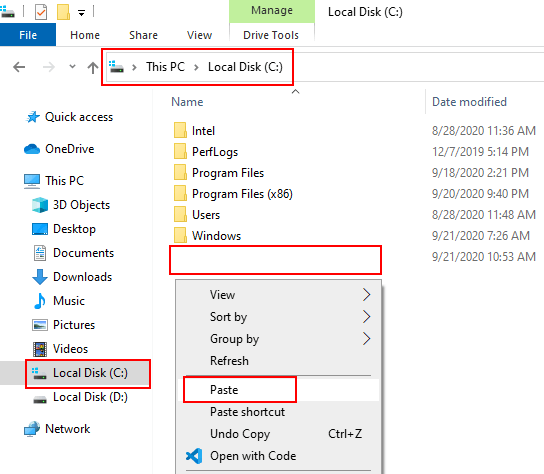
9. Go to the C drive (system drive) on your PC.
10. Right-click on an empty area and then click on Paste to copy the FFmpeg folder to the C drive (system drive) on your PC.
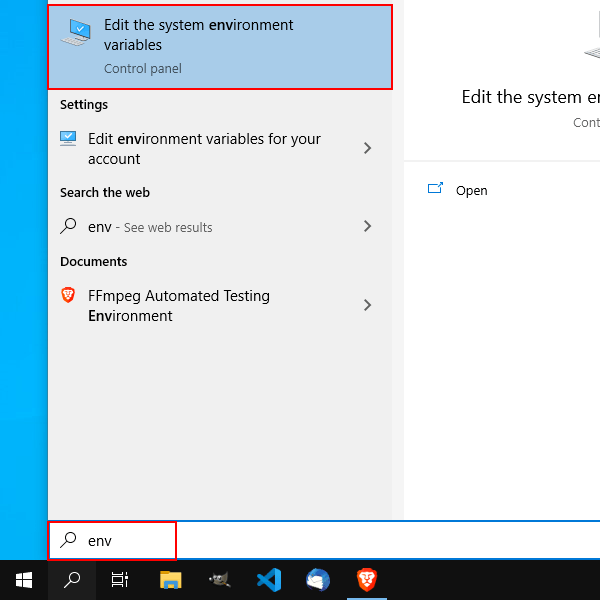
11. Type env in the Windows search bar.
12. Click on Edit the system environment variables when it appears.
You can also right-click on This PC > Properties > Advanced system settings > Environment Variables.
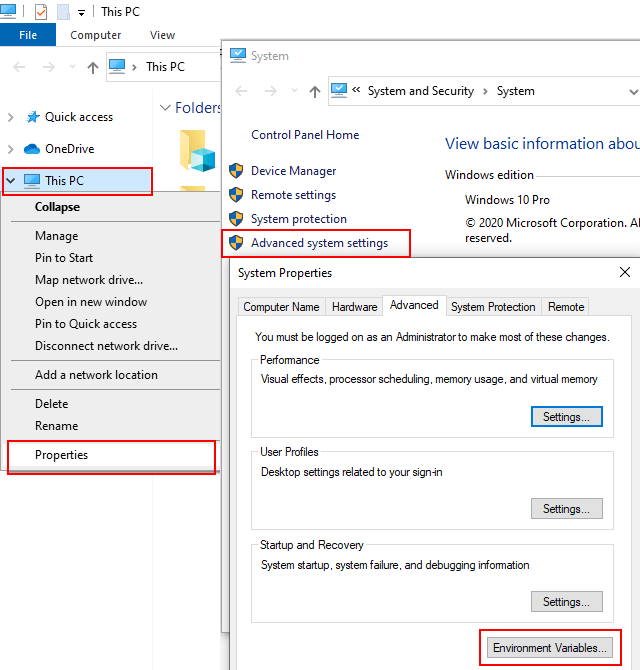
A “Environment Variables” window will appear.
Note: If a “System Properties” window appears instead of a “Environment Variables” window, then click on the Environment Variables button at the bottom right of the “System Properties” window.
13. In the System variables section, you double-click on the Path variable.
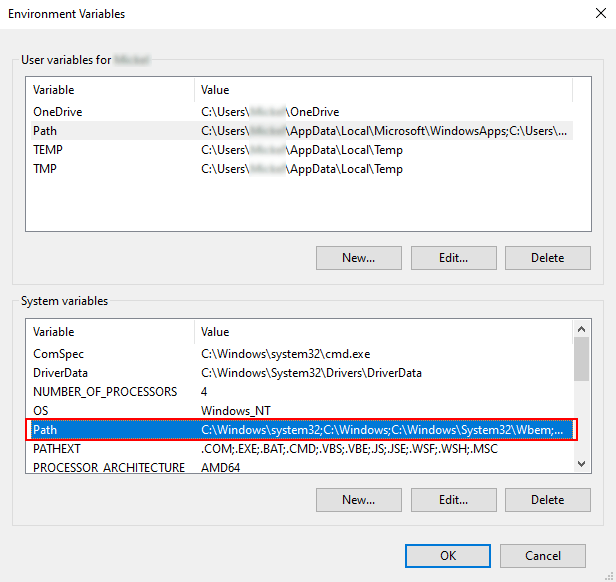
A “Edit environment variable” window will appear.
14. Click on the New button.
15. Click on the Browse button.
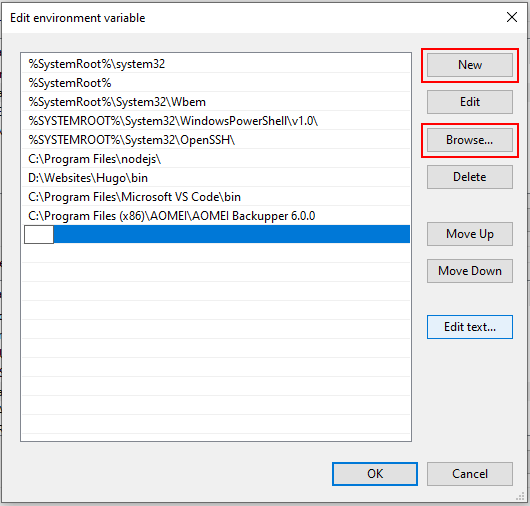
A “Browse For Folder” window will appear.
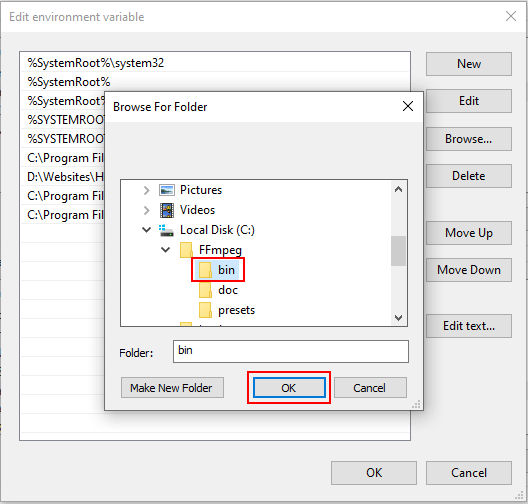
16. Go to the FFmpeg folder on your computer and open it.
17. Select the bin folder.
18. Click on the OK button.
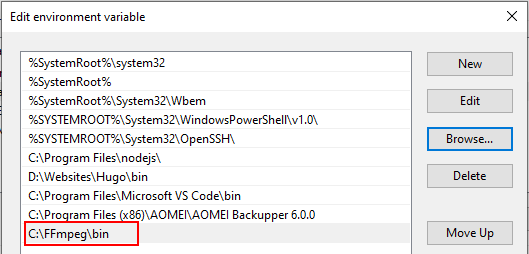
19. Click on the OK button at the bottom of the “Edit environment variable” window.
20. Click on the OK button at the bottom of the “Environment Variables” window.
FFmpeg is now installed on your computer.
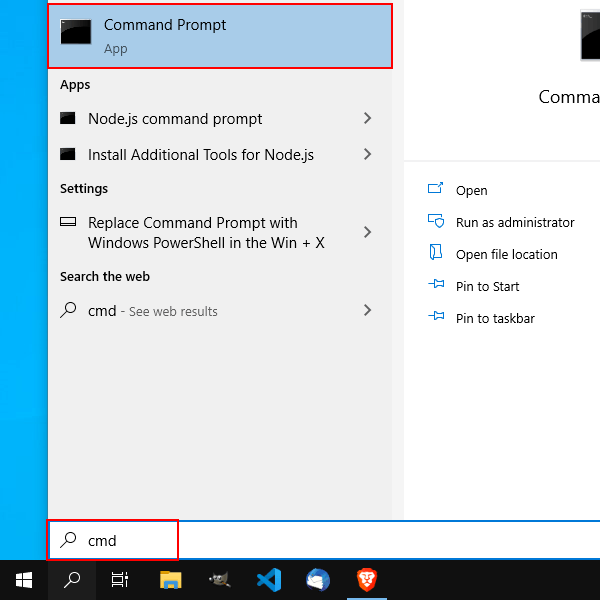
21. Now it's time to check if FFmpeg is properly installed on your computer. To do so, right-click on the start menu button and then click on Command Prompt or Windows Terminal (Windows 11).
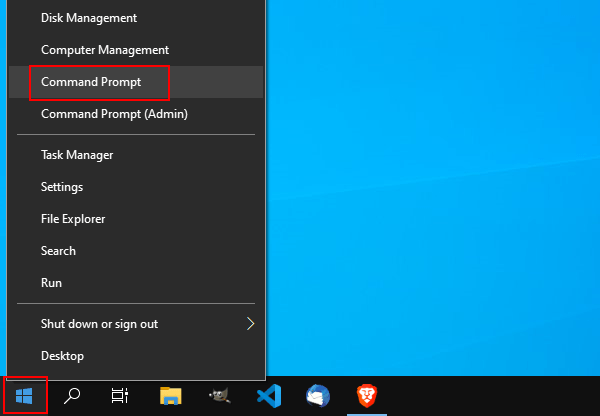
You can also type cmd in the Windows search bar and then click on Command Prompt when it appears.
22. In the Command Prompt window, you type (or copy and paste) the following command:
ffmpeg -version23. Press the Enter key on your keyboard.
If you see a list of information about FFmpeg, then it's installed properly.
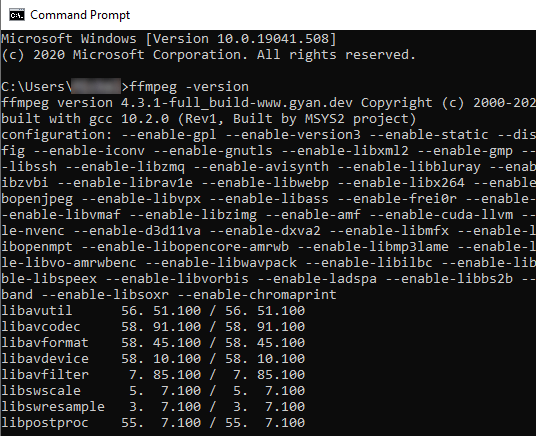
But if you get the “'ffmpeg' is not recognized as an internal or external command, operable program or batch file” error message, then you will have to check if the path to the FFmpeg/bin folder is correct in the Path variable settings.