
How to resize an image in Windows 11
Whether you need to shrink a large photo for an email or adjust dimensions for a web upload, you don't need expensive software like Photoshop. Windows 11 has powerful image tools built right in. In this guide, we’ll show you how to resize any image in seconds using the Photos app and Microsoft Paint—no downloads required.
Shrinking vs. Enlarging
When resizing images, keep this "golden rule" in mind:
- Shrinking is safe: You can make a large image smaller (downscaling) without losing any sharpness.
- Avoid enlarging: Making a small image significantly larger (upscaling) will usually cause it to look blurry or "pixelated." This is because the computer has to "guess" where the new pixels go. For the best results, always start with the largest version of your photo.
How to resize an image in Windows 11 using the Photos app
- Open File Explorer.
- Go to the image you want to edit.
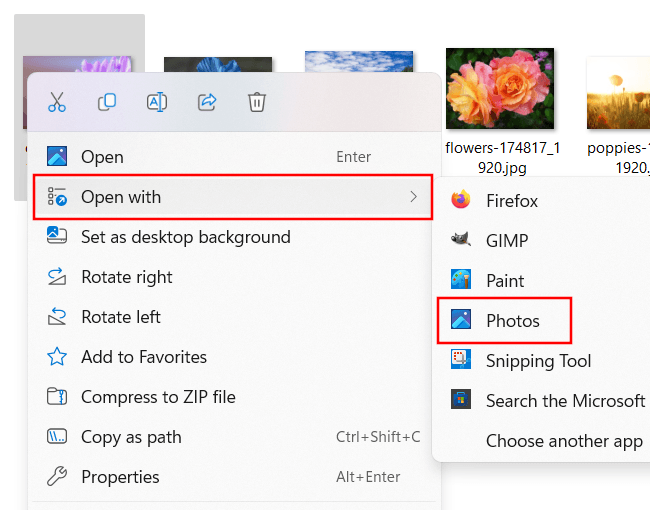
- Right-click on the image.
- Hover over Open with.
-
Select Photos.
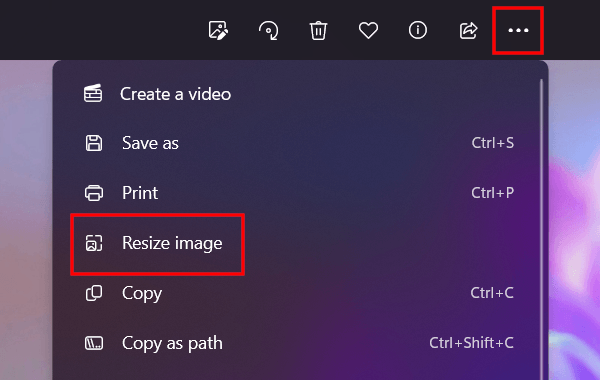
- Click the three‑dot options button in the top menu.
-
Click Resize image.
- In the next window, ensure the Pixels option is selected.
-
Enter the desired width or height.
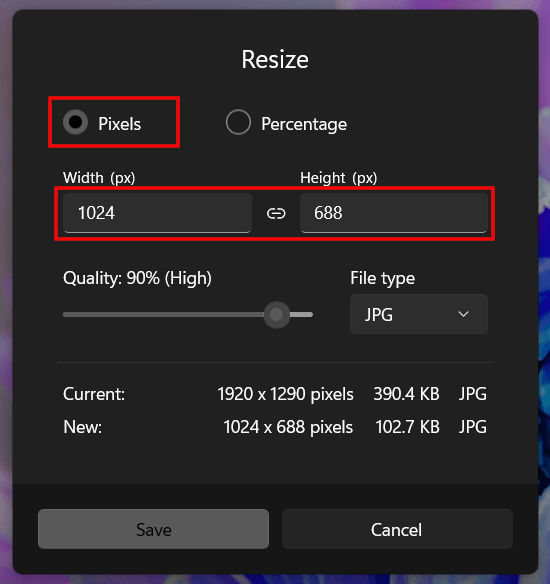
The image will maintain its aspect ratio. For example, if you enter a width, the height will automatically be resized to match the aspect ratio of the image.
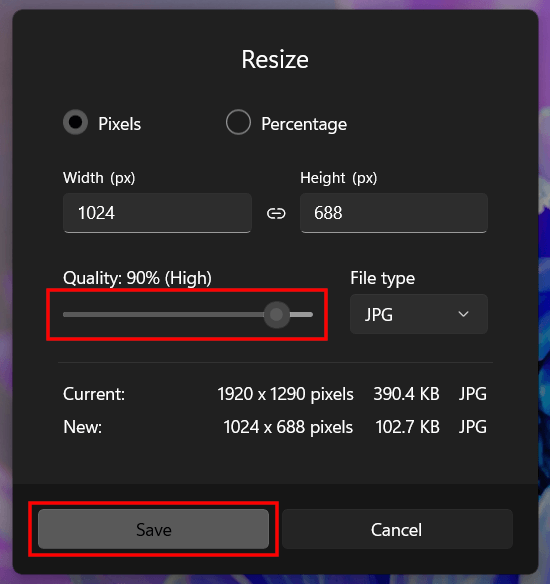
- You can select a quality by using the slider below Quality.
-
Click Save.
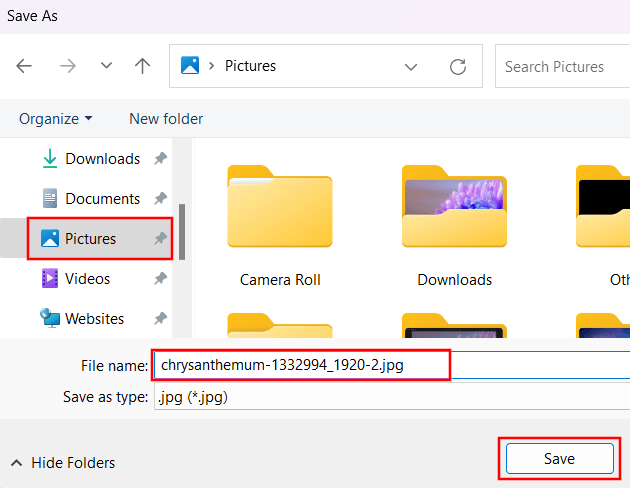
- In the next window, you can change the location on your computer where you want to save the edited image.
- You can edit the file name of the image in the File name field.
-
Click Save.
💡 Did You Know? If you have a newer Copilot+ PC (with an NPU chip), your Photos app includes a Super Resolution button. This uses AI to upscale small images up to eight times their original size while keeping them sharp. If you don't see this option, don't worry—you can still use the standard Resize steps above for great results!
How to resize an image in Windows 11 using Microsoft Paint
Paint (also known as Microsoft Paint or MS Paint) is a simple raster graphics editor that has been included with all versions of Microsoft Windows.
- Open File Explorer.
- Go to the image you want to edit.
- Right-click on the image.
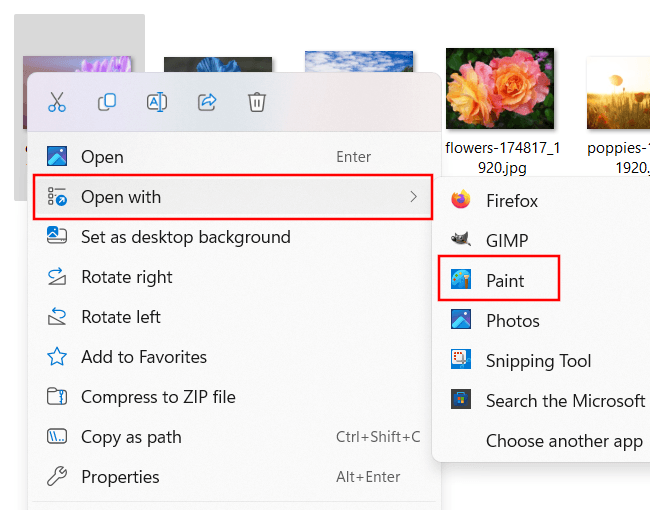
- Hover over Open with.
-
Select Paint.
-
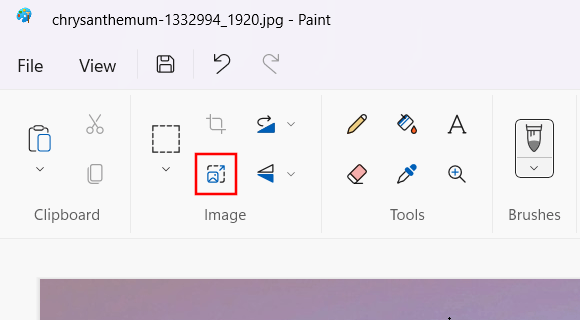
Click the Resize and Skew button in the toolbar section.
- In the next window, ensure the Pixels option is selected.
-
Enter the desired width or height.
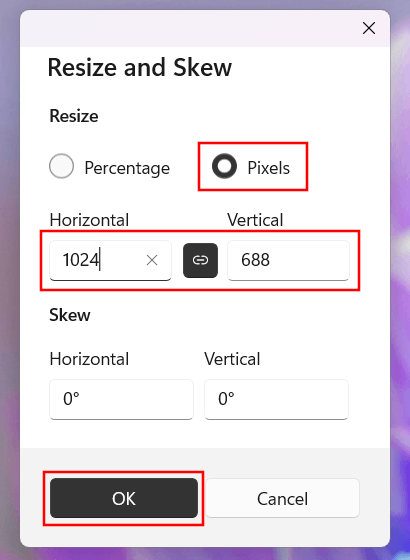
The image will maintain its aspect ratio. For example, if you enter a width, the height will automatically be resized to match the aspect ratio of the image.
- Click OK.
- Click File in the top left corner.
- Hover over Save as.
-
Select the format of your image (e.g., PNG, JPEG (JPG), GIF). In this example, the format is .jpg (JPEG).
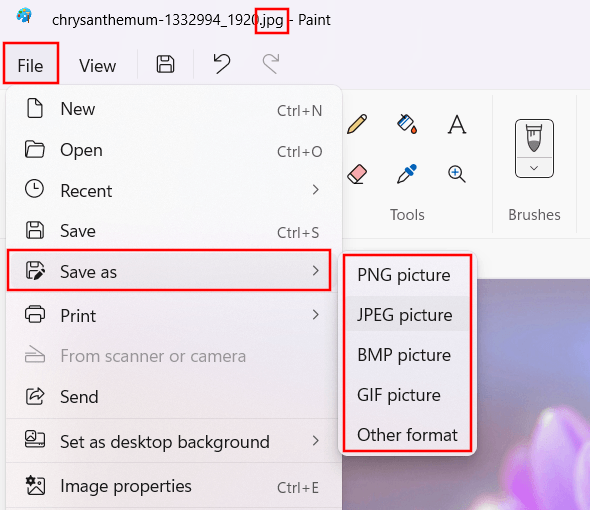
- In the next window, you can change the location on your computer where you want to save the edited image.
- You can edit the file name of the image in the File name field.
-
Click Save.
How to resize an image in Windows 11 using Microsoft PowerToys
Microsoft PowerToys is a set of free, open-source utilities designed to help power users and developers get more out of Windows. Get PowerToys from the Microsoft Store.
- Open File Explorer.
- Go to the image you want to edit.
- Right-click on the image.
-
Select Resize with Image Resizer.
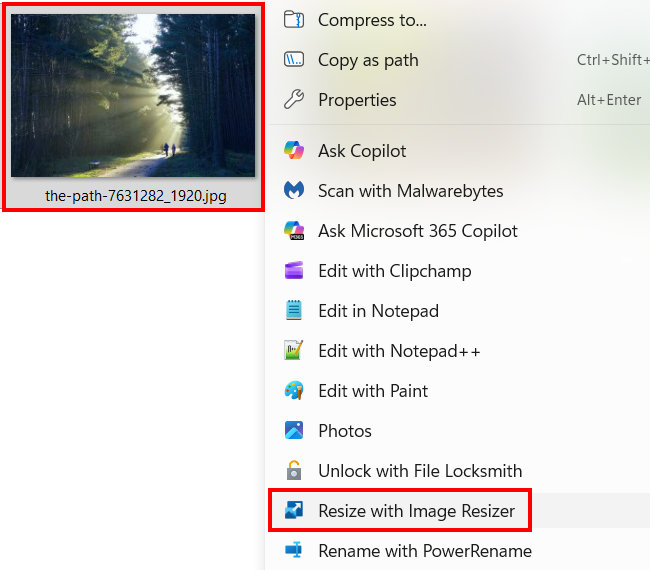
-
Choose the desired size or choose Custom.
The image will maintain its aspect ratio. For example, if you enter a width, the height will automatically be resized to match the aspect ratio of the image.
-
Click Resize.
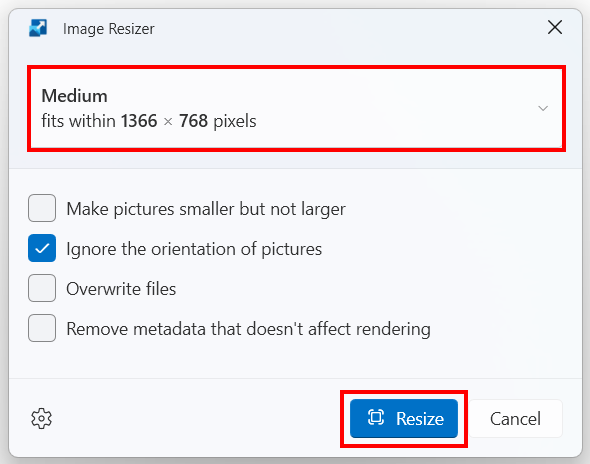
Related:
How to resize multiple photos at once in Windows 10 and 11