How to fix “VCRUNTIME140.dll was not found” in Windows 11
You click to launch a game or a program, and instead of opening, Windows hits you with a frustrating system error: "The code execution cannot proceed because VCRUNTIME140.dll was not found." This file is a critical component that applications rely on to run properly.
This issue happens because the application requires the Microsoft Visual C++ runtime library, but the library is either missing, corrupted, or wasn't installed correctly with the program. Fortunately, fixing it is entirely free and takes less than two minutes.
Solution 1: Install the official Microsoft Visual C++ Redistributable
The safest and most effective solution is to install or reinstall the entire runtime package directly from Microsoft's official servers. This instantly replaces the missing file.
- Go to the official Microsoft Visual C++ Redistributable download page.
- Scroll down to the Latest supported redistributable version section.
-
Download the version that matches the software causing the error: For standard modern games and programs, download the vc_redist.x64.exe file. If the error is coming from an older game or a legacy 32-bit program, download the vc_redist.x86.exe file.
Tip: Because 64-bit Windows 11 runs both modern and older 32-bit software, installing both the x64 and x86 packages is highly recommended to permanently fix the issue for all apps.
- Open the downloaded installer, check the I agree to the license terms box, and click Install.
- Restart your PC once the installation finishes.

Solution 2: Repair an existing Visual C++ installation
If you already have the runtime package installed but the file has become corrupted or broken, you can run a quick built-in repair sequence.
- Press Windows + I to open the Settings app.
- Click Apps.
- Click Installed apps.
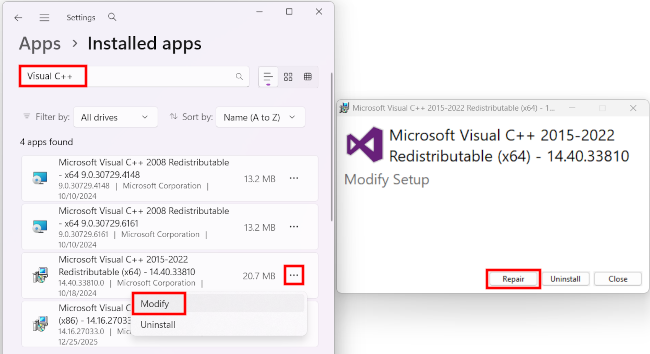
- Type Visual C++ into the search bar.
- Locate the latest version (usually labeled 2015-2022), click the three dots (...) next to it, and select Modify.
- In the pop-up window that appears, click the Repair button.
- Allow the process to complete, then restart your system.