How to fix connection problems with Google Chrome
This step-by-step tutorial will show you how to fix connection problems with Google Chrome in Windows 10 or 11.
If Google Chrome is not connecting to the internet and thus can't open a website or webpage, you can try the solutions on this page to help you fix the problem.
This page offers several solutions for connection problems with Google Chrome.
Common Google Chrome connection errors are:
- The www.example.com page isn't working www.example.com didn't send any data ERR_EMPTY_RESPONSE
- This webpage is not available ERR_CONNECTION_REFUSED
- No data received ERR_EMPTY_RESPONSE
- Error 324 (net::ERR_EMPTY_RESPONSE): The server closed the connection without sending any data.
- ERR_TIMED_OUT
Common causes are:
- Corrupt cache in your computer's temporary Internet folder
- Problem with your ISP internet connection
- Corrupt or invalid Registry keys
- Malware infection
- Browsing history
- Extension(s)
- Router
- VPN
Quick methods
First, you can try the quick methods below.
- Press the Ctrl + F5 keys on your keyboard to reload the page and bypass the local cache.
- Press the Ctrl + Shift + N keys on your keyboard to open a private browsing window (Incognito).
- Disable your VPN (if you're using one).
Delete browsing history in Google Chrome
Method 1
-
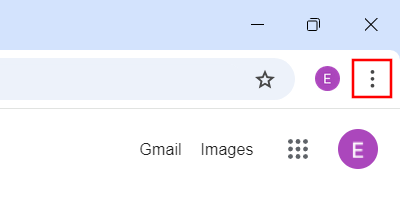
Click on the three-dot menu button in the top right corner of Chrome.
-
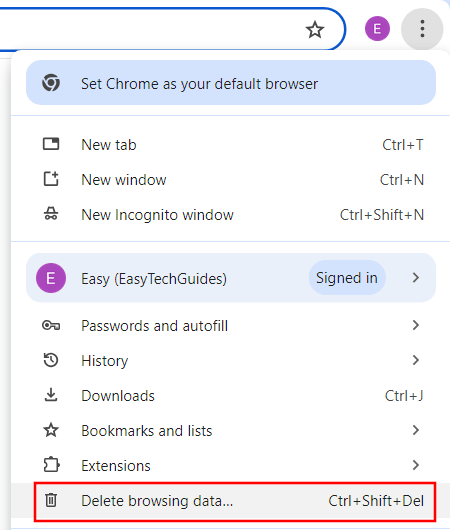
In the menu, you click on Delete browsing data.
-
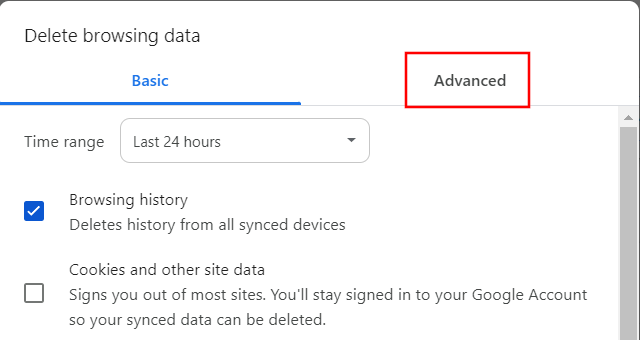
In the next window, you click on Advanced.
-
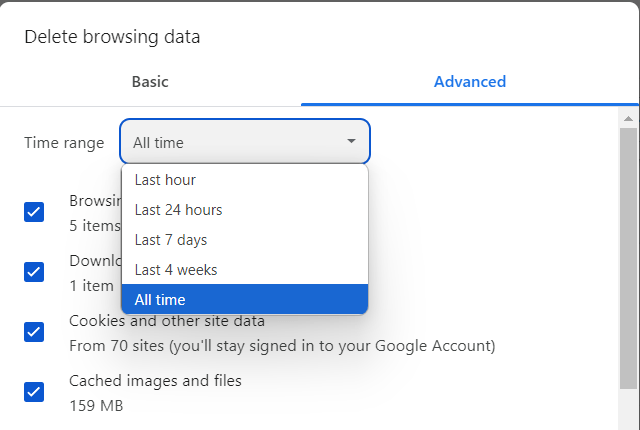
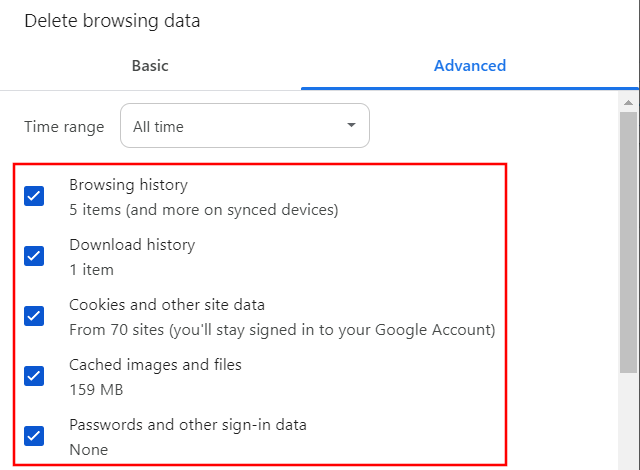
At Time range, you select All time.
-
Check all browsing data options (e.g., Browsing history, Cookies and other site data, etc.).
-
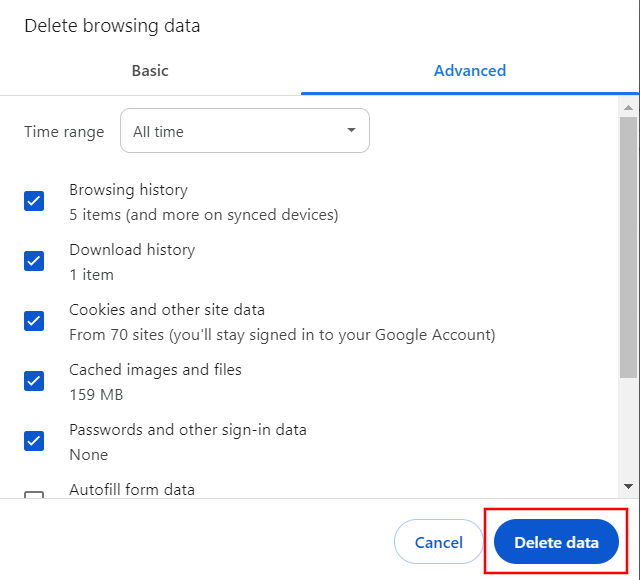
Click on Delete data.
- Restart Google Chrome when the browser is done deleting your browsing history.
Method 2
-
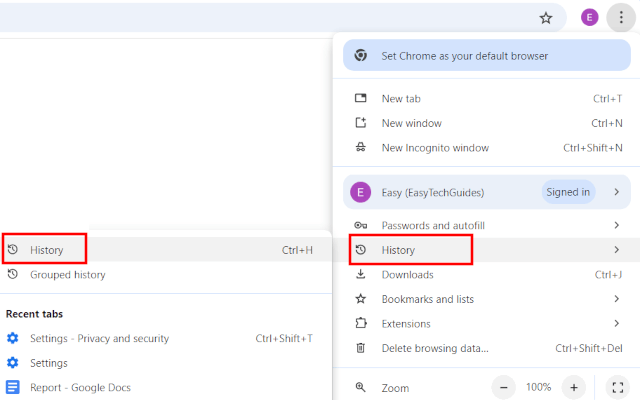
Click on the three-dot menu button in the top right corner of Chrome.
- In the menu, you go to History.
-
Click on History.
-
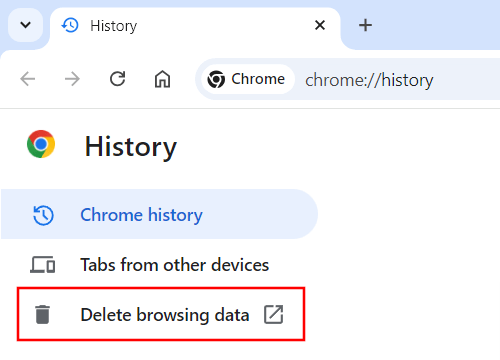
Click on Delete browsing data in the top left corner.
-
In the next window, you click on Advanced.
-
At Time range, you select All time.
-
Check all browsing data options (e.g., Browsing history, Cookies and other site data, etc.).
-
Click on Delete data.
- Restart Google Chrome when the browser is done deleting your browsing history.
Check browser extensions in Google Chrome
Sometimes extensions (add-ons) can cause problems, so the best way to test this is to disable all extensions and test which one is causing problems.
-
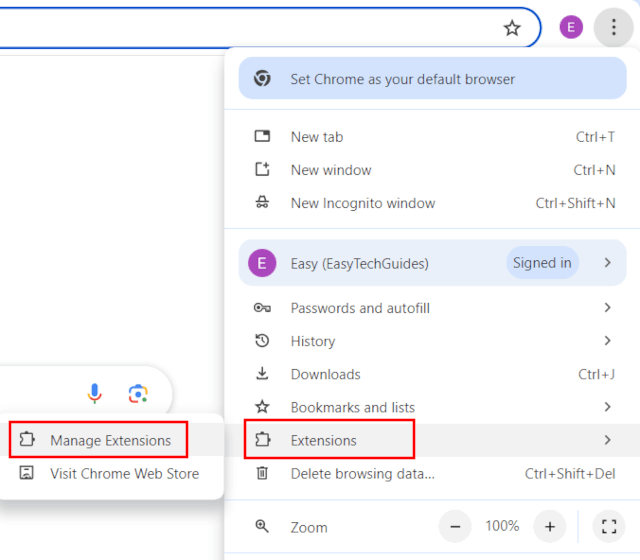
Click on the three-dot menu button in the top right corner of Chrome.
- Go to Extensions.
-
Click on Manage Extensions.
-
Disable all extensions.

- Restart Google Chrome.
- Try to open a website.
If you can open the website or webpage, you know the problem is one of the browser extensions. Enable the browser extensions individually and test which one is causing problems.
Clear Google Chrome's DNS cache
-
Type chrome://net-internals/#dns in the address bar of Google Chrome.
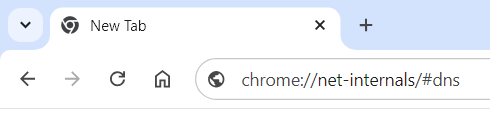
- Press the Enter key on your keyboard.
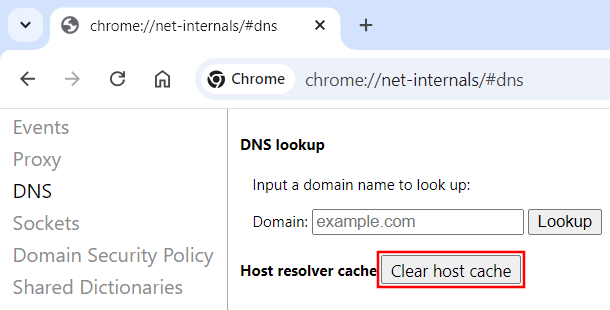
-
Click on Clear host cache.
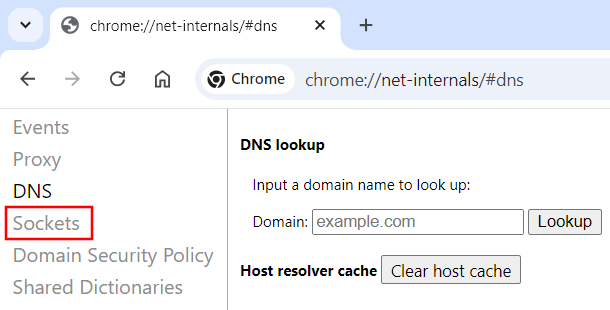
-
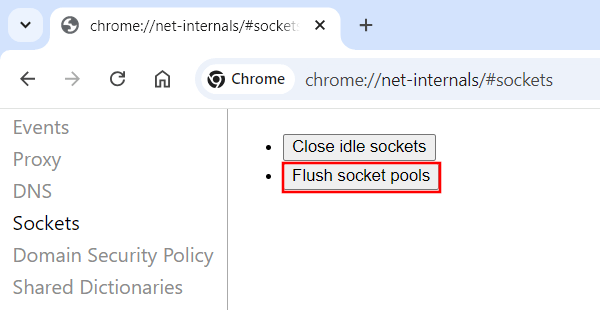
Click on Sockets located in the left menu.
-
Click on Close idle sockets.

-
Click on Flush socket pools.
- Restart Google Chrome.
Reset Google Chrome to default settings
-
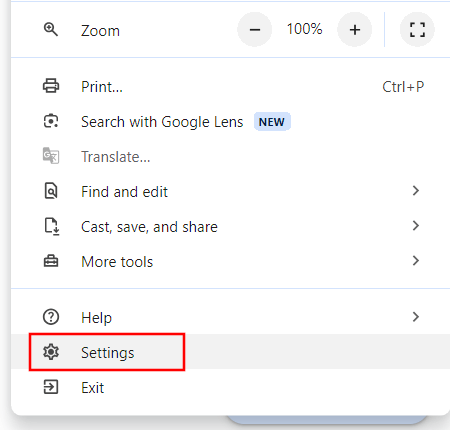
Click on the three-dot menu button in the top right corner of Chrome.
-
Click on Settings.
-
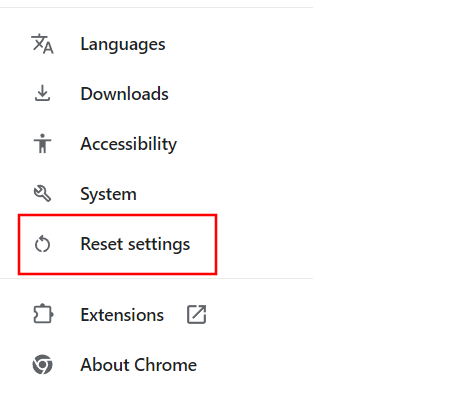
Click on Reset settings located in the left menu.
-
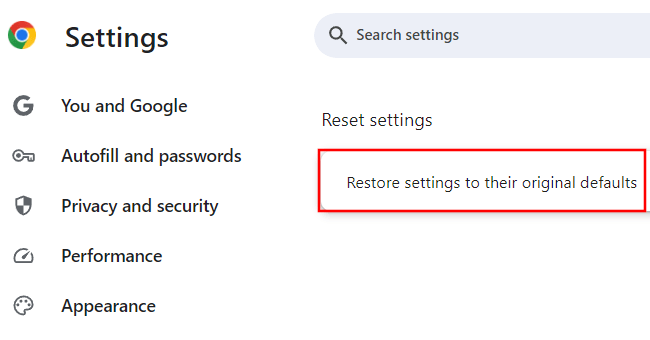
Click on Restore settings to their original defaults.
-
In the next window, you click on Reset settings.
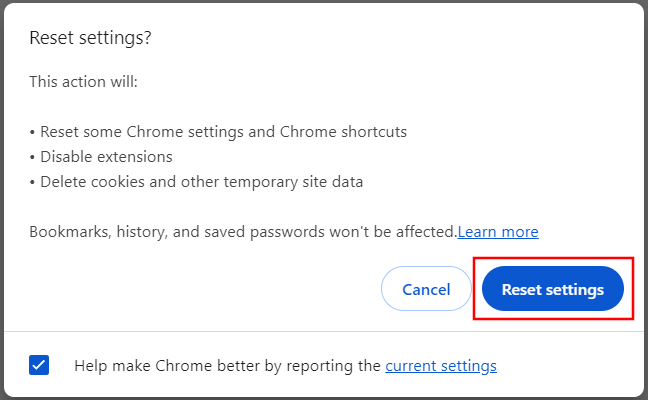
Google Chrome will now restore its settings to their original defaults.
Windows CMD commands
- Right-click on the Windows start menu button.
-
Click on Terminal (Admin) or Command Prompt (Admin).
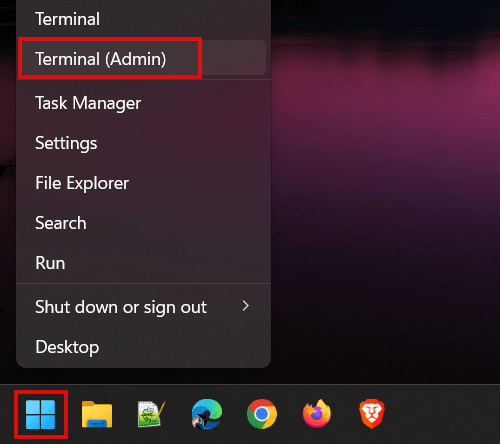
- When the 'User Account Control' window appears, you click on Yes. Depending on your settings, you may need to enter your administrator password first and then click on Yes.
-
Type the following command:
ipconfig /release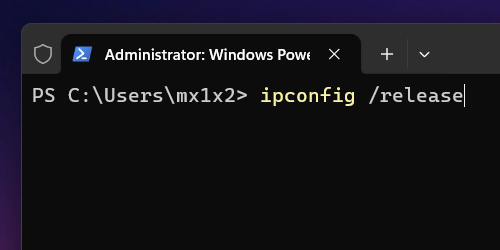
- Press the Enter key on your keyboard.
-
Type the following command:
ipconfig /all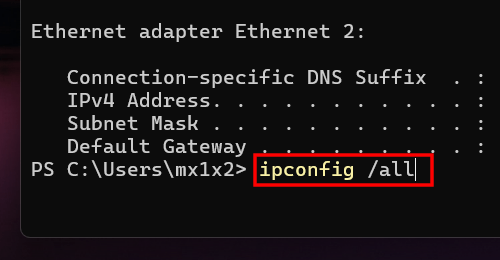
- Press Enter.
-
Type the following command:
ipconfig /flushdns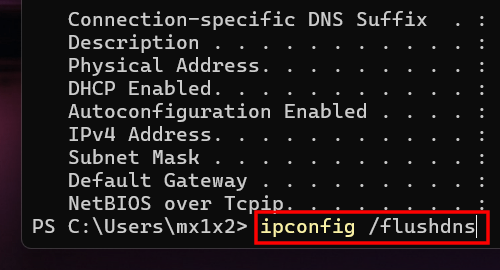
- Press Enter.
-
Type the following command:
ipconfig /renew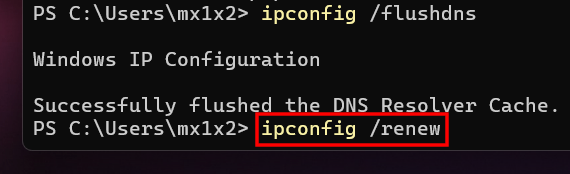
- Press Enter.
-
Type the following command:
netsh int ip set dns - Press Enter.
-
Type the following command:
netsh winsock reset - Press Enter.
- Close the Terminal or Command Prompt window.
- Restart your PC.
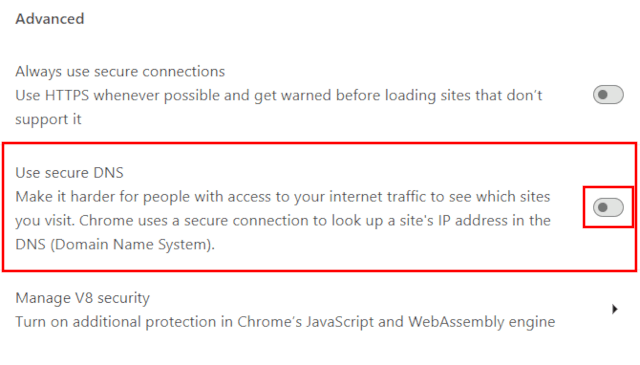
Use secure DNS in Google Chrome
Switching to a third-party DNS server and enabling secure DNS (DNS over HTTPS) may resolve connection problems.
-
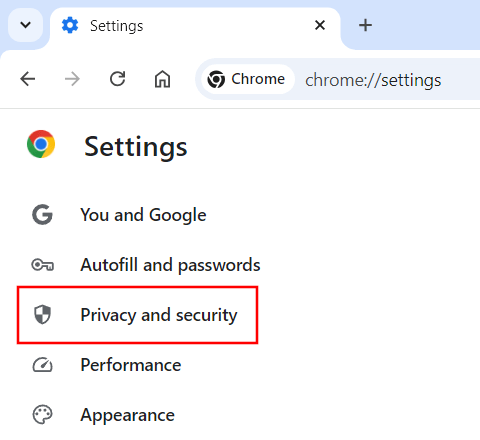
Click on the three-dot menu button in the top right corner of Chrome.
-
Click on Settings.
-
Click on Privacy and security in the left menu.
-
Click on Security.
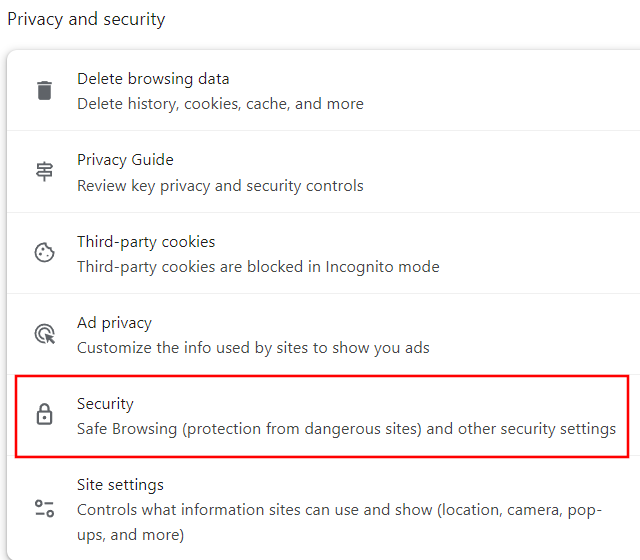
-
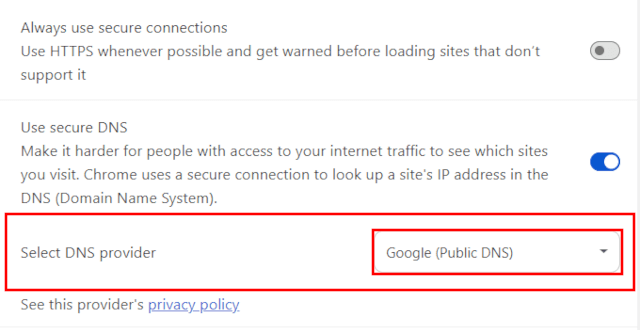
Click on Use secure DNS or the toggle button next to it to enable it.
-
Select a DNS provider (e.g., Google (Public DNS) or Cloudflare (1.1.1.1)).
- Restart Google Chrome.
Scan for malware
Malware (computer viruses, spyware, adware, rootkits, trojan horses, worms, etc.) can also cause connection problems with Google Chrome.
You can scan your computer for malware using Malwarebytes, Kaspersky Virus Removal Tool, ESET Online Virus Scanner, Emsisoft Emergency Kit.
If one of these scanners finds malware, you follow their instructions to remove it.
Restart modem, router, and computer
Turn off your modem, router, and computer. Wait a minute. Turn on your modem, router, and computer.
Uninstall and reinstall Google Chrome
Maybe the Google Chrome installation is corrupt. If that's the problem, it's better to uninstall and reinstall Google Chrome.