How to really defer updates in Windows 10 and 11
These step-by-step tutorials will show you how to defer updates in Windows 10 and 11 Home and Pro.
Defer updates in Windows 10 or 11 Pro (Local Group Policy Editor)
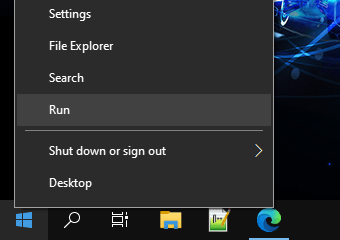
- Right-click on the Windows start menu button.
-
Click on Run.
- In the next window, you type gpedit.msc.
-
Click on OK or press the Enter key on your keyboard.

-
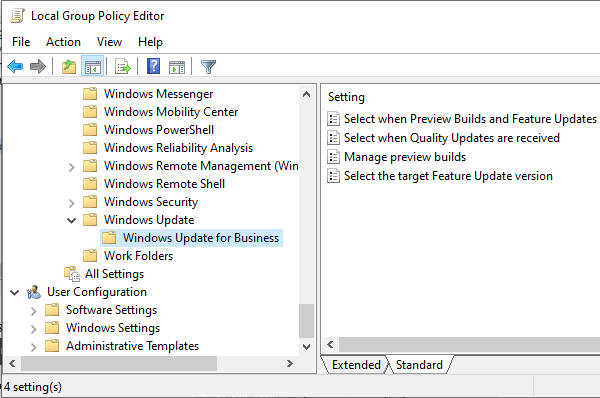
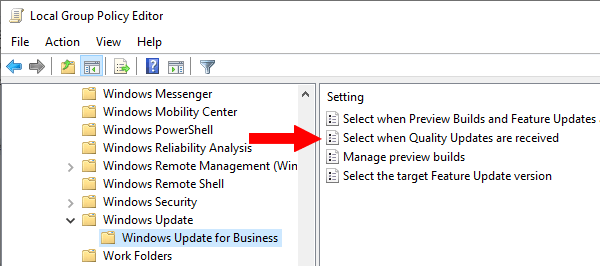
In the next window, you go to the following location on your PC; Computer Configuration > Administrative Templates > Windows Components > Windows Update > Windows Update for Business or Manage updates offered from Windows Update (Windows 11).
-
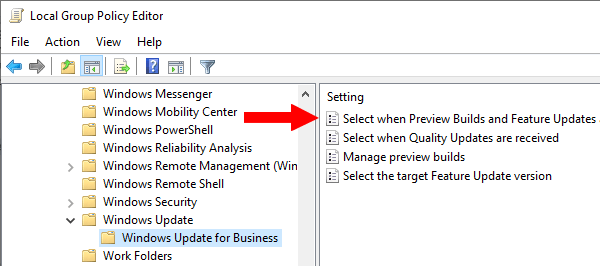
In the right section, you double-click on Select when Preview Builds and Feature Updates are received.
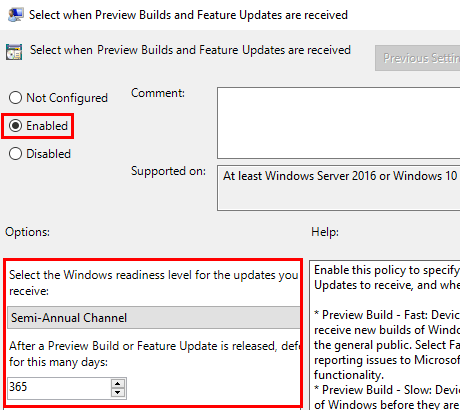
- Check the Enabled option.
- Select Semi-Annual Channel.
-
For days, you enter 365.
- Click on Apply in the bottom right corner of the window.
- Click on OK.
-
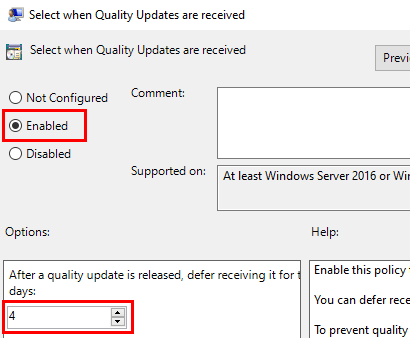
In the right section, you double-click on Select when Quality Updates are received. This is also security updates.
- Check the Enabled option.
-
Enter or select 4 days.
You may be wondering why four days.
Well. The reason is that all these updates get released on patch Tuesday, and sometimes these updates cause problems.
And if Microsoft releases a bad update and the update causes a lot of problems, they usually pull back the update two or three days after the release day.
And by the weekend, when your PC searches for updates, it's either fixed or already been pulled.
So if you delay these updates for four days, you'll only receive quality updates.
- Click on Apply in the bottom right corner of the window.
- Click on OK.
Windows 10 or 11 will now defer updates.
Defer updates in Windows 10 or 11 Home (Registry Editor)
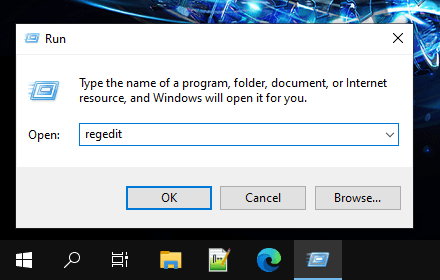
- Right-click on the Windows start menu button.
-
Click on Run.
- In the next window, you type regedit.
-
Click on OK or press the Enter key on your keyboard.
- When the 'User Account Control' window appears, you click Yes. Depending on your settings, you might need to enter an administrator password first and then click Yes.
-
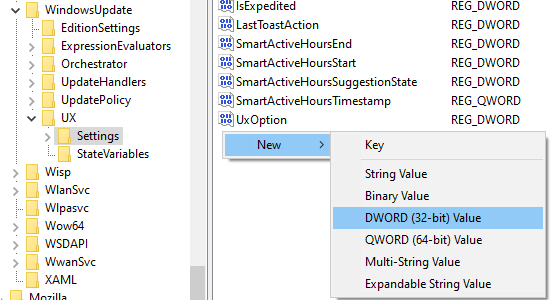
In the next window, you go to the following key:
Computer\HKEY_LOCAL_MACHINE\SOFTWARE\Microsoft\WindowsUpdate\UX\Settings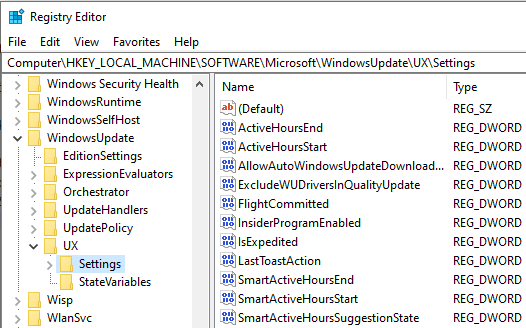
- In the right section, you right-click on an empty space.
- Go to New.
-
Click on DWORD (32-bit) Value.
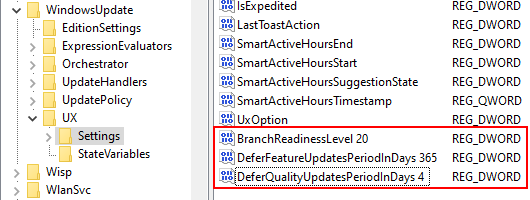
- Name the new value BranchReadinessLevel 20.
- Create another DWORD (32-bit) Value with the name DeferFeatureUpdatesPeriodInDays 365.
-
Create one more DWORD (32-bit) Value with the name DeferQualityUpdatesPeriodInDays 4.
You may be wondering why four days.
Well. The reason is that all these updates get released on patch Tuesday, and sometimes these updates cause problems.
And if Microsoft releases a bad update and the update causes a lot of problems, they usually pull back the update two or three days after the release day.
And by the weekend, when your PC searches for updates, it's either fixed or already been pulled.
So if you delay these updates for four days, you'll only receive quality updates.
- Close the Registry Editor.
Windows 10 or 11 will now defer updates.