How to copy a CD to another CD with only one drive
These step-by-step tutorials will show you how to copy a CD to another blank CD on a Windows 10 or 11 PC with only one drive.
Copying CDs
If you don't want to risk damaging your favorite CDs, it's a good idea to make copies, store the originals in their cases, and use only the duplicates. To duplicate a CD, you'll need a computer with a CD burner and a blank disc.
Most desktop computers—and especially laptops—have only one CD burner drive. That's why the tutorials on this page focus on copying CDs using PCs with a single CD burner.
Tip: If you want to copy an audio CD, use a blank CD-R and not CD-RW, because not all CD players and car stereos can play rewritable CDs properly – even when burned in the correct audio format.
How to copy a CD to another CD on a PC with only one drive using CDBurnerXP
- Insert the CD you want to copy into the CD burner drive of your PC.
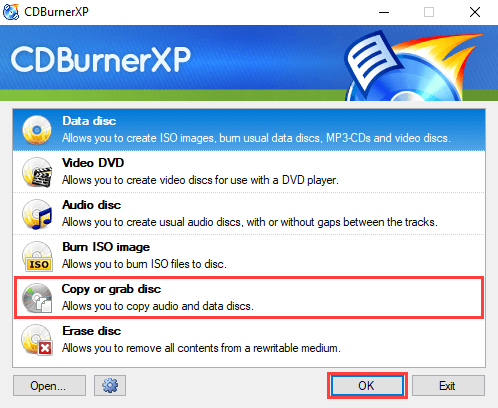
- Open CDBurnerXP.
- Select Copy or grab disc.
-
Click on OK at the bottom right.
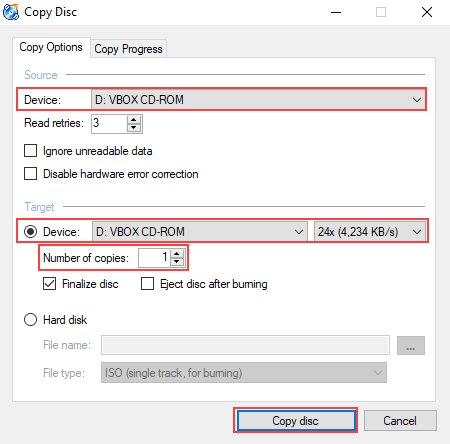
- In the next window, you make sure the CD burner drive of your PC is selected at Device in the 'Source' section.
- In the 'Target' section, at Device, you also make sure the CD burner drive of your PC is selected.
- Next to Device, you also have the option to select a burning speed. The maximum speed you can select depends on the capacity of the CD burner of your PC and the capacity of the CD.
- At Number of copies, you can enter the number of copies. This option is for people who want to burn more copies of the CD.
-
Click Copy disc.
CDBurnerXP will now extract the content of your CD and when it's done it will eject your CD.
- Take out your disc and insert a blank CD into the CD burner drive of your computer.
CDBurnerXP will now burn the copy of your CD to your blank CD.
How to copy a CD to another CD on a PC with only one drive using ImgBurn
- Insert the CD you want to copy into the CD burner drive of your PC.
- Open ImgBurn.
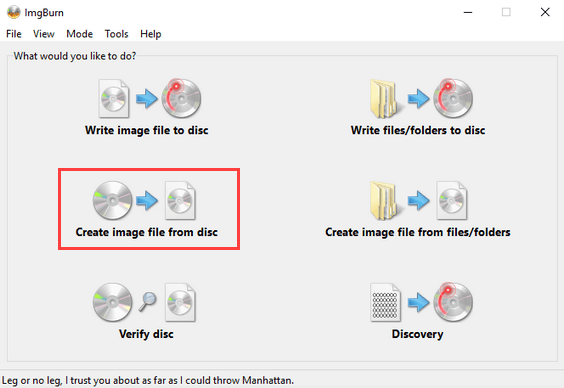
-
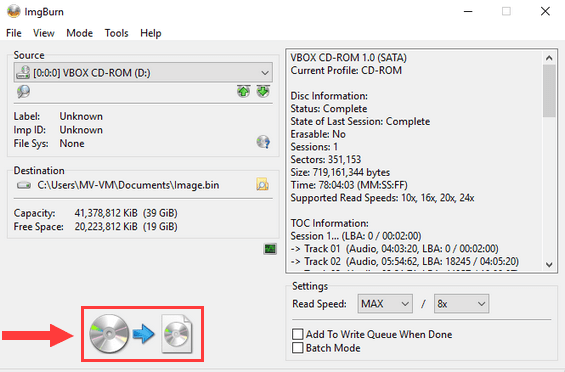
Click on Create image file from disc.
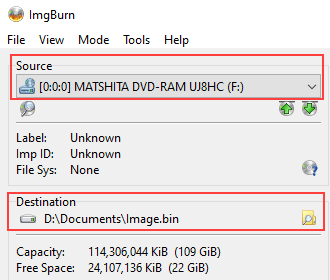
- In the Source section, you make sure that the CD burner drive of your computer is selected.
-
In the Destination section, you can see and change the location on your computer where ImgBurn will save the image file. Remember the location because you will need the image file later.
-
Click on the 'disc → file' (read) button at the bottom of ImgBurn.
ImgBurn will now create an image file from your CD.
- When the process is complete, you take out your CD and insert a blank CD into the CD burner drive of your PC.
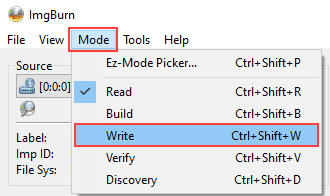
- Click on Mode located in the top menu of ImgBurn.
-
Select Write from the drop-down menu.
-
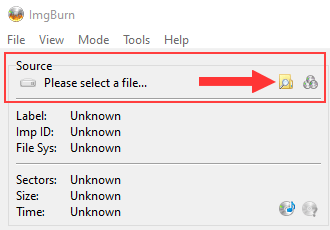
In the Source section, you click on the folder icon.
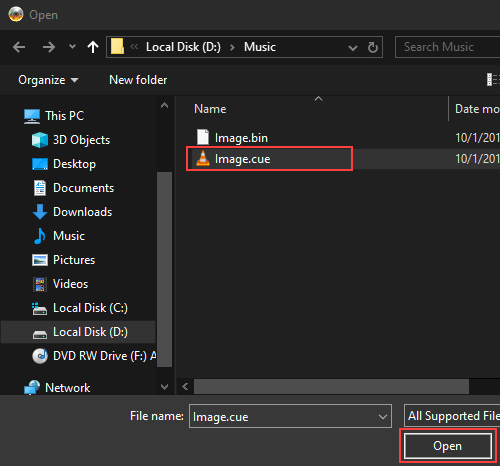
- In the next window, you go to the image file you created earlier.
- Select the .cue file (e.g., Image.cue).
-
Click on Open.
- In the Destination section, you make sure that the CD burner drive of your PC is selected.
-
Click on the 'file → disc' (write) button at the bottom of ImgBurn.
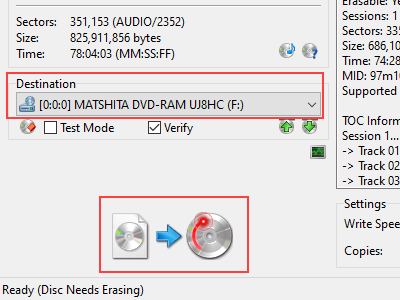
ImgBurn will now burn the copy of your CD to your blank CD.
Related:
How to copy a DVD to another DVD with only one drive (2 ways)