How to clear cache in Windows 10
These step-by-step tutorials will show you how to clear the cache in Windows 10.
Clear temporary files on Windows 10
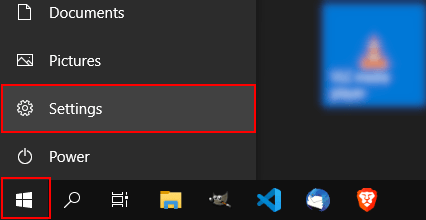
- Click on the Windows start menu button.
-
Click on Settings.
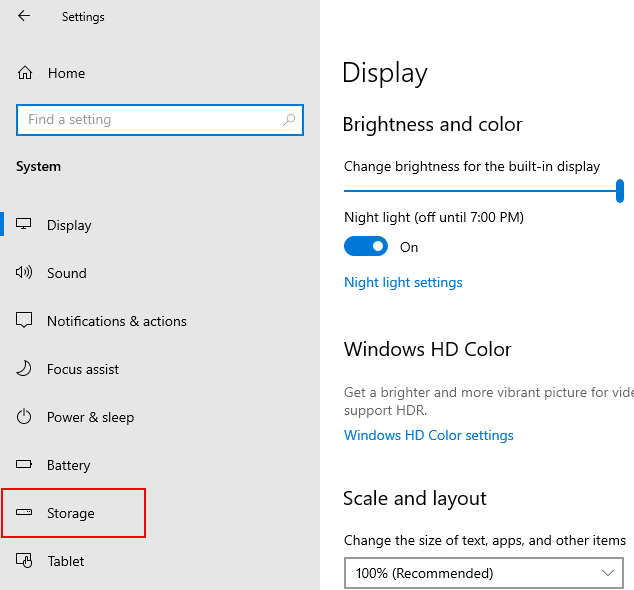
- Click on System.
-
Click on Storage in the left menu.
-
Click on Temporary files.
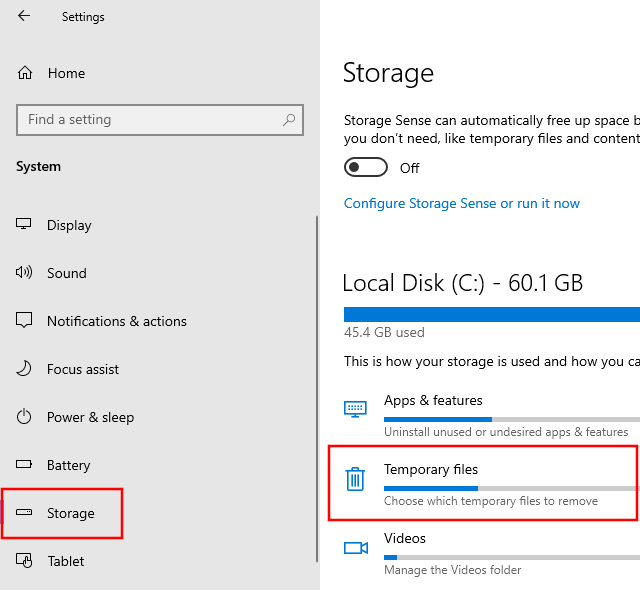
Note: If you don't see the Temporary files option, click on Show more categories.
Windows will now search for temporary files that can be deleted.
- Select the files you want to delete.
-
Click on Remove files.
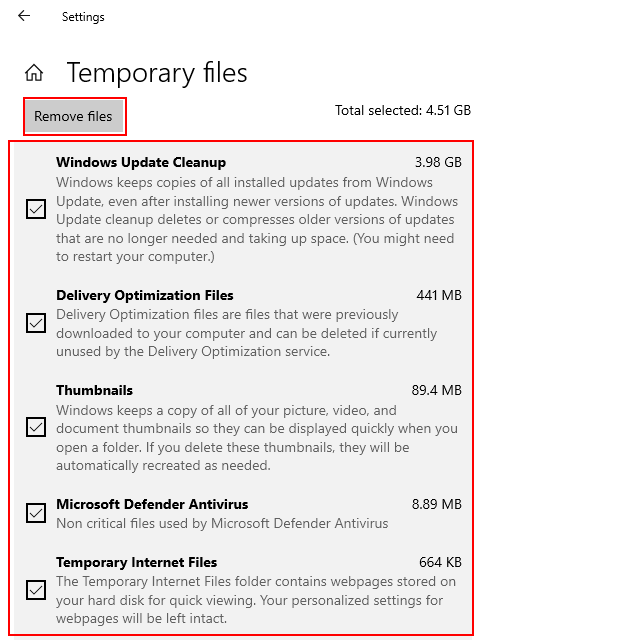
The built-in cleanup tool will now delete unnecessary files on your PC. This process may take several minutes. Sometimes it may seem like nothing is happening. You must let the program complete the process.
Clear DNS cache on Windows 10
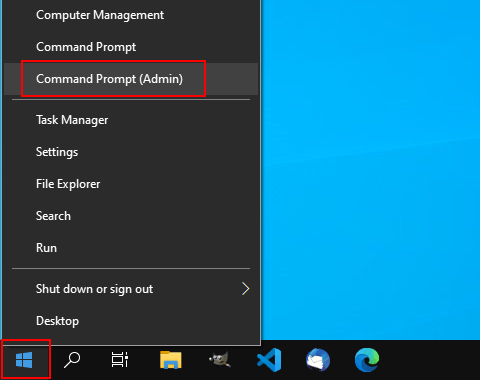
- Right-click on the Windows start menu button.
-
Click on Command Prompt (Admin).
- When the User Account Control (UAC) window appears, you click on Yes. Depending on your settings, you might need to enter your administrator password first and then click on Yes
-
Type the following command:
ipconfig/flushdns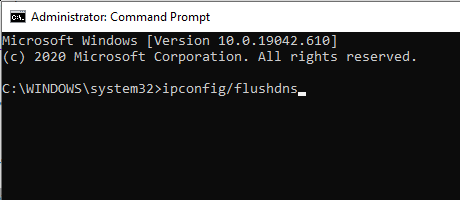
- Press the Enter key on your keyboard.
You will receive the 'Successfully flushed the DNS Resolver Cache' message when it's complete.
Clear Microsoft Store cache on Windows 10
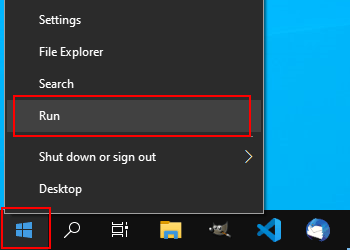
- Right-click on the Windows start menu button.
-
Click on Run.
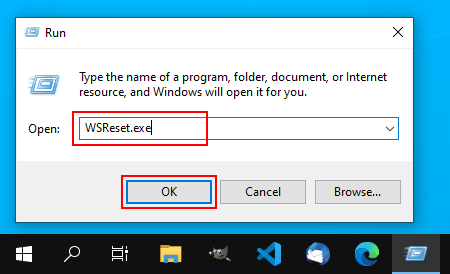
-
Type
WSReset.exein the text field of the 'Run' command window. -
Click on OK or press the Enter key on your keyboard.
A black window will appear.

Windows will now clear the Microsoft Store cache.
Once the black window closes, the cache is cleared, and the Microsoft Store will launch automatically.
You can close the Microsoft Store if you want.
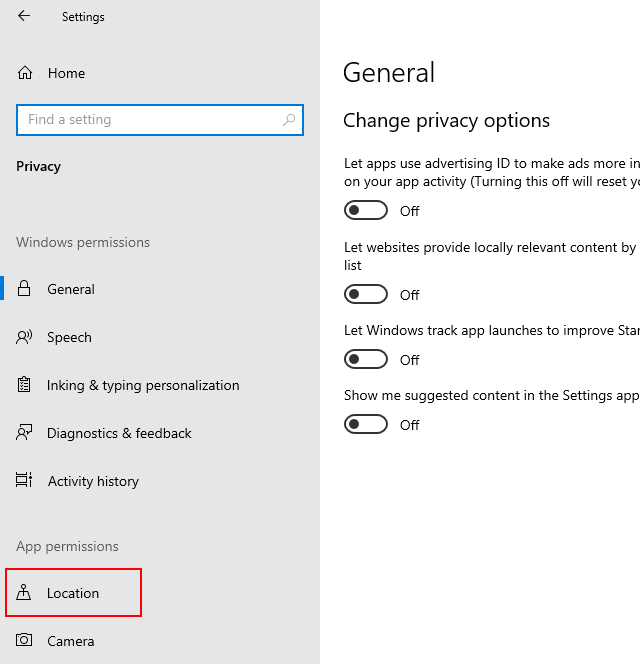
Clear location cache on Windows 10
- Click on the Windows start menu button.
-
Click on Settings.
- Click on Privacy.
-
Click on Location in the left menu.
- Scroll down to Location history.
-
Under Location history, you click Clear.
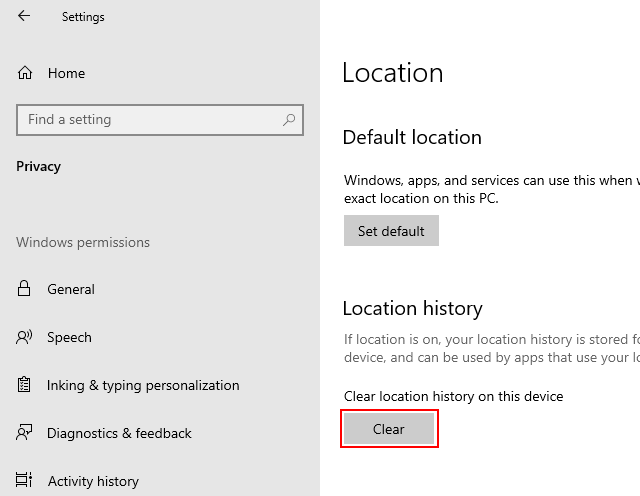
Windows will now clear the location cache.
Clear thumbnail cache on Windows 10
- Click on the Windows start menu button.
-
Click on Settings.
- Click on System.
-
Click on Storage in the left menu.
-
Click on Temporary files.
Note: If you don't see the Temporary files option, click on Show more categories.
Windows will now search for temporary files that can be deleted.
- Check the Thumbnails option is. You can also select other files you want to delete.
-
Click on Remove files.
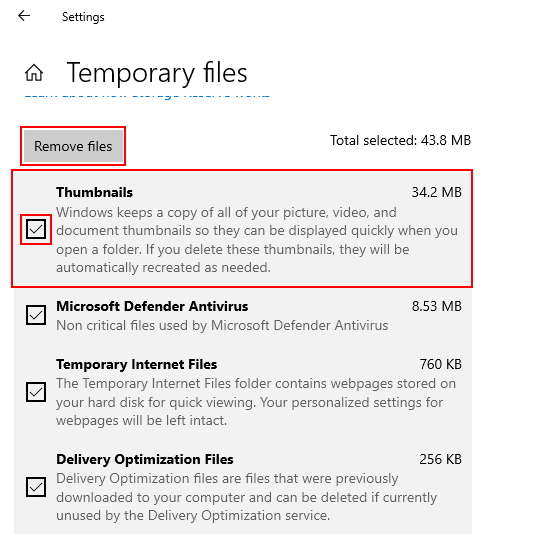
The built-in cleanup tool will now delete thumnails and other unnecessary files on your PC. This process may take several minutes. Sometimes it may seem like nothing is happening. You must let the program complete the process.
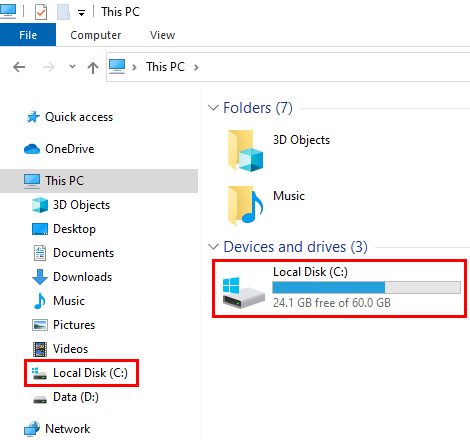
Clear icon cache on Windows 10
-
Open File Explorer.

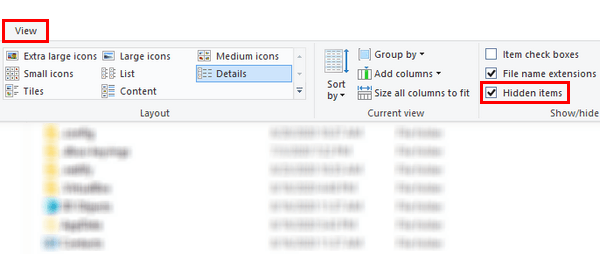
- Click on View located in the top menu of File Explorer.
-
Check the Hidden items option.
-
Open the (C:) drive.
-
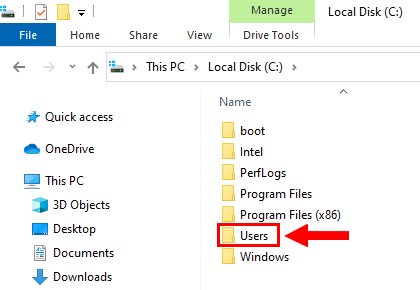
Open the Users folder.
-
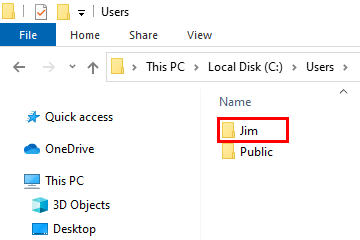
Open the folder with your user account name.
- Open the AppData folder.
- Open the Local folder.
-
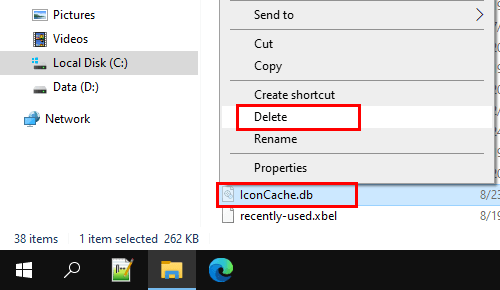
Delete the IconCache.db file.
- Restart your PC.