How to change a username on Windows 10 and 11 without account
This step-by-step tutorial will show you how to change your username on Windows 10 and 11 without a Microsoft account. The steps work for local user accounts.
A local user account is an offline account that you use to log in to your Windows 10 or 11 PC.
How to change a username on Windows 10 and 11 without account
-
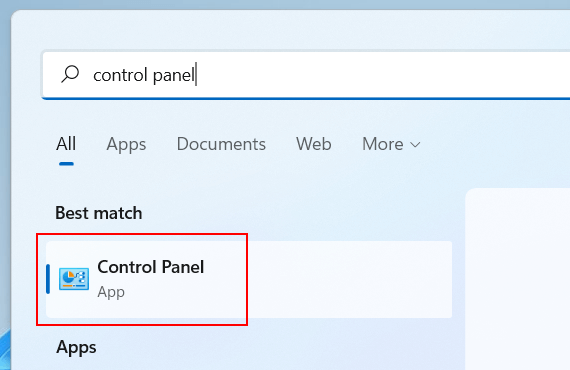
Click on the Windows start menu button or search icon.

- Type control panel.
-
Click on Control Panel when it appears in the search results.
-
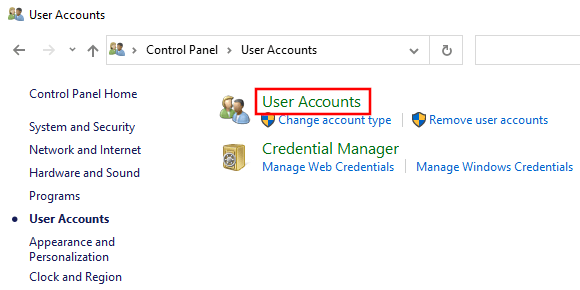
Click on User Accounts.

-
Click again on User Accounts.
-
Click on Change your account name.
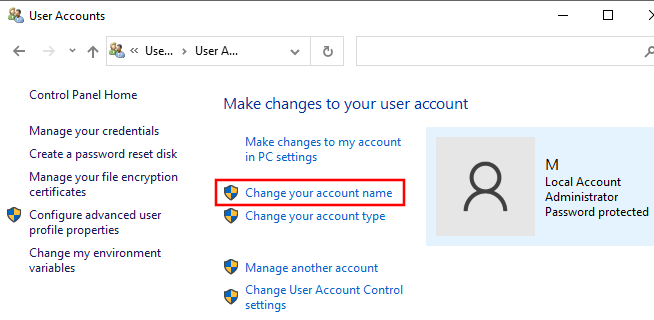
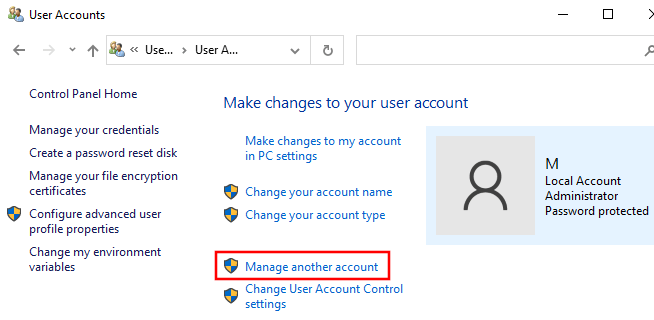
Note: If you want to change the username of another account, then click on Manage another account and select the account you wish to edit.
- If a 'User Account Control' window appears, you click on Yes.
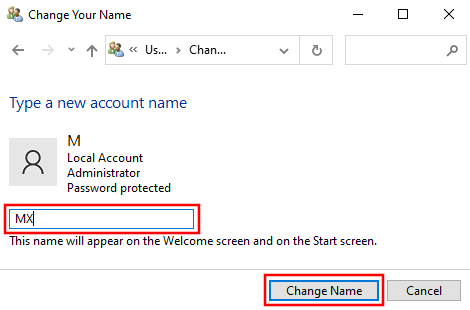
- Enter a new username for the account.
-
Click on Change Name.
The username is now changed.
You may need to restart your PC to see the change.