
How to burn videos to a DVD for free (no watermarks)
Need to watch your digital video files on a regular DVD player? Here are the best free ways to burn videos to a DVD on Windows 10 or 11 without hidden fees or watermarks.
If you want to watch digital video files (like MP4, MKV, or AVI) on a DVD player, you need to write them to a physical disc. While many modern guides push paid converters or software bundled with hidden adware, you can actually do this completely out-of-the-box or with trusted open-source tools.
This guide shows you how to burn videos to a DVD on Windows 11 and 10 using free methods—without paying for software or risking malware installers.
How to burn videos to a DVD with WinX DVD Author
WinX DVD Author is a free Windows program that converts and burns video files (like MP4, MKV, and AVI) into a format that plays on any DVD player.
Note: You can burn multiple videos to a single DVD. The number of files depends on your video file sizes and the storage capacity of your disc (usually 4.7 GB).
-
Click Video DVD Author.
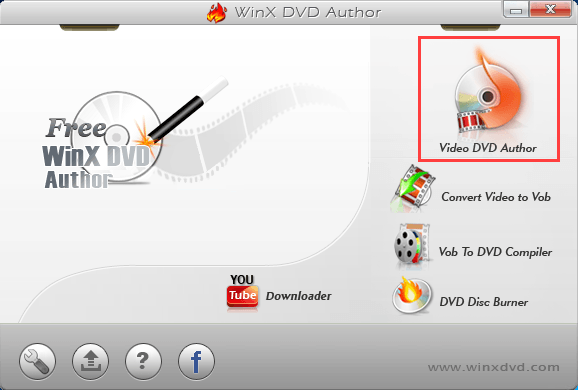
-
At Encoder Engine, select the quality.
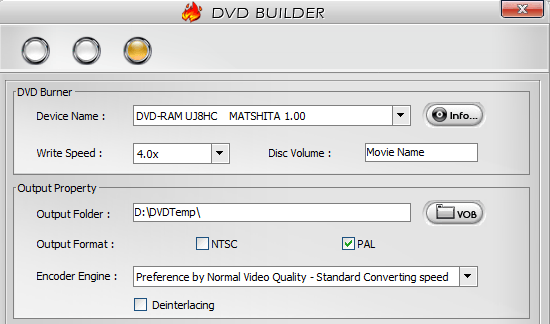
WinX DVD Author will now convert your files and burn them to the disc. This process can take anywhere from a few minutes to over an hour, depending on your video's length, your computer's processor speed, and the maximum writing speed of your DVD drive.
How to burn videos to a DVD with DVD Flick
DVD Flick is a free, open-source program that specializes in converting rare or unusual video formats into standard DVDs. Because it uses a massive backend codec library, it can handle almost any file type you throw at it without hidden watermarks or adware.
Note: You can burn multiple videos to a single DVD. The number of files depends on your video file sizes and the storage capacity of your disc (usually 4.7 GB).
Note: DVD Flick uses a companion burning tool called ImgBurn to write data to the disc. This is completely normal and installs automatically alongside the main software.
- Insert a blank DVD into the DVD burner drive of your computer.
- Open DVD Flick.
-
Click Add title on the right sidebar, select your video file from your computer, and click Open.
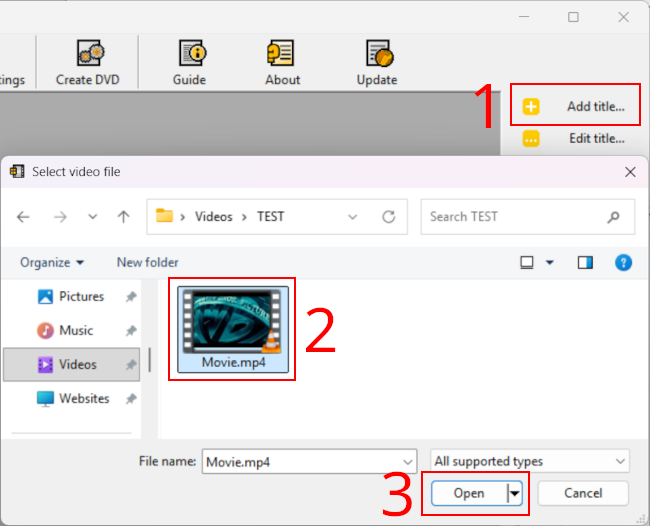
Tip: To include subtitles, make sure your .srt file has the exact same name as your video file and is saved in the same folder before adding the video.
-
To configure subtitles, audio tracks, or chapters, select your video from the main list and click Edit title on the right sidebar.
Tip: Go to the Subtitle tracks tab and check whether the subtitles are there. If they are not, click Add and select your .srt file to hardcode subtitles directly into the video stream.
-
Click Project settings in the top menu bar.
You can change settings for every aspect of a DVD, including audio, video, playback, burning, and general options. Most settings are fine, but some you may want to change.
- On the General tab, give your disc a title, such as the movie’s name.
-
At Target size, select the disc size you will burn to, for example DVD (4.3 GB).
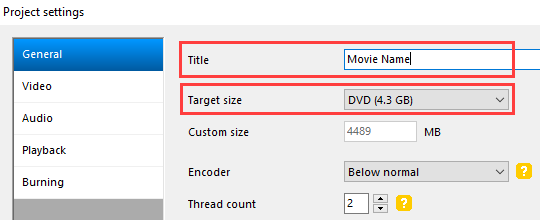
- In the Video tab, set Target format to NTSC for North America and Japan, or PAL for Europe and Australia.
- In the Burning tab, check the box for Burn project to disc to burn directly to DVD after conversion.
- Ensure your physical disc burner is selected at Drive.
-
Set the Speed to 4x or 6x. Lower speeds drastically reduce the chance of data corruption or write errors.
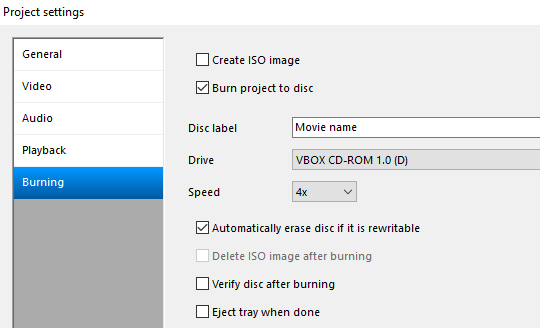
- Click Accept at the bottom of the window to save the settings.
- You can edit the DVD menu by clicking Menu settings in the top menu bar.
- Click Browse at the bottom right corner to select a temporary save location on your hard drive.
- Click Create DVD in the top menu bar to start the process.
DVD Flick will now convert your files and burn them to the disc. This process can take anywhere from a few minutes to over an hour, depending on your video's length, your computer's processor speed, and the maximum writing speed of your DVD drive.
Related:
How to burn a CD or DVD in Windows 11 & 10 (step by step)