How to rip a DVD to your computer with HandBrake or VLC
Learn how to rip a DVD to your computer using HandBrake or VLC on Windows and Linux. This also works for copy-protected DVDs.
Ripping a DVD is the process of copying video and audio content from a DVD to a computer.
HandBrake (Windows)
HandBrake cannot rip a copy-protected DVD by default, but there is a way to get around this by installing libdvdcss.
libdvdcss (or libdvdcss2 in some repositories) is a free and open-source software library created by the VLC developers for decoding copy-protected DVDs encrypted with the Content Scramble System (CSS).
On Windows, you will need to download the libdvdcss.dll file which you can download here.
Once you've downloaded the file, you copy it to the installation folder of HandBrake. The default path is C:\Program Files\HandBrake.
The steps below will show you how to rip a DVD using HandBrake.
1. Insert the DVD you want to rip into the DVD drive of your computer.
2. Open HandBrake.
3. If the “Source Selection” screen appears, you click on your DVD.
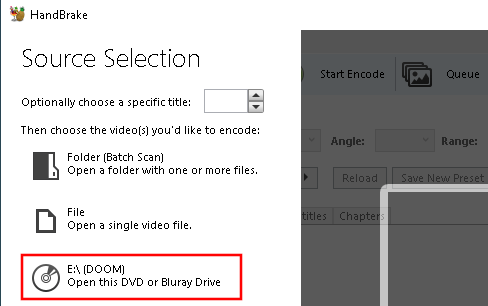
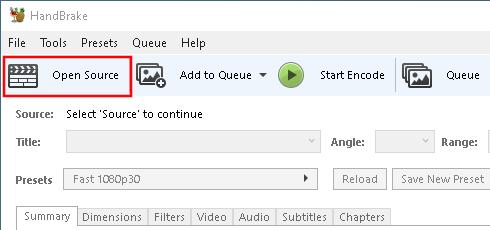
And otherwise, you click on the Open Source button located in the top left corner and then click on your DVD.
HandBrake will now scan your DVD.
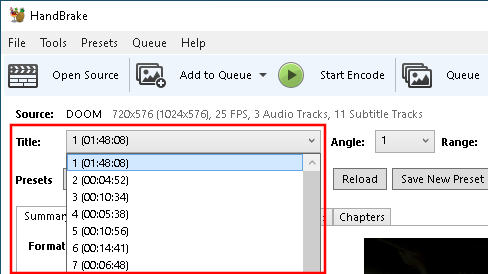
4. When it's done scanning, you click on the “Title” drop-down menu and select which part of the DVD you want to rip. In the case of movies, it's usually the longest title.
Now it's time to select a preset (video display resolution, frame rate, etc.).
Most commercial DVD's have a standard resolution, usually 480p or 576p. So ripping a commercial DVD at 720p30 or 1080p30 is a waste of disk space, slower, and does absolutely nothing to increase the quality of the video.
HandBrake will show you the resolution and frame rate of the original DVD at Source (top left), so you should select a preset that matches that as close as possible.
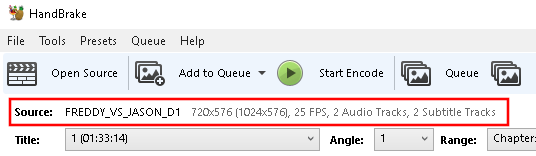
480p has a resolution of 720×480. This means that it has 720 pixels horizontally and 480 pixels vertically.
576p has a resolution of 720x576. This means that it has 720 pixels horizontally and 576 pixels vertically.
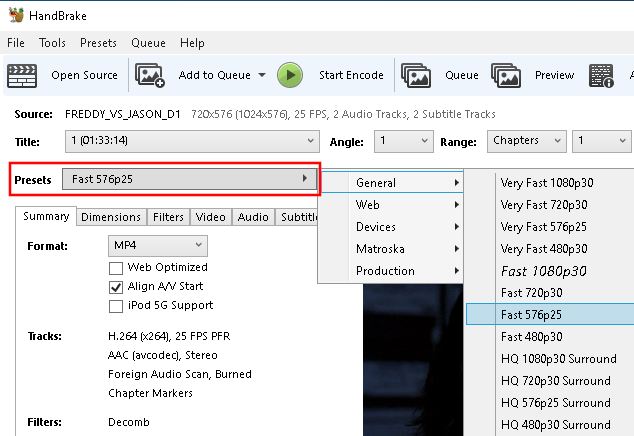
If you look at the screenshot above, you will see that my DVD has a resolution of 720x576, which means that I should select Fast 576p25 or HQ 576p25 Surround. HQ stands for high quality.
5. Click on the “Presets” drop-down menu and select a preset (e.g., 576p25).
Note: For MP4 files, HandBrake will automatically use the .m4v extension when you pass-through audio (AC3), use SRT subtitles, or have chapter markers enabled.
MP4 and M4V are the exact same file, the only difference is the file extension (.mp4 and .m4v).
If you want, you can change the file extension from .m4v to .mp4 because the file is exactly the same. There are no differences in the content or container itself.
6. Click on the Browse button located in the bottom right corner.

A “Save As” window will appear.
7. Select a location on your computer where you want to save the new video file.
8. At File name, you enter a name for your video.
9. Click on the Save button.

10. When you're ready, you click on the Start Encode button located in the top toolbar.
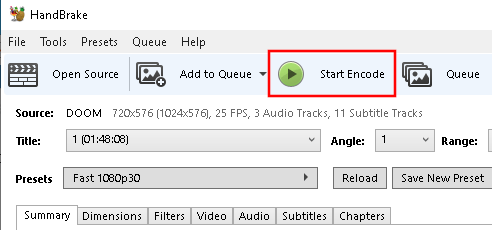
HandBrake will start ripping your DVD.
This may take a while. The amount of time it takes depends on your computer's hardware, your settings, video file format, and the file size of the DVD.
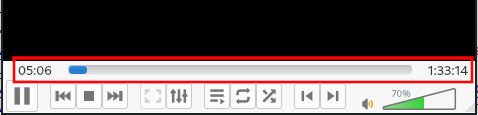
You can see the progress at the bottom of HandBrake.

HandBrake (Linux)
HandBrake cannot rip a copy-protected DVD by default, but there is a way to get around this by installing libdvdcss.
libdvdcss (or libdvdcss2 in some repositories) is a free and open-source software library created by the VLC developers for decoding copy-protected DVDs encrypted with the Content Scramble System (CSS).
On some Linux distributions, like Manjaro, you can find libdvdcss in the software manager.
On Debian and Ubuntu, you can install libdvdcss via libdvd-pkg helper package using the following commands:
sudo apt install libdvd-pkgsudo dpkg-reconfigure libdvd-pkgThe steps below will show you how to rip a DVD using HandBrake.
1. Insert the DVD you want to rip into the DVD drive of your computer.
2. Open HandBrake.
3. Click on the Open Source button located in the top left corner.
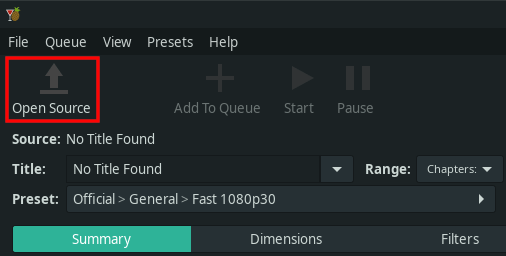
A new window will appear.
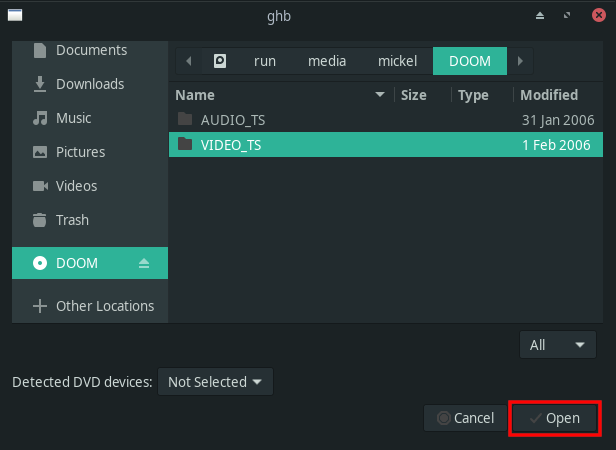
4. Click on your DVD.
5. Select VIDEO_TS.
6. Click on the Open button.
HandBrake will now scan your DVD.
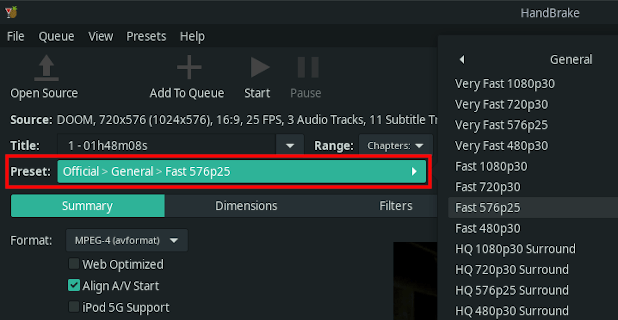
7. When it's done scanning, you click on the “Title” drop-down menu and select which part of the DVD you want to rip. In the case of movies, it's usually the longest title.

Now it's time to select a preset (video display resolution, frame rate, etc.).
Most commercial DVD's have a standard resolution, usually 480p or 576p. So ripping a commercial DVD at 720p30 or 1080p30 is a waste of disk space, slower, and does absolutely nothing to increase the quality of the video.
HandBrake will show you the resolution and frame rate of the original DVD at Source (top left), so you should select a preset that matches that as close as possible.
480p has a resolution of 720×480. This means that it has 720 pixels horizontally and 480 pixels vertically.
576p has a resolution of 720x576. This means that it has 720 pixels horizontally and 576 pixels vertically.
If you look at the screenshot above, you will see that my DVD has a resolution of 720x576, which means that I should select Fast 576p25 or HQ 576p25 Surround. HQ stands for high quality.
8. Click on the “Preset” drop-down menu and select a preset (e.g., 576p25).
Note: For MP4 files, HandBrake will automatically use the .m4v extension when you pass-through audio (AC3), use SRT subtitles, or have chapter markers enabled.
MP4 and M4V are the exact same file, the only difference is the file extension (.mp4 and .m4v).
You can change the file extension between .mp4 and .m4v because the file is exactly the same. There are no differences in the content or container itself.
9. When you're ready, you click on the Start button located in the top toolbar.
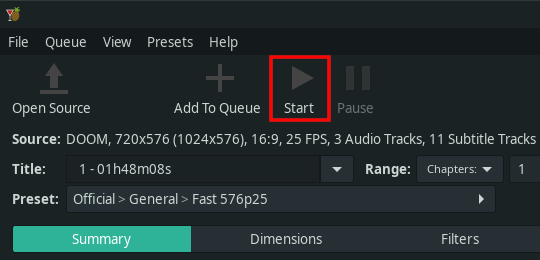
HandBrake will start ripping your DVD.
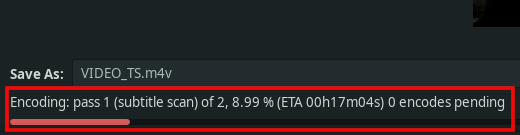
This may take a while. The amount of time it takes depends on your computer's hardware, your settings, video file format, and the file size of the DVD.
You can see the progress at the bottom of HandBrake.
By default, HandBrake will save the video in the Videos folder on your computer.
VLC media player (Windows and Linux)
1. Insert the DVD you want to rip into the DVD drive of your computer.
2. Open VLC media player.
3. Click on Media located in the top left corner and then click on Convert/Save.
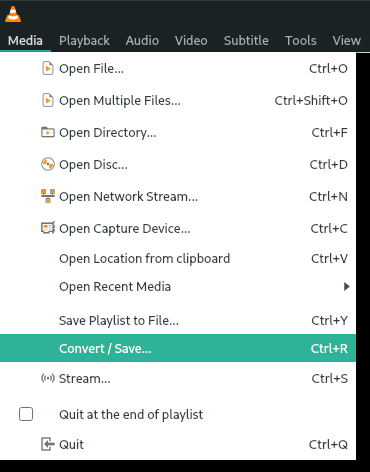
A “Open Media” window will appear.
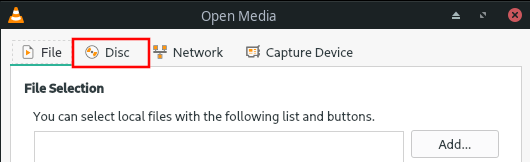
4. Click on the Disc tab.
5. Make sure that the DVD option is selected.
6. Make sure that the No disc menus option is selected.
7. Make sure that your DVD drive is selected in the “Disc device” field.
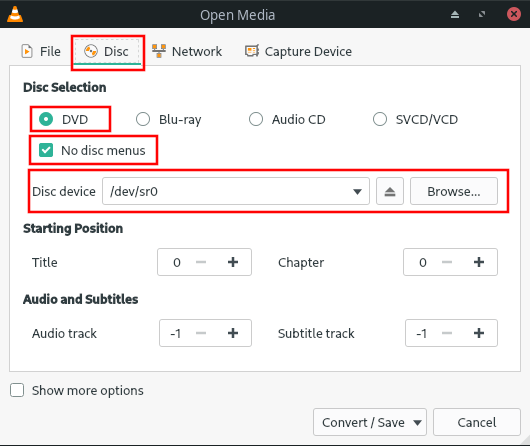
8. Click on the Convert/Save button at the bottom right of the “Open Media” window.
A “Convert” window will appear.
9. At Profile, you can select what type of video codec and container you want to use to rip your DVD. By default, VLC will select Video - H.264 + MP3 (MP4) (H.264 video codec - MP3 audio format - MP4 container).
But if you want to change something, like for example, video codec, audio codec, audio bitrate, audio sample rate, or include subtitles, then click on the tool button.
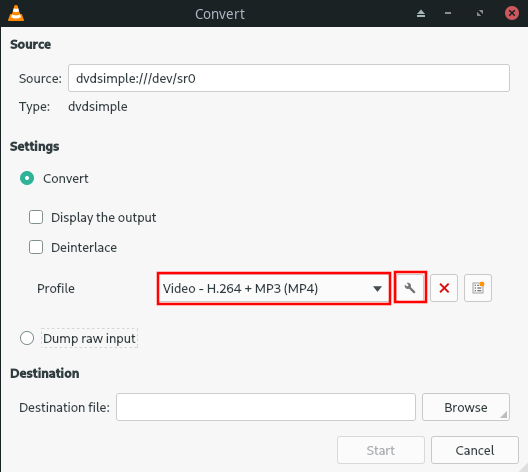
10. When you're satisfied with your profile choice, you click on the Browse button at the bottom right of the “Convert” window.
A “Save file” window will appear.
11. Select a location on your computer where you want to save the new video file.
12. At File name, you enter a name for your video but with the video file extension at the end (e.g., video.mp4, video.mkv, video.avi, etc.).
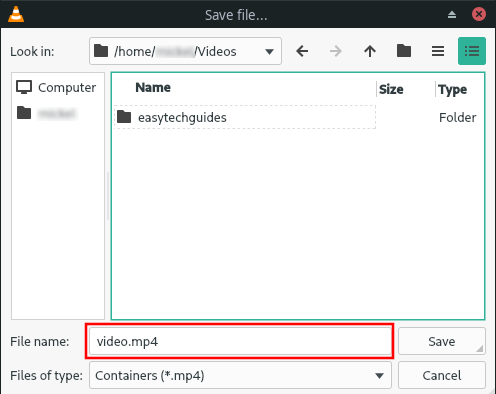
13. Click on the Save button located in the bottom right corner of the “Save file” window.
14. When you're ready, you click on the Start button.
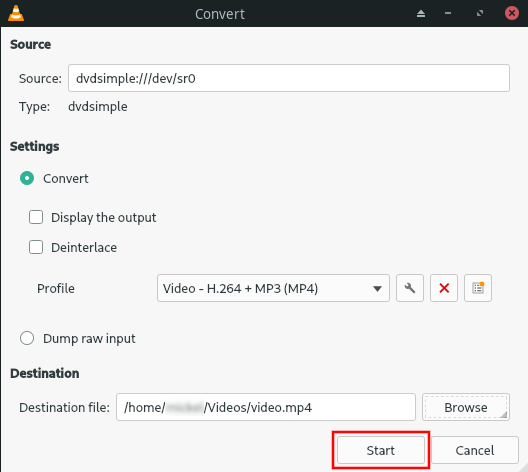
VLC media player will start ripping your DVD.
This may take a while. The amount of time it takes depends on your computer's hardware, your settings, video file format, and the file size of the DVD.
You can see the progress at the bottom of VLC.