How to remove sound from a video (step by step)
Learn how to permanently remove sound from a video using VLC media player, Shotcut, HandBrake, or Filmora.
The result will be a new video file without sound. The original video file will not be affected.
The steps on this page work on Windows, Linux, and macOS.
VLC media player
VLC media player is a free and open-source cross-platform multimedia player for Microsoft Windows, Linux, and macOS.
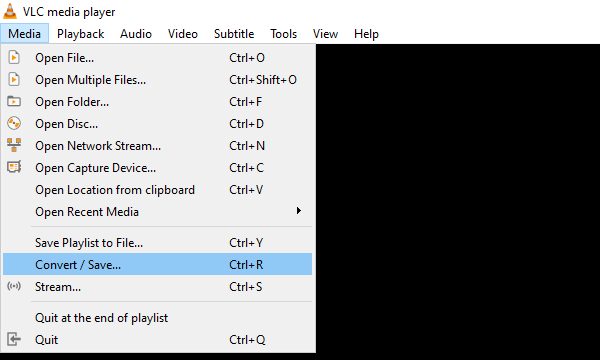
1. Open VLC media player.
2. Click on Media located in the top left corner.
3. Click on Convert / Save.
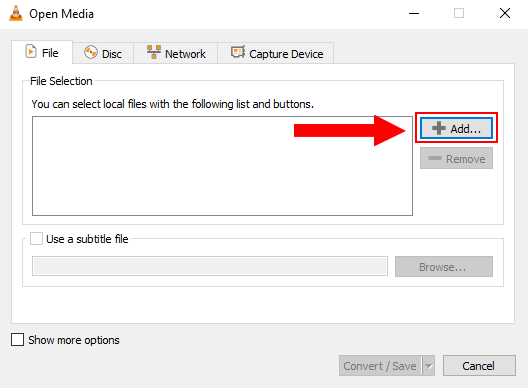
A “Open Media” window will appear.
4. In this window, you click on the Add button.
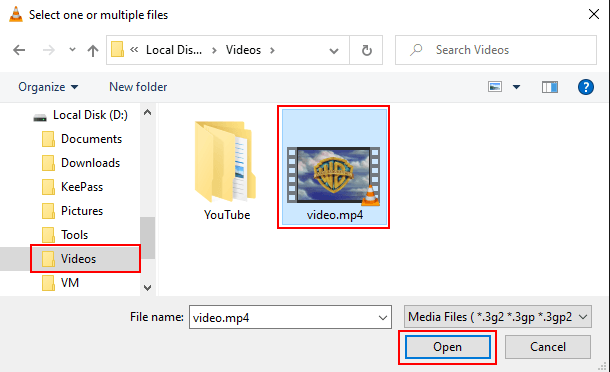
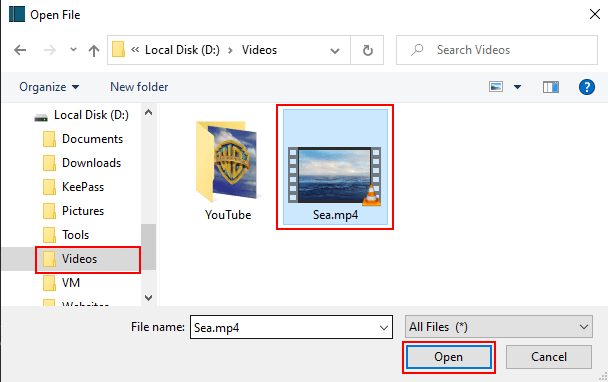
A “Select one or multiple files” window will appear.
5. Within this window, you go to the video file you want to remove the sound from.
6. Select the video file.
7. Click on the Open button.
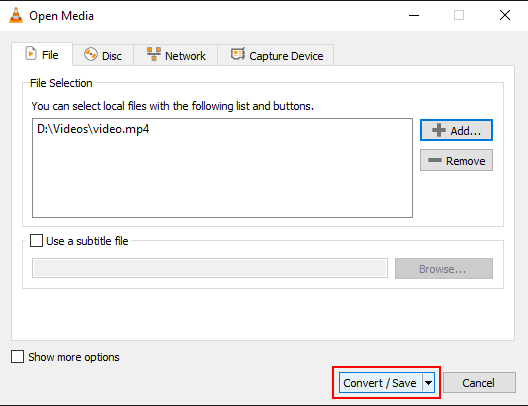
8. Click on the Convert/Save button at the bottom of the window.
A “Convert” window will appear.
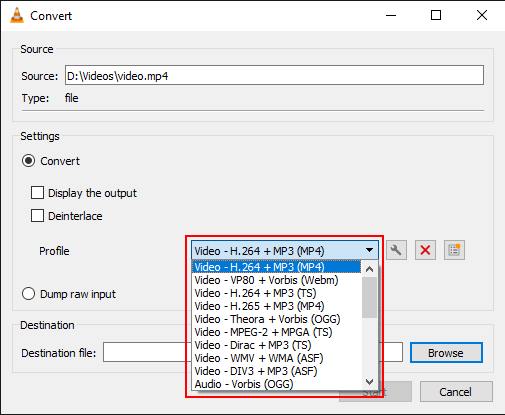
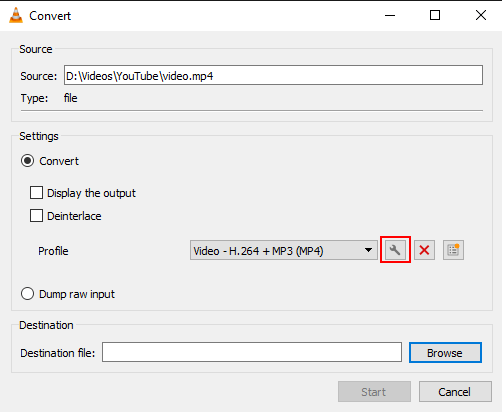
9. At Profile, you click on the selection menu button and select a video format. If you want an MP4 video file, then you select Video - H.264 + MP3 (MP4).
10. Click on the tool button next to the profile selection menu button.
A “Profile edition” window will appear.
11. Click on Audio codec.
11. Remove the check mark from the Audio option.
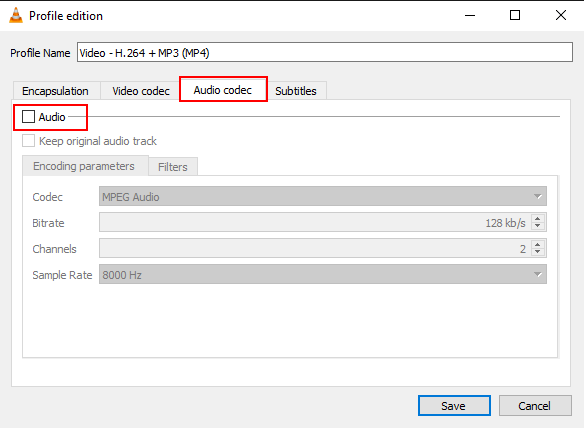
12. Click on the Save button at the bottom of the window.
13. Click on the Browse button.
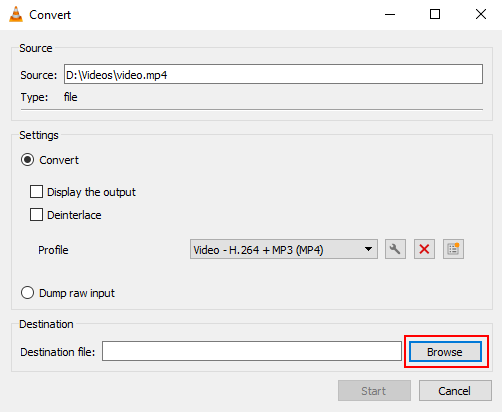
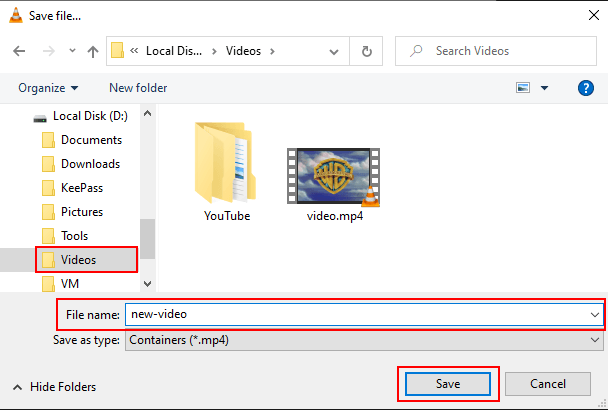
A “Save file” window will appear.
15. Within this window, you select a location on your computer where you want to save the new video.
16. At File name, you type a name for the video file.
17. Click on the Save button.
14. When you're ready, you click on the Start button.
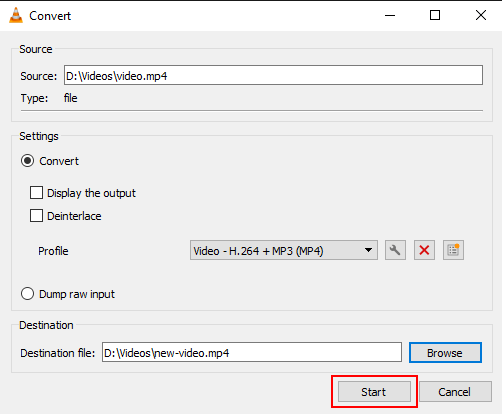
VLC media player will now convert your video to another video file.
The result will be a new video file without sound. The original video file will not be affected.
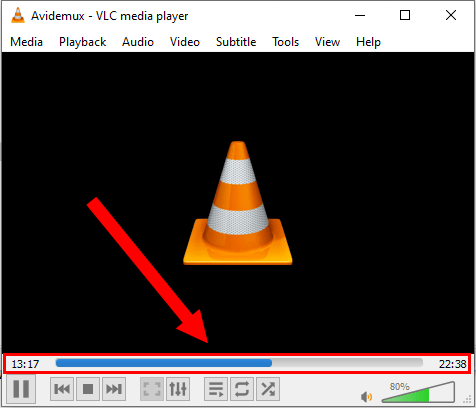
You can see the progress at the bottom of VLC.
Shotcut
Shotcut is a free and open-source cross-platform video editor for Microsoft Windows, Linux, and macOS.
1. Open Shotcut.
2. Click on Open File in the top left corner.

A “Open File” window will appear.
3. Within this window, you go to the video file you want to remove the sound from.
4. Select the video file.
5. Click on the Open button.
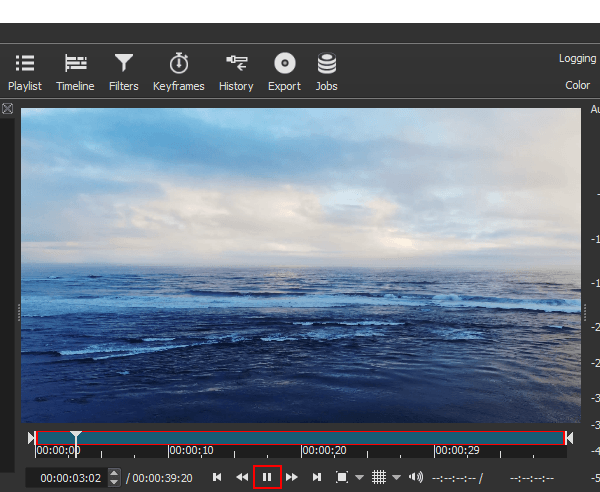
The video will start playing immediately. You can pause the video by clicking on the pause button below the video.
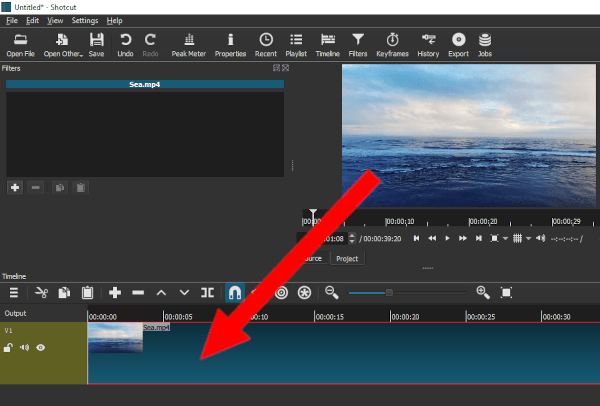
6. Drag the video to the timeline.
7. Right-click on the video and then click on Detach Audio.
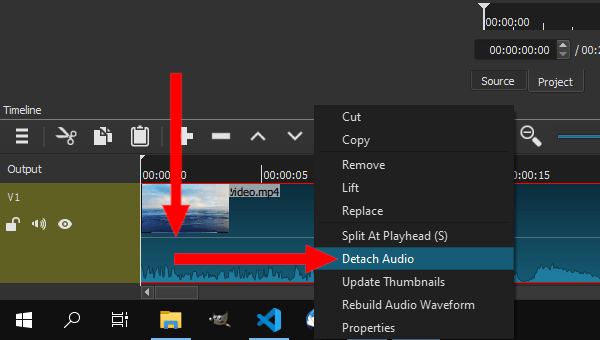
An audio bar will appear below the video.
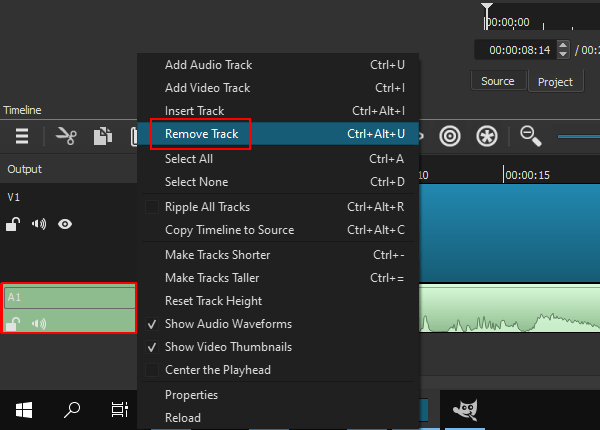
8. In the Output section located at the left side, you right-click on the audio track and then click on Remove Track.
9. When you're done editing the video, you click on Export at the top.
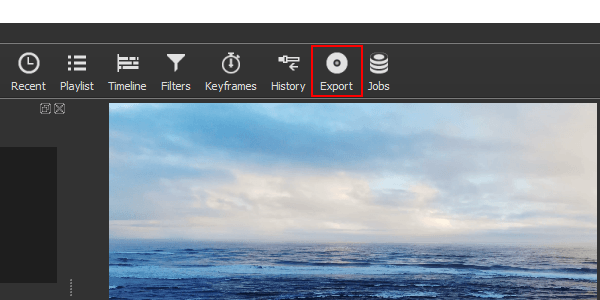
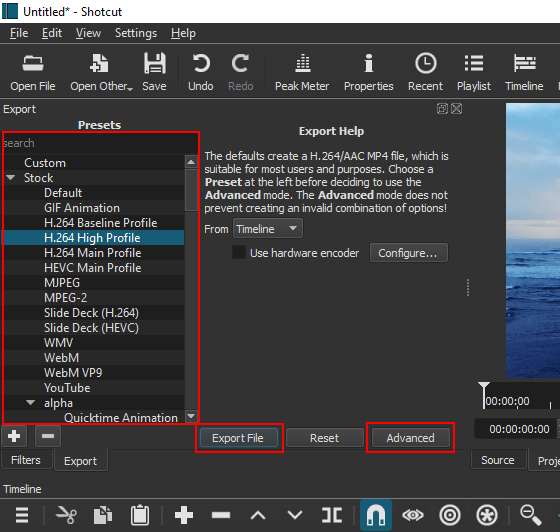
A “Export” panel will appear.
10. In the Presets section, you select a video format.
11. If you want more advanced settings, you click on the Advanced button.
12. When you're done, you click on the Export File button.
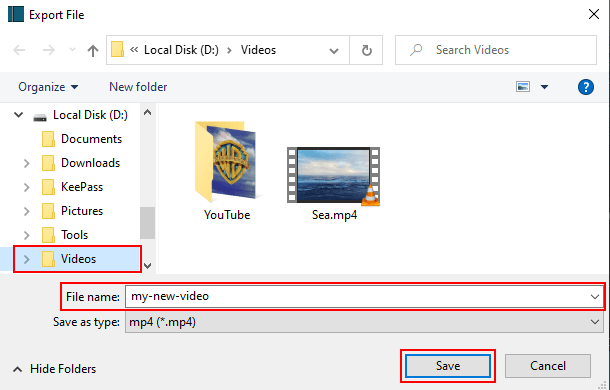
A “Export File” window will appear.
13. Select a location on your computer where you want to save the video file.
14. At File name, you type a name for the video.
15. Click on the Save button.
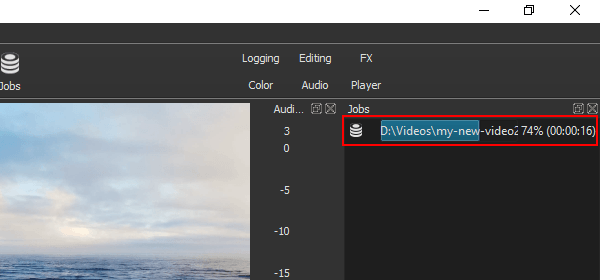
Shotcut will now create your video.
The result will be a new video file without sound. The original video file will not be affected.
You can see the progress at Jobs located in the top right corner.
HandBrake
HandBrake is a free and open-source cross-platform video converter for Microsoft Windows, Linux, and macOS.
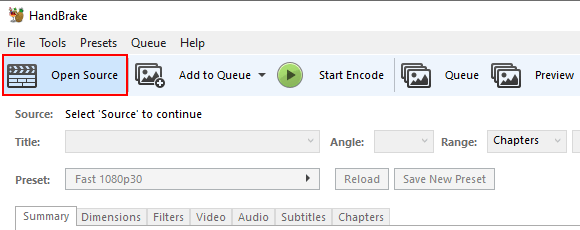
1. Open HandBrake.
A “Source Selection” panel will appear.
Note: If the “Source Selection” panel doesn't appear, then click on the Open Source button in the top left corner.
2. Click on File.
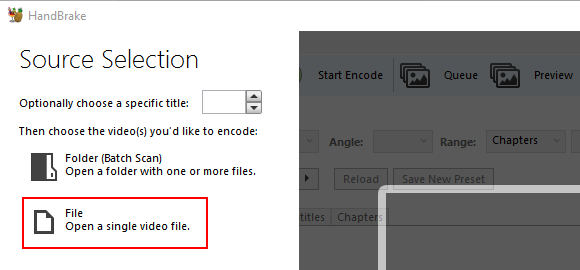
A “Open” window will appear.
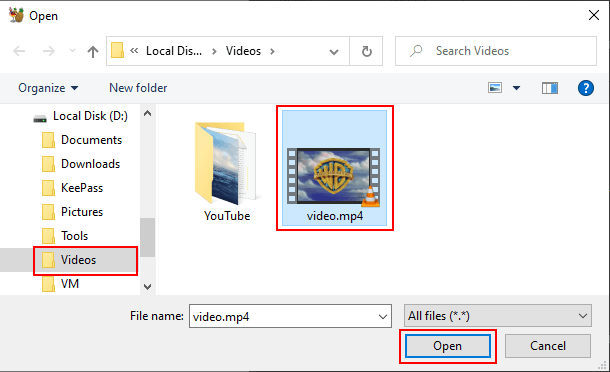
3. Within this window, you go to the video file you want to remove the sound from.
4. Select the video file.
5. Click on the Open button.
HandBrake will now load your video file.
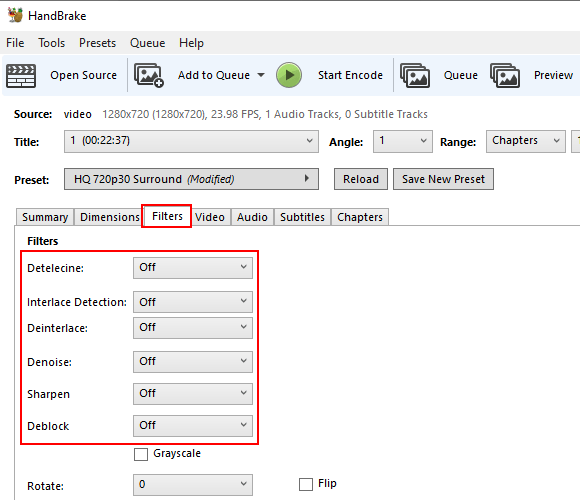
6. Click on the Filters tab.
7. Disable all filters.
8. Click on the Video tab.
9. At Video Codec, you select H.264 (x264).
10. At Framerate (FPS), you select Same as source.
11. Make sure the Variable Framerate option is selected.
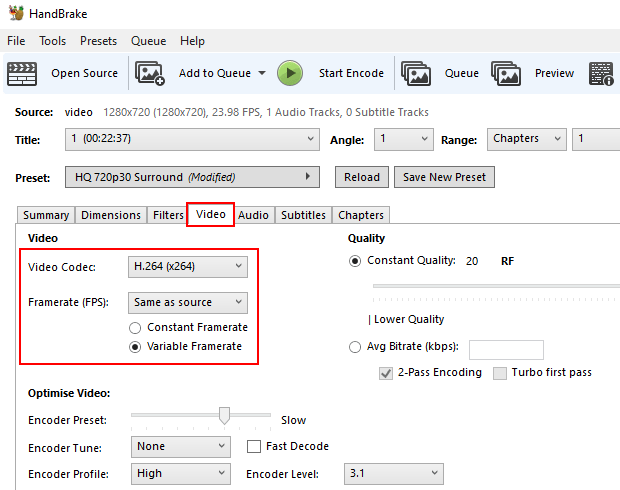
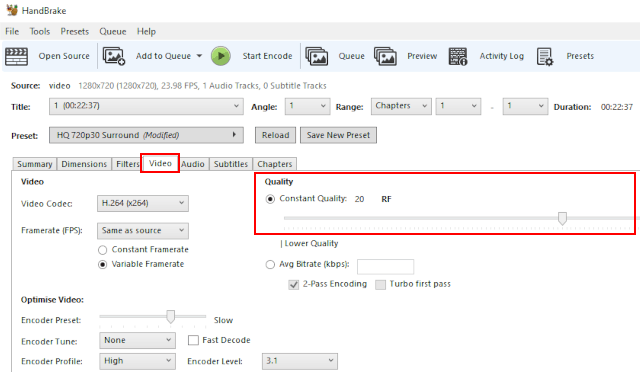
12. At Quality > Constant Quality, you can change the quality.
A lower RF number produces higher quality video, and a higher RF number produces lower quality video.
In this example, I'm using a 720p video, so I'm setting the RF to 20.
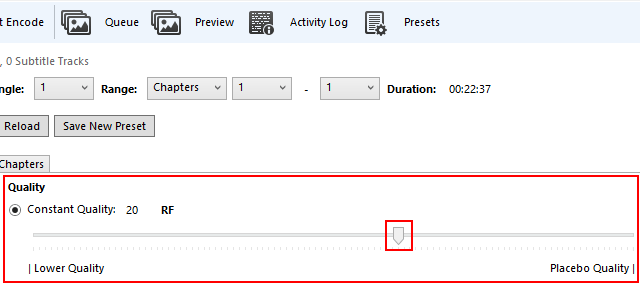
Begin by making small adjustments. Plus or minus 1 or 2 RF is usually noticeable.
Recommended settings for x264 and x265 encoders:
- RF 18-22 for 480p/576p Standard Definition
- RF 19-23 for 720p High Definition
- RF 20-24 for 1080p Full High Definition
- RF 22-28 for 2160p 4K Ultra High Definition
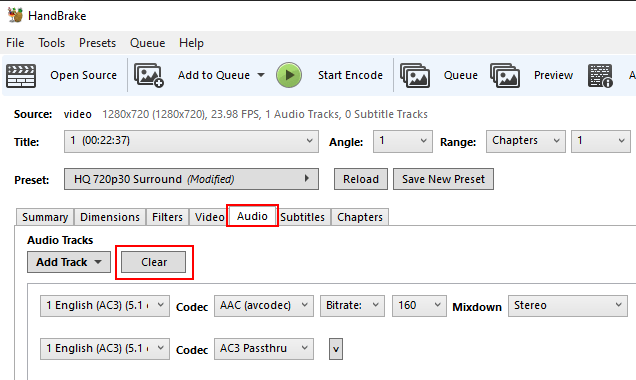
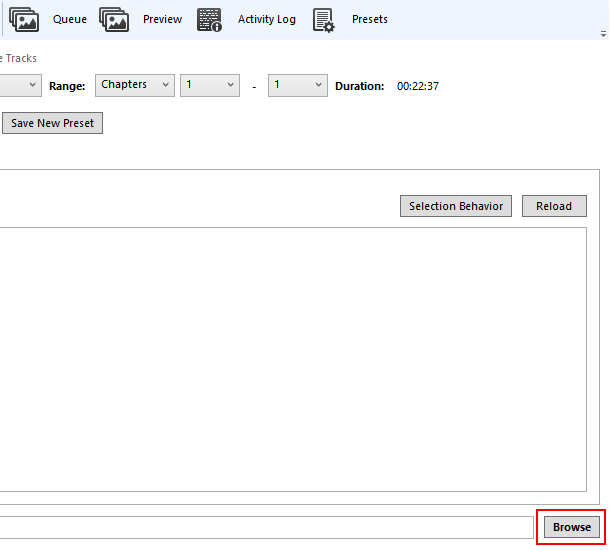
13. Click on the Audio tab.
14. Click on the Clear button to delete all audio tracks.
15. Click on the Browse button in the bottom right corner of HandBrake.
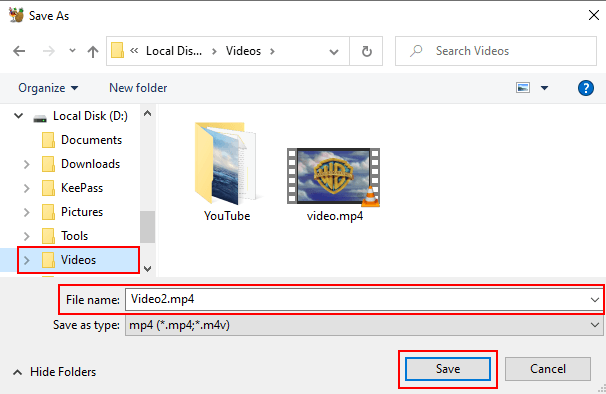
A “Save As” window will appear.
16. Select a location on your computer where you want to save the video file.
17. At File name, you type a name for the video with .mp4 or .mkv at the end of the file name.
18. Click on the Save button.
19. When you're ready, you click on Start Encode located at the top of HandBrake.
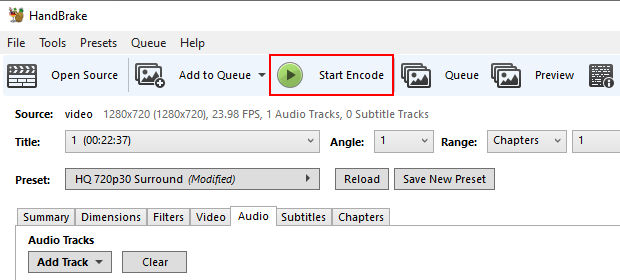
HandBrake will now convert your video to another video file.
The result will be a new video file without sound. The original video file will not be affected.
You can see the progress at the bottom of HandBrake.

Filmora
Filmora is a user-friendly video editor for Microsoft Windows and macOS.
I'm using Filmora for editing videos for my YouTube channel.
1. Open Filmora.
2. Click on Import and then click on Import Media Files.
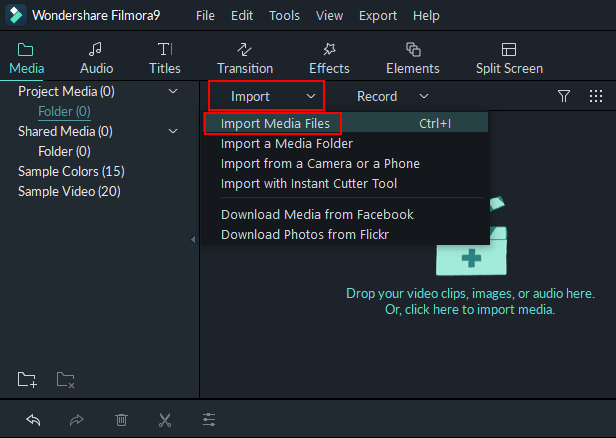
A “Open” window will appear.
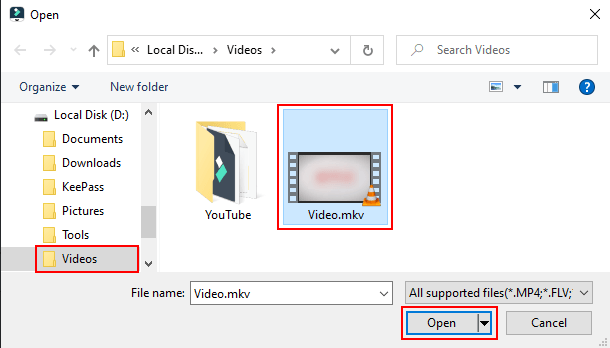
3. Within this window, you go to the video file you want to remove the sound from.
4. Select the video file.
5. Click on the Open button.
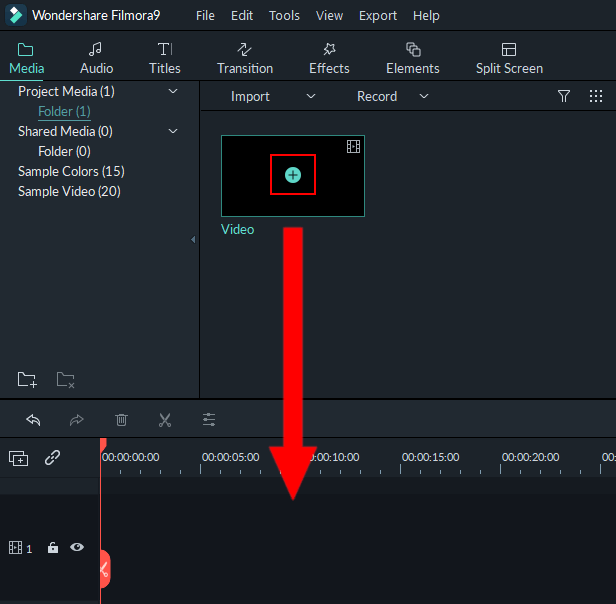
6. Drag the video to the timeline.
Or stand with your mouse cursor on the video and then click on the (+) button in the middle of the video.
7. Filmora will now ask you if you want to change the project's settings to match this media. I recommend choosing the same resolution and framerate as the original video.
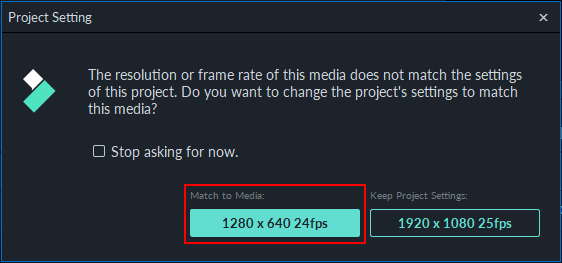
Note: You can also find a project settings button below the video preview player.

8. Right-click on the video in the timeline and then click on Detach Audio.
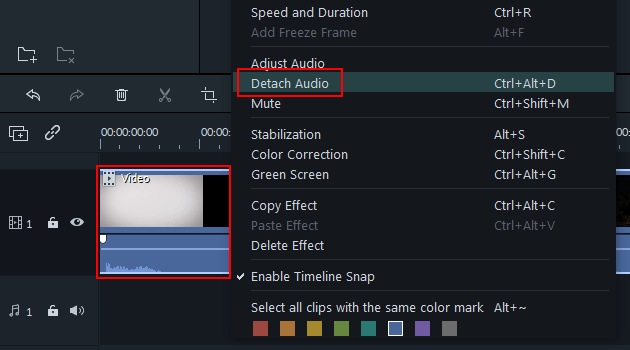
Now you will see an audio track appear below the video.
9. Click on the audio track to select it.
10. Right-click on the audio track and then click on Delete.
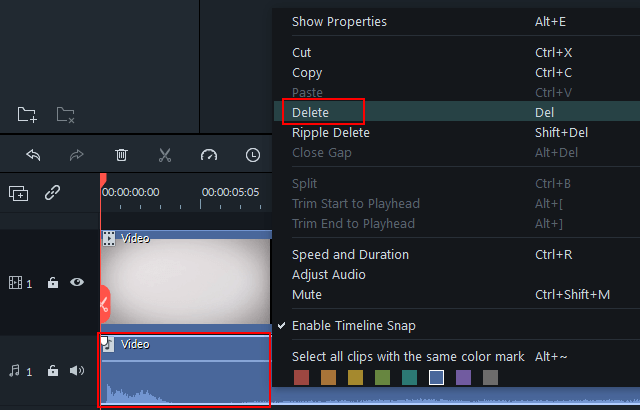
The audio track is now deleted.
11. If you're done editing, you can export the video. To do so, you click on the Export button at the top.
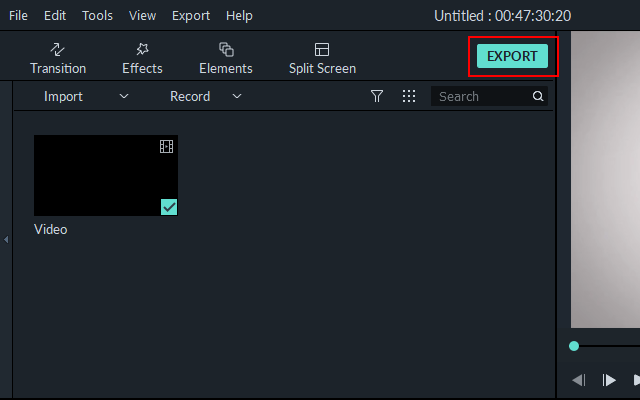
A “Export” window will appear.
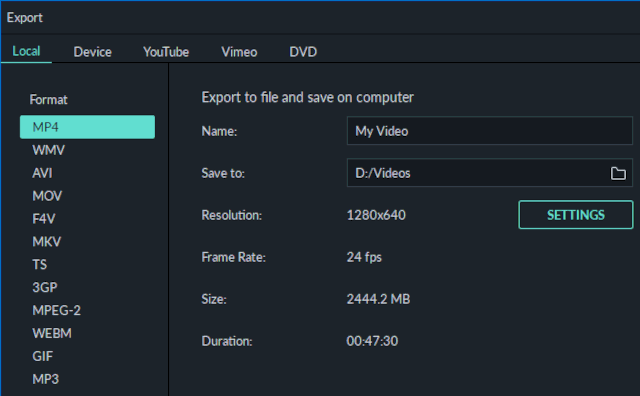
12. Select a video format.
13. Type a name for your video.
14. At Save to, you can see and change the location on your computer where Filmora will save the new video. To change this location, click on the small folder icon.
15. If you want more advanced settings, you click on the Settings button.
16. When you're ready, you click on the Export button at the bottom right of the “Export” window.
Filmora will now create your video.
The result will be a new video file without sound. The original video file will not be affected.
A small window will appear and here you can see the progress.
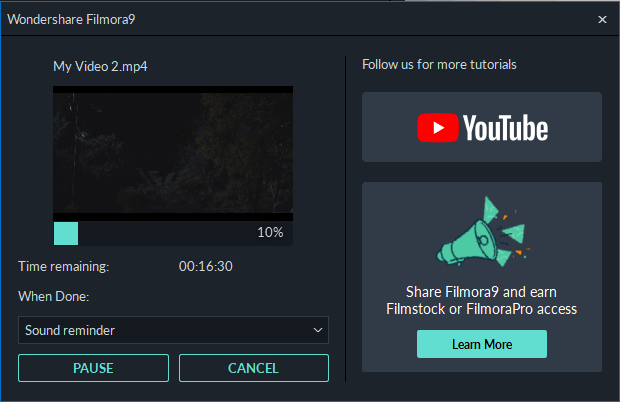
Filmora will also play a sound when the process is complete.