How to back up files in Windows 10 & 11 using reliable free software
Learn how to back up your files in Microsoft Windows 10 and 11 using reliable free backup software.
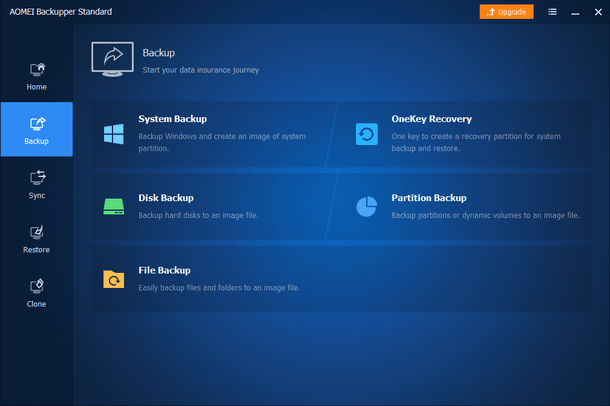
How to back up your files using AOMEI Backupper Standard
AOMEI Backupper Standard is a free reliable backup program for backing up your files and Windows operating system.
Its sleek modern interface is so user-friendly that even beginners will have their files and system backed up in no time.
In this tutorial, I'll be using AOMEI Backupper Professional because that's the program I'm using on my PC, but AOMEI Backupper Standard looks and works the same. The only difference is that the “Professional” version has more features, like, for example, the ability to encrypt (password protect) your backups.
Tip 1: I recommend to first assign a permanent drive letter to your external hard drive or USB flash drive. And how that works, I will show you in the steps below.
Tip 2: I also recommend using an external hard drive because external hard drives are more reliable than USB flash drives.
1. Assign a permanent (static) drive letter to your USB drive
The Microsoft Windows operating system will automatically assign a drive letter to any drive you connect to your PC.
This can cause problems with backup tools because these tools require the same drive letter every time.
That's why it's a good idea to first assign a permanent drive letter to the USB drive you want to use to back up your files.
You can use the Disk Management tool built into the Microsoft Windows operating system to assign a permanent drive letter to an external hard drive or USB pen drive.
1. Insert the external hard drive or USB flash drive into your PC.
2. Right-click on the Windows start menu button.
3. Click on Disk Management.
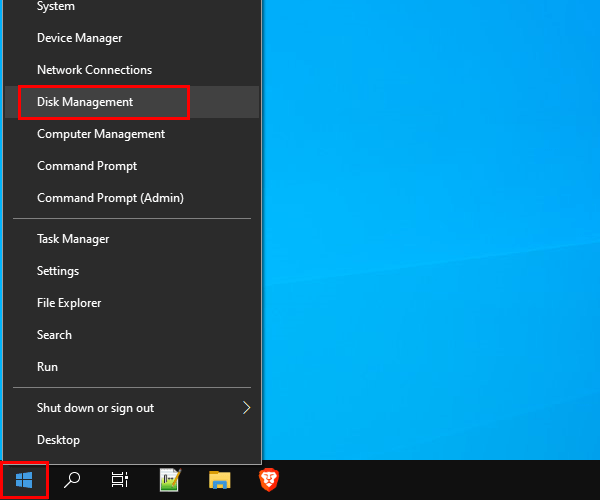
You can also open Disk Management by typing disk management in the Windows search bar and then clicking on Create and format hard disk partitions when it appears in the search results.
4. Right-click the USB drive to which you want to assign a persistent drive letter and then click Change Drive Letter and Paths.
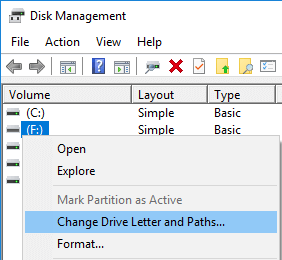
A Change Drive Letter and Paths for ... window will appear.
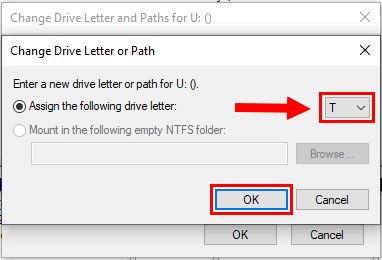
5. Click on the Change button.
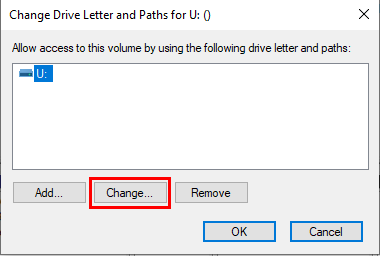
6. At Assign the following drive letter, you click on the selection menu button and select a drive letter between M and Z, because Microsoft Windows rarely uses these drive letters.
7. When you're done, you click on OK.
Now you will get the following warning Some programs that rely on drive letters might not run correctly. Do you want to continue?.
8. Click on Yes.
The new drive letter is now assigned to the drive.
9. You can now close Disk Management.
Now it's time to create a backup.
2. Create a full backup
A full backup makes a copy of all selected data. It's the starting point for all other backups and contains all the data of the files and folders you want to back up.
You will need to create a full backup first, and then when you want to add, delete, or change files, you can update your backup by creating an incremental or differential backup.
1. Connect your external hard drive or USB flash drive to your PC.
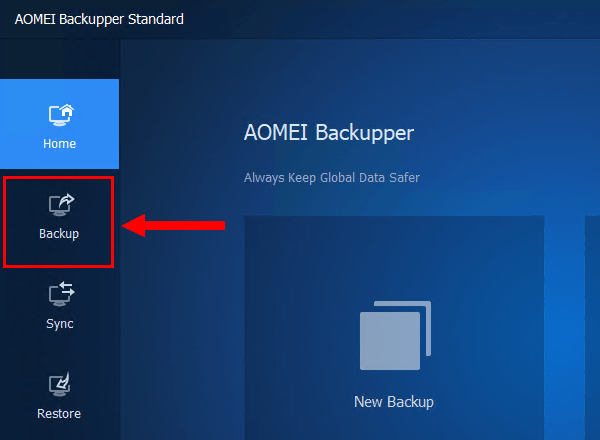
2. Open AOMEI Backupper.
3. Click on Backup in the left menu.
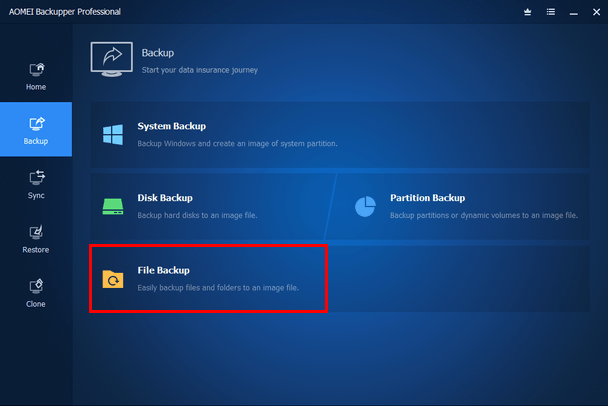
4. Click on File Backup.
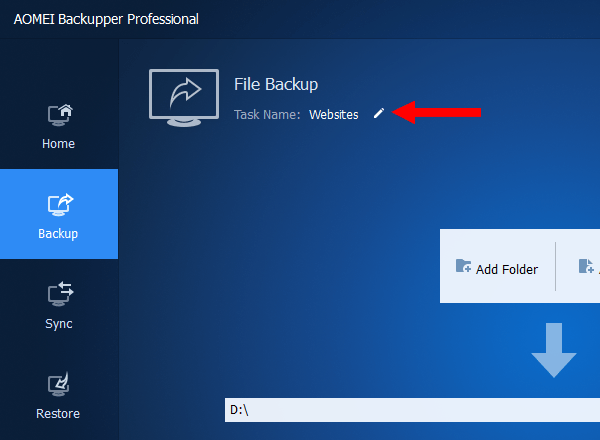
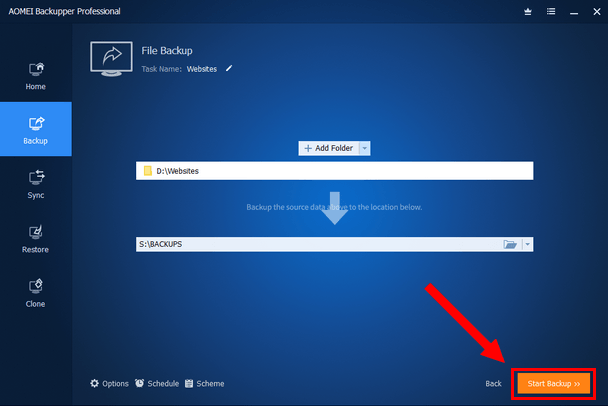
5. At Task Name located at the top, you type a name for your backup.
6. Click on Add Folder or Add File.
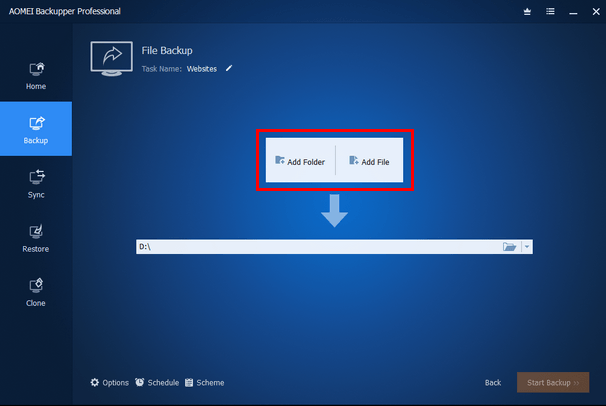
As an example, I will use Add Folder because I think that most people will want to back up multiple files at once, so it will be a good idea to place all files in a folder (with maybe subfolders).
A window will appear.
7. Within this window, you go to the location on your computer where the folder with files is stored you want to backup.
8. Select the folder.
9. Click on the Open button.
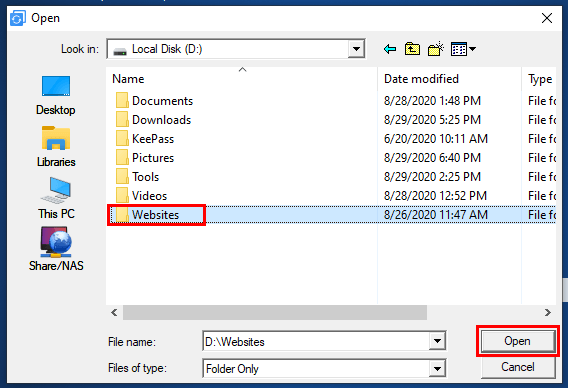
Note: You can add more folders if you want.
10. Now it's time to select your external hard drive or USB flash drive. To do so, click on the field below your folder.
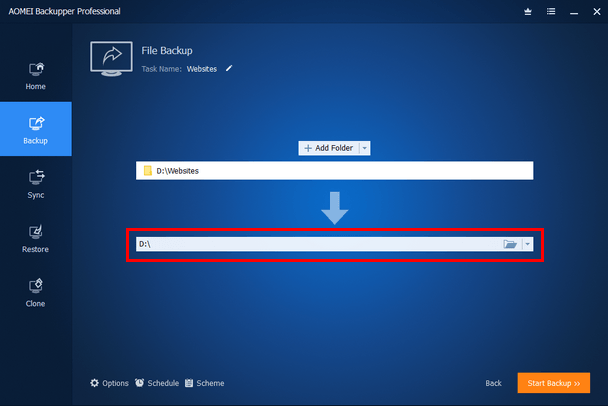
A window will appear.
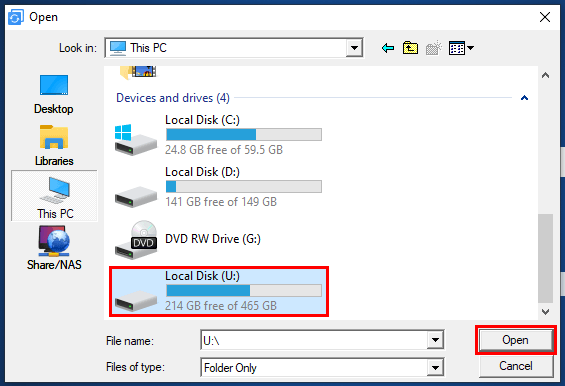
11. Within this window, you select your external hard drive or USB flash drive or a folder located on your USB drive. In my example, the external hard drive has the drive letter U, but this will probably be a different drive letter for your USB device.
12. Click on the Open button.
13. When you're ready, you click on the Start Backup button in the bottom right corner.
AOMEI Backupper will now back up your files.
This may take a few seconds or minutes.
The time it takes depends on the file size of your data and your computer's hardware.
14. When the backup is complete, you click on the Finish button.
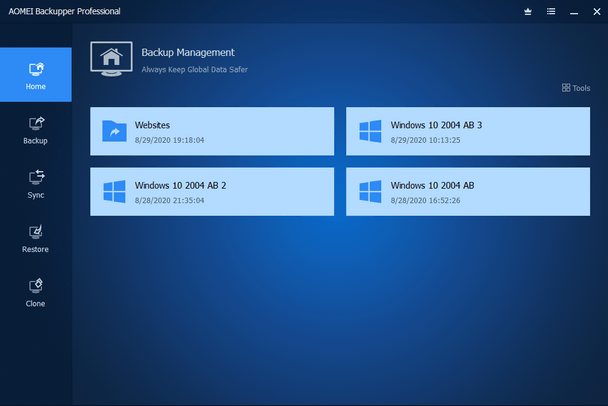
Your backup will appear on the home screen of AOMEI Backupper so that you can easily and quickly manage your backup.
In the steps below, I will show you how to update your backup by creating an incremental or differential backup.
3. Create an incremental or differential backup
If you've added, deleted, or edited files, then you can update your backup by creating an incremental or differential backup.
The difference between an incremental and differential backup is that a differential backup makes a copy of the data that has changed since the last full backup. An incremental backup makes a copy of the data that has changed since the previous backup, whether a full backup or an incremental backup. Each differential backup will be larger than the previous differential backup, and to restore your backup, you will only need the full backup and the latest differential backup. Incremental backups are smaller, but to restore your data, you will need the full backup and all incremental backups, which will take longer to restore your data.
1. Connect your external hard drive or USB flash drive to your PC.
2. Open AOMEI Backupper.
On the home screen of AOMEI Backupper, you can see the backup(s) you've made with AOMEI Backupper, and here you can manage your backup(s).
3. Move with your mouse cursor (pointer) on the backup you want to manage.
4. Click on the menu button. The menu button consists of three horizontal lines (≡).
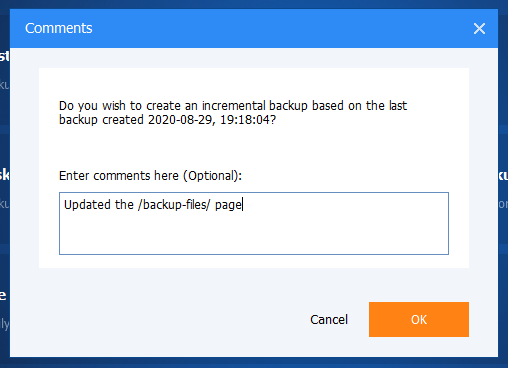
5. Move your mouse cursor on Backup, and then click on Incremental Backup or Differential Backup.

I make an incremental backup almost every evening, and a full backup once a month.
A “Comments” window will appear.
6. Within this window, you can type comments if you want. You can, for example, type the changes you've made to your files, or which files you've added.
7. When you're ready, you click on the OK button.
AOMEI Backupper will now back up your files.
This may take a few seconds or minutes.
The time it takes depends on the file size of your data and your computer's hardware.
8. When the backup is complete, you click on the Finish button.